All Posts By:

patrickdulmage

Beef

Beef Brisket, Rice and Cheese Burritos

On the menu tonight – Beef Brisket, Rice, and Cheese Burritos!

I made a brisket the other night, and I’m already working on things I can do with it. Steak burritos are awesome, so I decided to make a batch of burritos.

Steak burritos from my local Mexican place are so delicious and were the inspiration for what I made tonight. I tried to keep it pretty simple as far as ingredients, beef, onions, peppers, cheese, and rice. Red bell pepper and jalapeno were the peppers. The burritos were seasoned pretty simply with some ground cumin, salt and pepper. Mexican cheese blend and queso blanco were the cheeses used. I kind of went crazy on the cheese at the store, buying the Mexican blend, Queso blanco, another pre-shredded queso blanco cheese, and a pre-made queso blanco with jalapenos like you get when you order cheese dip.

The pre-shredded queso blanco tasted pretty much like mozzarella and decided I won’t be using that again. I tasted the pre-made queso blanco with jalapenos and while it was pretty good decided not to use it for this application.

The only fussy thing about this dish was folding the burritos. I decided to use measuring cups to make sure that I could roll each one shut consistently. In the end, I was really happy with the way they turned out. I hope the next time you are craving Mexican food, you will try Beef Brisket Burritos!

Beef Brisket, Rice and Cheese Burritos

1 Star2 Stars3 Stars4 Stars5 Stars (No Ratings Yet)
Loading...
By Patrick Dulmage Serves: 8
Prep Time: 15 minutes Cooking Time: 45 minutes Total Time: 1 hour

Beef Brisket, Rice and Cheese Burritos

Ingredients

  • 2-3 lbs cooked beef brisket, shredded or chopped
  • 8 large flour tortillas
  • 1 red bell pepper, diced
  • 1 Vidalia Onion, diced
  • 1 Jalapeño pepper, seeded and diced
  • 3-4 cups Mexican cheese blend, shredded
  • 1 cup rice
  • 2 cups water or chicken stock
  • 2-3 Tbsp Rotelle tomatoes and chiles
  • 1 tsp cumin
  • 1 Tbsp olive oil

Instructions

1

Pre-heat a large skillet over med-high heat

2

Add olive oil onion, bell pepper, and jalapeño

3

Cook the mixture beyond translucent and let it get a little darker

4

Once done, cut the heat, add the brisket, mix, and let it cool

5

If you haven't already, start on the rice

6

Rinse the rice and then add it along with the chicken stock to a small pot

7

Bring the water and rice to a boil, then simmer 12 minutes

8

If it doesn't look light and fluffy allow more time to finish cooking

9

Once finished, add the Rotelle tomatoes and stir to combine

10

With the rice finished, warm the tortillas to make them pliable

11

Add about a 1/4 cup of the rice mixture on a tortilla

12

Sprinkle some shredded cheese, not too much, on the rice

13

Add about 1/4-1/2 cup of the brisket, onion, pepper mixture

14

Tightly roll the burrito and put in a baking dish

15

Repeat for the rest of the burritos

16

Top the burritos with some more cheese

17

Bake for about 30 minutes until the cheese is bubbly and a little browned

18

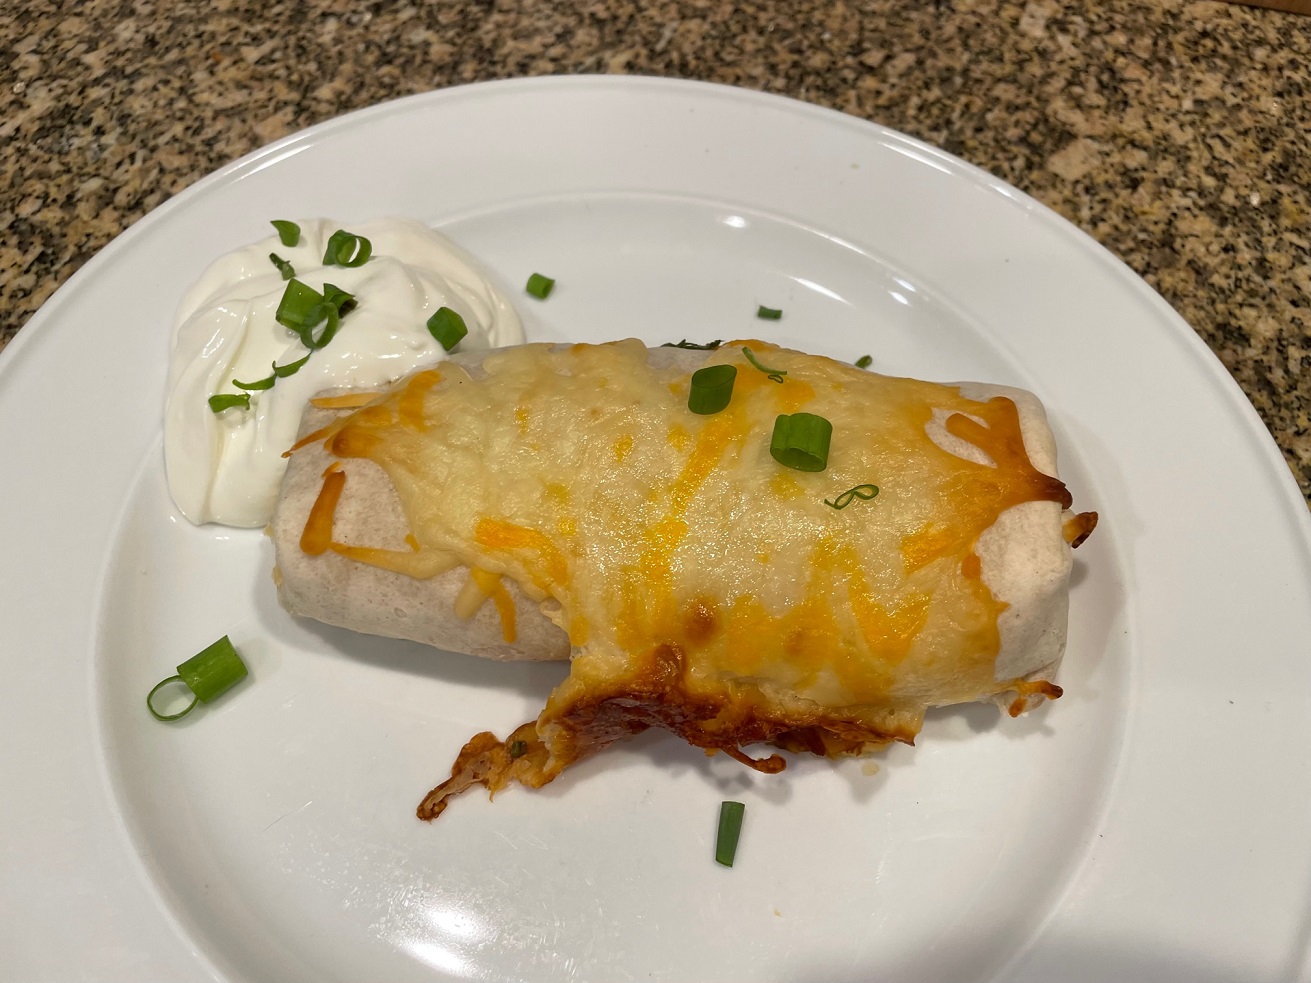
Serve with sour cream and your favorite salsa

Featured Item

Featured Item – Dexter-Russel 4″x2 1/2″ Spatula

One of the ways you can support what I do is by clicking on any of the Featured Items.
It won’t cost you anything and it will help keep cooking and sharing my tips and recipes.
Please consider helping the site by clicking on any of the Featured items before you do your
Amazon shopping.

https://amzn.to/3nMl1j8

Dexter-Russell Spatula

I have a few spatulas for various tasks. They market this spatula as a pancake turner. I like it because it isn’t too big and it is made of metal, so I can use it for the grill. The blade is nice and thin so you can easily get under your food to flip or remove from the grill / pan. While the blade is thin it is sturdy.

If you are cooking with cast iron, carbon steel, or the grill, you need a metal spatula so it doesn’t melt.

You need the right tool for the job, it makes the task so much easier and enjoyable. If you are in need of a good quality spatula made in the U.S.A., check out the Dexter-Russel line.

PartyFood

Homemade French Onion Dip

On the Menu Tonight – French Onion Dip!

Since I’m making this for 4th of July, I wanted to make something more special than sour cream and French Onion Soup mix. This dip has lots of onion, some shallots, and garlic along with sour cream, cream cheese and some other ingredients.

It takes some time to get the onions, shallots, and garlic cooked down, so plan to spend some time watching the onions so they caramelize all over. Once they are done to your liking, cut the heat and let them cool.

While the onions cook, you can assemble the cold ingredients in a big bowl. Once the onions are cooled off, gently fold in the onion mixture and let it rest in the fridge at least an hour before serving.

I hope you’ll try my version of French Onion Dip.

Homemade French Onion Dip

1 Star2 Stars3 Stars4 Stars5 Stars (No Ratings Yet)
Loading...
By Patrick Dulmage Serves: 8-10
Prep Time: 15 minutes Cooking Time: 20-30 minutes Total Time: 45 minutes

Homemade French Onion Dip

Ingredients

  • 2 Vidalia Onions, quartered and sliced
  • 2 shallots, quartered and finely sliced
  • 2 - 3 garlic cloves, minced
  • 1 cup mayonnaise
  • 2 cups sour cream
  • 8 oz block cream cheese, softened
  • 1-2 green onions, finely chopped
  • 1 tsp Worcestershire sauce
  • 1 tsp celery seed
  • 1 tsp salt
  • 1 tsp freshly ground pepper
  • 1 Tbsp olive oil

Instructions

1

Pre-heat a large pan over med-high heat

2

Add the onions with the olive oil

3

Meanwhile, in a large mixing bowl add the sour cream, cream cheese, and mayonnaise

4

Add the celery seed, salt, pepper, and green onions

5

Gently fold the ingredients in the bowl

6

Stir the onions and add the shallots

7

After about 5 minutes, add the minced garlic

8

Continue cooking until the onions and shallots are cooked to your liking (they should have a light brown color at the minimum)

9

When finished cooking, cut the heat and let them cool

10

Once the onions have fully cooled, fold them in to the sour cream mixture, let rest at least an hour before serving

Beef

Beef Short Ribs with Polenta

On the Menu Tonight – Beef Short Ribs with Polenta!

When I was shopping the other day, I saw a package of beef short ribs marked way down. They looked great, no discoloration, so I got them. I let them dry age in my fridge for a day by taking them out of the packaging, patting them dry, and putting them on a plate. If you didn’t know, doing this process with any cut of beef helps reduce some of that water content and intensifies the beefy flavor.

This recipe is really easy, but it does take some time. I seasoned the beef with seasoned salt and pepper. I also used some seasoned flour – it was pre-made, so I’m not sure all the spices. When I make my seasoned flour, I’ll put pepper, garlic powder, onion powder, and maybe some paprika. Brown the seasoned short ribs, then add the veggies, then the stock (beef and chicken), as well as the wine. Let it come to a boil, then put in the oven for about 3 hours.

When you are close to done with the beef, start your polenta. You can serve the polenta relatively loose, or you could cook it ahead of time, spread it on a sheet pan, let it cool, and cut it into squares or rectangles, then serve the short ribs on top.

Short Ribs with no sauce

If you wanted to shorten the cook time, you could do the short ribs in a pressure cooker. I may do another version using the pressure cooker. However you decide to prepare it, let me know how your version turns out!

Beef Short Ribs with Polenta

1 Star2 Stars3 Stars4 Stars5 Stars (No Ratings Yet)
Loading...
By Patrick Dulmage Serves: 4
Prep Time: 30 minutes Cooking Time: 3.5 hours Total Time: 4 hours

Beef Short Ribs with Polenta

Ingredients

  • Short Ribs:
  • 12-16 beef short ribs
  • 2-3 carrots, sliced, or diced
  • 1 Vidalia onion, diced
  • 2 celery stocks, diced
  • 2-3 cloves garlic, mince
  • 3-4 Yukon Gold potatoes
  • 1 12 oz. can fire roasted tomatoes
  • 2-3 cups seasoned flour, salt, pepper, garlic powder, paprika (to coat the short ribs)
  • 2-3 cups red wine (not cooking wine, use something you drink)
  • 1 cup beef stock
  • 1 cup chicken stock
  • 1-2 green onions, finely chopped for garnish
  • Polenta:
  • 1 cup polenta
  • 2 cups whole milk
  • 2 cups chicken or vegetable stock

Instructions

1

Pre-heat oven to 225 degrees

2

Pre-heat large cast iron skillet to medium-high heat

3

Pat dry the short ribs with a paper towel

4

Season the short ribs with seasoned salt, kosher salt, and onion powder

5

Add the seasoned ribs to the pan and get a good crust on both sides

6

Work in batches so you don't crowd the pan, only do 4-5 at a time

7

Once the last of the short ribs are done, add the onions, celery, and carrots, cook about 5 minutes

8

Add the tomatoes, garlic, beef and chicken stock, and the wine

9

Put in the oven for 90 minutes

10

After 90 minutes, add the potatoes and put back in the oven for another 90 minutes

11

When you are t-minus 45-60 minutes, start the polenta

12

Add the stock and milk to a pot and bring to a boil

13

Once it comes to a boil, slowly pour in the polenta to avoid clumps and reduce heat to low

14

Stir the polenta for about 5-10 minutes and cut the heat

15

Let the polenta sit 30 minutes before serving

16

When you pull the short ribs from the oven, put the meat on a plate

17

Pour some of the veggies and liquid in a blender to make a nice sauce

18

Plating:

19

Put the polenta down first

20

Put two to three short ribs on top of the polenta

21

Spoon on some of the sauce

22

Garnish with chopped green onions or chopped parsley

Seafood/ Side Dishes/ Vegetarian

Shrimp Fried Rice

On the menu tonight – Shrimp Fried Rice!

I love fried rice and this version is SO easy to make. While I know how to make rice, I like to take a shortcut when I make fried rice. Whenever we order Chinese food, we never eat all the rice. You can only have plain rice as a side with so many things. SO, what to do? Fried Rice!

Fried Rice… you can go vegetarian – garlic, peas, carrots, and green onion. OR Pescatarian – same as vegetarian and add shrimp. OR you can go Carnivore – same as vegetarian and add your choice of meat. My recommendation would be Spam. Yes – Spam. Spam and pineapple. Today, I went with shrimp for the protein.

When I say this dish comes together quickly, we’re talking about 15 minutes. I mentioned the Chinese food rice, the second shortcut is frozen peas and carrots. Frozen veggies are just as fresh as fresh – they have to be. The veggies are frozen right away after being picked and processed wherever they are grown. Just don’t let them sit in your freezer for 6 months and expect them to taste fresh. They are PERFECT for fried rice. The carrots are already diced way better than you or I are going to dice them and there’s no prep for the peas. So, for prep on this dish all I had to do was smash and finely chop the garlic, measure out the soy sauce, fish sauce, and sesame seed oil.

For the cook, just heat up a large skillet or even a roasting pan, sans the rack, and heat up the oil. Cook the scrambled eggs, remove and let cool. Then add in the shrimp and garlic, cook about 3 minutes. Don’t forget to flip the shrimp so the other side gets to cook. Then, add the peas and carrots, cook an additional 3-5 minutes. Add the rice, soy sauce, fish sauce, and sesame seed oil. Stir to combine and continue stirring to let the rice get a little crispy.

Serve immediately with a little chopped green onion on top. I hope the next time you are in the mood for Fried Rice, I hope you’ll try my Shrimp Fried Rice.

Shrimp Fried Rice

1 Star2 Stars3 Stars4 Stars5 Stars (No Ratings Yet)
Loading...
By Patrick Serves: 8-10
Prep Time: 10 minutes Cooking Time: 15 minutes Total Time: 25 minutes

Shrimp Fried Rice

Ingredients

  • 1/4 - 1/2 lb shrimp - deveined
  • 2- 3 cups cooked rice
  • 12 oz pkg frozen peas and carrots
  • 2-3 cloves garlic, minced or smashed and finely chopped
  • 2 eggs, scrambled
  • 2 Tbsp Soy Sauce
  • 1 Tbsp Fish Sauce
  • 1/4 tsp Sesame Seed Oil
  • 1/4 - 1/2 tsp white pepper
  • 1 Tbsp vegetable oil

Instructions

1

Pre-heat large cast iron skillet or roasting pan over medium-high heat (you want some room to groove on this one)

2

Add about 1/2 tsp oil to the pan

3

Add the scrambled eggs and cook to finished - but barely finished and remove from pan. The eggs will get cooked more with the rice later

4

Add the shrimp and garlic and cook about a minute and a half, then flip the shrimp to cook another minute and a half on the other side

5

Add the peas & carrots mix, the rice, fish sauce, soy sauce, and sesame oil, cook another 3-5 minutes

6

Add the white pepper and stir to combine

7

Continue stirring the mixture to let some of the rice get crispy bits

8

It should be ready now... serve immediately and garnish with the chopped green onion

Notes

This same recipe could be tweaked so many ways. As I mentioned the Spam Fried Rice. For that one, you'll want to add some pineapple and bell pepper.

Chicken

Oven “Fried” Chicken

On the menu tonight – Fried Chicken! It’s not really fried, it’s oven “fried” chicken.

I wanted fried chicken, but I didn’t want stand over a pan of hot oil at the end of the day. To get close to the same flavor, I prepared the chicken like I would have if I was going to fry it, but I baked it instead.

It came out really good! Since I used bread crumbs for the coating and didn’t actually fry it, the coating was a little on the dry side. I kind of expected that to happen as the chicken didn’t get a dunk in hot oil. The rest of the familiar flavors were there. I added some Tabasco to my egg wash to give it a little kick. I also used a BBQ rub in the breadcrumb mixture and that has a little bit if cayenne pepper. The end result was fantastic! There’s a little heat, but I wouldn’t even call it a medium heat.

What I love most about this meal is how quickly it came together. I put some flour seasoned with a little salt and pepper in one pan, a few whisked eggs with some Tabasco in another pan, and Italian bread crumbs with some onion powder, garlic powder, and BBQ rub in another pan. I prepped the chicken just as I would have if I were going to fry it, coating it in the flour, dipping in the egg mixture, then coating with the bread crumbs and setting aside. Setting the chicken aside for a bit to let that coating dry a little is key – don’t skip that step. If you like a thick crust, repeat the process.

Because you set the chicken aside to dry for a bit, it’s a great make-ahead meal. You can get the chicken prepped and coated, waiting in the fridge. When you’re ready to cook, pull it out to let it come to room temperature before putting it in the oil or oven.

When it comes out of the oven, let it rest a few minutes before serving. I made a mix of tenders and thighs. You can serve all of it on it’s own with dipping sauces and sides, or you could make your own chicken biscuits and sandwiches.

Chicken Tenders
Chicken Thighs
Chicken Sandwich

I hope you’ll try my Oven “Fried Chicken”!

Oven Fried Chicken

1 Star2 Stars3 Stars4 Stars5 Stars (No Ratings Yet)
Loading...
By Patrick Dulmage Serves: 4
Prep Time: 30 minutes Cooking Time: 35 minutes Total Time: 65 minutes

Oven Fried Chicken

Ingredients

  • 1.5 lbs chicken thighs (boneless and skinless)
  • 2-3 eggs, whisked
  • 1 cup AP flour
  • 2ish cups of Italian bread crumbs (error on the side of too much bread crumbs. I'd rather use the leftover in something else or throw it away than not have enough to coat the chicken)
  • 1 tsp Kosher salt
  • 1 tsp freshly ground black pepper
  • 2 tsp garlic powder
  • 2 tsp onion powder
  • 2 tsp BBQ rub (store bought or make your own)
  • Tabasco sauce - a few dashes

Instructions

1

Dry off the chicken

2

Get a pan/plate with the flour and season it with the Kosher salt and ground pepper

3

Get a pan/bowl with the whisked eggs and add a few dashes of Tabasco sauce

4

Get a pan/plate with the Italian bread crumbs, BBQ rub, garlic powder, and onion powder

5

Dredge the chicken in the flour, shake off the excess

6

Dredge the chicken in the egg mixture, let the excess drip off

7

Dredge the chicken in the bread crumb mixture

8

Set the coated chicken on a wired rack or plate

9

Repeat the process for the rest of the chicken

10

If you like a thicker crust on your chicken, repeat the coating process after the chicken has had a few minutes to dry a little

11

Put the coated chicken in the fridge for at least 20 minutes

12

Pre-heat the oven to 350 degrees

13

Put the chicken on a baking sheet and bake for about 35 minutes (Note that I used boneless chicken, if using bone-in chicken it will take longer)

14

When finished baking, let it rest for 5 minutes before serving

15

Notes

I prefer chicken thighs for fried chicken. Thigh meat is more flavorful and forgiving, it won't dry out as much as say a chicken breast. In this recipe, I used boneless and skinless because that's what was in my fridge. If you use bone-in and skinned chicken, you will want to add some time to the cook. I'd have added about 12-15 minutes to the cook time in the oven if I'd have used bone-in chicken thighs.

Breakfast

Southern-Style Buttermilk Biscuits and Gravy

On the menu this morning – Biscuits and Gravy!

I was craving biscuits and gravy, so I decided to make it. I can’t seem to get the flaky biscuits you get from the tube, BUT mine were definitely nice and light. They couldn’t be easier to make. The trick to fluffy light biscuits is don’t over-work them. Also – COLD butter. I’ll use a frozen stick of butter and box grater to get the amount I need.

On the butter and salt… if you use salted butter, I recommend you don’t put any salt or very little salt in the batter. If you use un-salted butter, I wouldn’t use more than 3/4 teaspoon of salt (Kosher). I made a batch one time using salted butter and I put in 3/4 teaspoon of salt and it was too much.

Buttermilk Biscuits

Once the biscuits were in the oven, I started on the gravy. Use your favorite bulk breakfast sausage along with whole milk and some flour – that’s it! Break up the sausage as it’s cooking so you get the nice brown bits in your gravy.

I also made some sunny side up eggs to go with the biscuits. YUM!

Eggs and Biscuit

The next time you want a hearty breakfast to keep you going all day, I hope you’ll try my biscuits and gravy!

Biscuits and gravy

Southern-Style Buttermilk Biscuits and Gravy

1 Star2 Stars3 Stars4 Stars5 Stars (No Ratings Yet)
Loading...
By Patrick Dulmage Serves: 4-6

Southern-Style Buttermilk Biscuits and Gravy

Ingredients

  • Biscuits:
  • 2 cups AP flour
  • 2 TBSP lard or shortening
  • 2 TBSP butter, frozen and grated
  • 1TBSP baking powder
  • 1/4 Tsp baking soda
  • 1/4 Tsp salt
  • 1 cup buttermilk, cold (I'll leave it in the fridge until I'm ready to use it)
  • Gravy:
  • 1lb breakfast sausage
  • 2-3 cups whole milk
  • 1/2-3/4 cup flour
  • Freshly ground pepper to taste

Instructions

1

Pre-heat the oven to 450 degrees

2

In a large bowl, sift the flour, salt, baking soda, and baking powder

3

Add the shortening and butter

4

Quickly and gently mix to combine until you have "pebbles" or a crumby mixture

5

Add the buttermilk

6

Stir to combine until it just comes together, don't over-work it - it's going to be really sticky

7

Lightly flour your work surface

8

Turn out the biscuit mix on to the work surface and gently fold it over on to itself 5 or 6 times (You want to try to get flakey layers)

9

Gently flatten the dough to the thickness you want - I usually go about 1 1/2 inches thick

10

Cut out the biscuits to the size you want with a biscuit cutter, glass, or butter knife - I usually do 2 - 3 inch biscuits

11

You'll have to re-form the dough once or twice as you cut out the biscuits. Gently push the dough together rather than balling it up again as those biscuits won't be as fluffy as the first ones

12

Make the last few biscuits and put them on a baking sheet and leave some room between them

13

Bake for 15-20 minutes until the tops are lightly browned

14

While the biscuits are baking, melt some butter to brush on top when they are done

15

Gravy:

16

Pre-heat a large cast iron skillet

17

Add the sausage and break it into small pieces

18

Cook the sausage until it's nicely browned

19

Add the flour and stir it around to cook for 2-3 minutes

20

Add the milk and stir until desired consistency

21

Spoon some over the biscuits and enjoy!

Beef/ Lamb

Gyro-Style Beef and Lamb Burger with Tzatziki Sauce

On the menu tonight – Gyro Burgers! I wanted a burger but I wanted to do something a little different. I decided to go Greek and make a gyro-style burger.

Gyros are traditionally made with lamb. If you aren’t sure if you would like a burger with ground lamb, do what I did and do a 50/50 mix of ground beef and ground lamb. This version turned out really good. A gyro wouldn’t be a gyro without that lovely tzatziki sauce. Sure, you can buy it, but I decided to make my own and I’m glad I did! It’s really easy to make and you know exactly what goes in to to the sauce.

The burger hits all the flavors of a gyro, but in the convenient and familiar bun of a traditional burger. So, the next time you are looking for something different on grill day, try a Gyro Burger!

Gyro-Style Beef and Lamb Burger with Tzatziki Sauce

1 Star2 Stars3 Stars4 Stars5 Stars (No Ratings Yet)
Loading...
By Patrick Dulmage Serves: 6
Prep Time: 10 minutes Cooking Time: 12 minutes Total Time: 22 minutes

Gyro-Style Beef and Lamb Burger with Tzatziki Sauce

Ingredients

  • 1 lb ground lamb
  • 1 lb ground beef
  • 2 tsp ground coriander
  • 3 tsp fresh fine chopped mint
  • 1 - 2 tsp Kosher salt
  • 1 - 2 tsp freshly ground pepper
  • 1 red onion, thickly sliced
  • Tzatziki Sauce:
  • 8 ounces Greek Yogurt (whole fat)
  • 1-2 garlic cloves, minced
  • zest and juice of a half lemon
  • 1 1/2 tsp fresh dill, finely chopped
  • 1/4-1/2 English cucumber, grated
  • 1 tsp fresh mint, finely chopped
  • Kosher salt and freshly ground pepper to taste
  • Buns (or pita)
  • 1 tomato, chopped
  • Romaine lettuce, chopped

Instructions

1

Pre-heat grill to high

2

Start with the tzatziki sauce

3

In a medium bowl, combine yogurt, dill, garlic, cucumber, lemon juice, zest, and season with salt and pepper

4

Put the tzatziki in the fridge while you start on the burgers

5

In a large bowl, combine the ground beef, ground lamb, coriander, mint, salt and pepper

6

Divide the meat into equal portions and form into burger patties

7

Put the patties on the grill and don't touch them or smash them

8

Add the onion slices to the grill as well

9

After about 5 minutes flip the burgers - they should have a nice crust on one side

10

Flip the onion slices as well

11

After another 5 minutes or so, check to see if the other side of the burgers have a nice crust

12

When finished, pull the onion slices and burgers from the grill and let rest

13

Toast your buns, if desired

14

Build the burger by adding a patty to the bottom bun, add some grilled onion, a dollop of tzatziki sauce

15

Top it off with some lettuce and a little tomato

Seafood/ Soup

Tom Yum Soup with Shrimp

On the menu tonight – Tom Yum Soup with Shrimp! I went outside my comfort zone on this one. I don’t know how many times I’ve eaten out and had Tom Yum Soup and loved it. But, I have never made it – until now. First, I don’t eat a lot of soup. Second, since it’s a Thai soup, I was anticipating it to be difficult to make.

It was so easy to make this soup, and inexpensive too. The secret to this soup are two things, the Tom Yum paste, and the pre-made broth. I used a combination of seafood broth and vegetable broth to give it a little bit more depth in the flavoring. There aren’t a lot of ingredients, so quality really counts in the ingredients.

It only took about 30 minutes from start to finish to make this soup. You’ll never get take out that tastes as good as this soup in the short amount of time it takes to make. If you like Thai soup, or are adventurous to try Thai, please make this soup.

Some of the ingredients may not be regular pantry pulls. For your convenience, I’m including some links to some of the harder to find ingredients. Let me know how your version turns out!

Tom Yum Paste – https://amzn.to/3y6I5zu

Kaffir Lime Leaves – https://amzn.to/3OP7PGr

Fish Sauce – https://amzn.to/3y7048I

Tom Yum Soup with Shrimp

1 Star2 Stars3 Stars4 Stars5 Stars (No Ratings Yet)
Loading...
Thai
By Patrick Serves: 4
Prep Time: 5 minutes Cooking Time: 25 minutes Total Time: 30 minutes

Tom Yum Soup with Shrimp

Ingredients

  • 1 liter seafood broth
  • 1 liter vegetable broth
  • 3 Tbsp Tom Yum paste
  • 1 garlic clove, minced
  • 1/4 cup lemongrass, minced (or from the tube)
  • 3 kaffir lime leaves, torn
  • 3 Tbsp fish sauce
  • 3 Tbsp lime juice
  • 1 cup coconut milk
  • 1 pack (450 g) Thai rice noodles, cooked
  • 20 - 25 shrimp
  • Garnish:
  • 2 cups cilantro, chopped
  • 2 tomatoes, diced
  • 1/4 - 1/2 cup shitake mushrooms, cut to bite sized pieces

Instructions

1

Add the stock to a heavy pot over high heat

2

Add the Tom Yum paste, garlic, lemongrass, kaffir lime leaves - bring to a boil

3

Reduce heat to a simmer and cook for 10 minutes

4

Add the fish sauce, coconut milk, and lime juice, cook another two minutes

5

Divide the cooked noodles in each of the 4 bowls, ladle the broth over the noodles

6

Garnish with the cilantro, tomatoes, and mushrooms

Featured Item

Featured Item – Instant Pot

One of the ways you can support what I do is by clicking on any of the Featured Items. It won’t cost you anything and it will help keep cooking and sharing my tips and recipes. Please consider helping the site by clicking on any of the Featured items before you do your Amazon shopping.

Instant Pot – https://amzn.to/3ybXIFX

Instant Pot

Instant Pot Duo 7-in-1 Electric Pressure Cooker, Slow Cooker, Rice Cooker, Steamer, Sauté, Yogurt Maker, Warmer & Sterilizer, 6 Quart, Stainless Steel/Black

Split Pea Soup

What about pulled pork? Rather than slow cooking the pork butt all day, you can pressure cook it for about an hour for excellent pulled pork for Cuban sandwiches, BBQ sandwiches, Brunswick Stew… you get the idea.

I use mine to make split pea soup all the time. All you have to do is dump in the dried split peas (no soaking), along with the chopped carrots, parsnip, onions, etc, set it and walk away. About 15-20 minutes later, you have some of the best split pea soup you ever had! Here is the link to my Split Pea Soup recipe.