Browsing Category

Chicken

Chicken

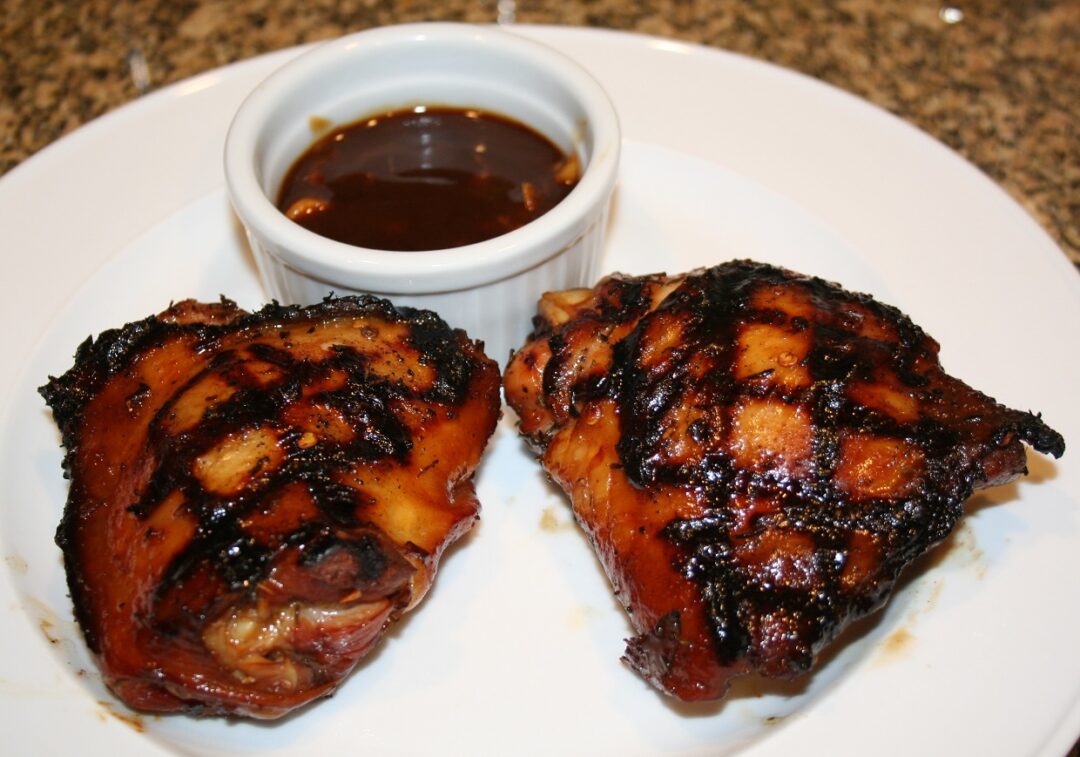
Grilled Honey Garlic Chicken Thighs

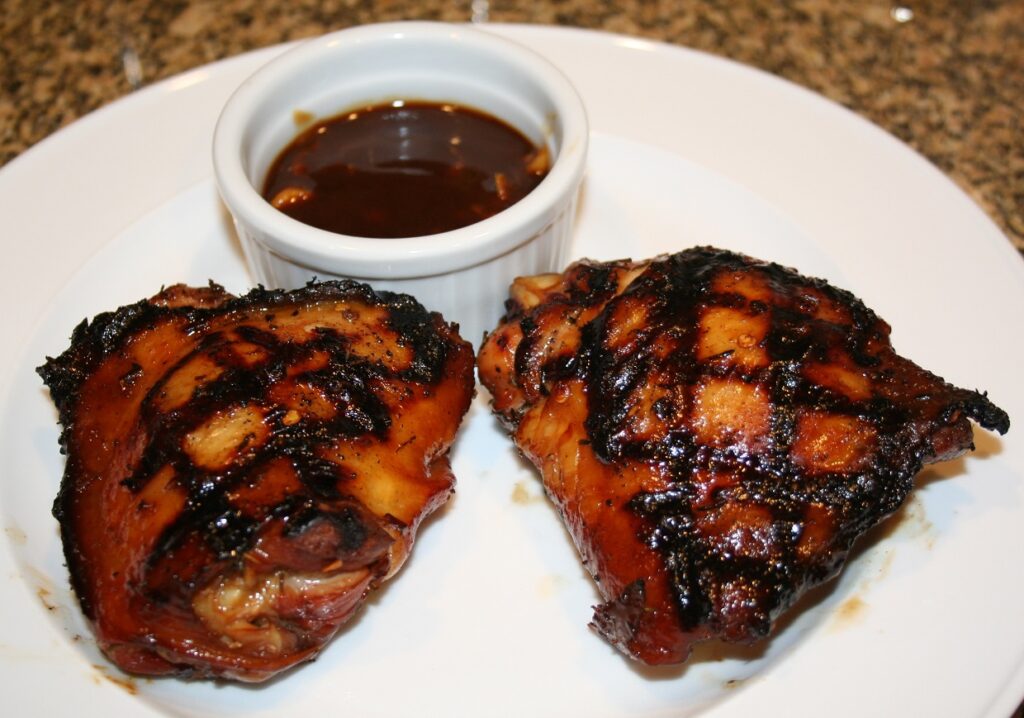
On the menu tonight – Grilled Honey Garlic Chicken Thighs!
Honey Glazed Grilled Chicken

After being on vacation last week, it was time to get back in the kitchen. Summer is coming to an end, so I wanted to make sure I grilled out this weekend. Chicken is one of my go-to grill items, but I wanted to do something a little different.

I went slightly Asian this time. The marinade is soy sauce, honey, apple cider vinegar, some thyme, and a little salt and pepper.

After grilling the chicken, I took the marinade and made a nice sauce. It was SO GOOD! You know that sauce your chicken has from the Chinese restaurant? This was that only BETTER!

I hope you’ll try this dish and let me know what you think.

Grilled Honey Garlic Chicken Thighs

1 Star2 Stars3 Stars4 Stars5 Stars (No Ratings Yet)
Loading...
By Patrick Dulmage Serves: 4
Prep Time: 3 hours Cooking Time: 40 minutes Total Time: 3 hours 40 minutes

Grilled Honey Garlic Chicken Thighs

Ingredients

  • 4 bone-in, skin-on chicken thighs
  • 1/3 cup low sodium soy sauce
  • 1/3 cup honey
  • 2 tbsp apple cider vinegar
  • 1 tsp red pepper flakes
  • 1 tsp thyme
  • 3-4 garlic cloves
  • 1/2 tsp freshly ground pepper
  • salt to taste
  • 1 tsp corn starch
  • 3/4 cup water

Instructions

1

In a 2 cup or more glass measuring cup, mix the soy sauce, honey, apple cider vinegar, red pepper flakes, salt and pepper. (you can add the garlic now or wait to use it in the sauce. I prefer to wait and use it in the sauce)

2

Rinse your chicken and put it in a one gallon zip lock bag. Put the bag in a bowl in case it leaks and then in the fridge for 2-3 hours (more is ok)

3

When it's time to cook, pull the chicken from the fridge and let it start coming to room temperature

4

Pre-heat the grill as hot as you can get it

5

Once the grill is to temperature, put on the chicken, skin-side down and let it cook about 15 minutes. DON'T TOUCH IT! Let it get those beautiful grill marks

6

After about 15 minutes, give the chicken a quarter turn and let it cook another 12-15 minutes

7

Flip the chicken and let it cook another 12-15 minutes

8

While the chicken is finishing up on the grill, start your sauce. Put a medium sauce pan on medium heat and put in your marinade (add the garlic if you didn't add it in the beginning)

9

Let the marinade reduce about 5 minutes

10

In a measuring cup add your cornstarch and water, mix well, and add a little to the marinade (about 2-3 tablespoons)

11

The sauce needs to come to at least a gentle boil for the cornstarch to do its thing

12

Once it's to the consistency you want, cut the heat and move to another burner

13

Take the chicken off the grill and let it rest about 5 minutes

14

Serve with the sauce on the side

Notes

I think the next time I make this, I'll include a little lime on the side too for some acid.

Chicken

Chicken Parmesan

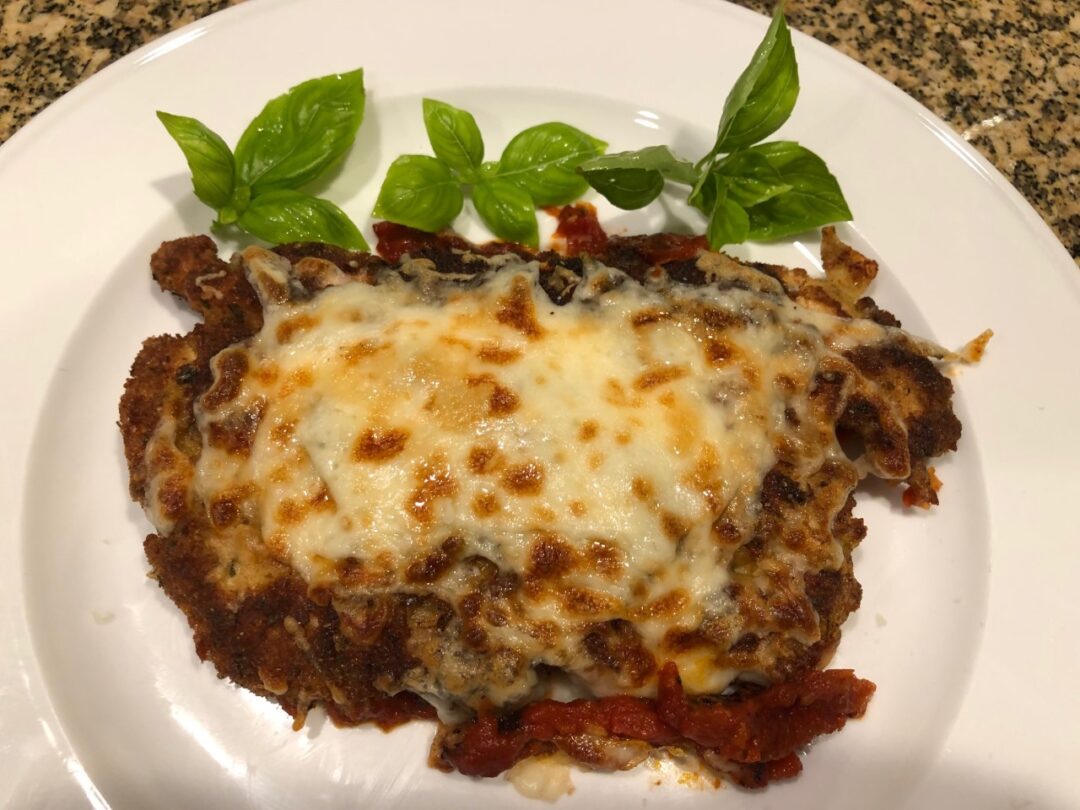
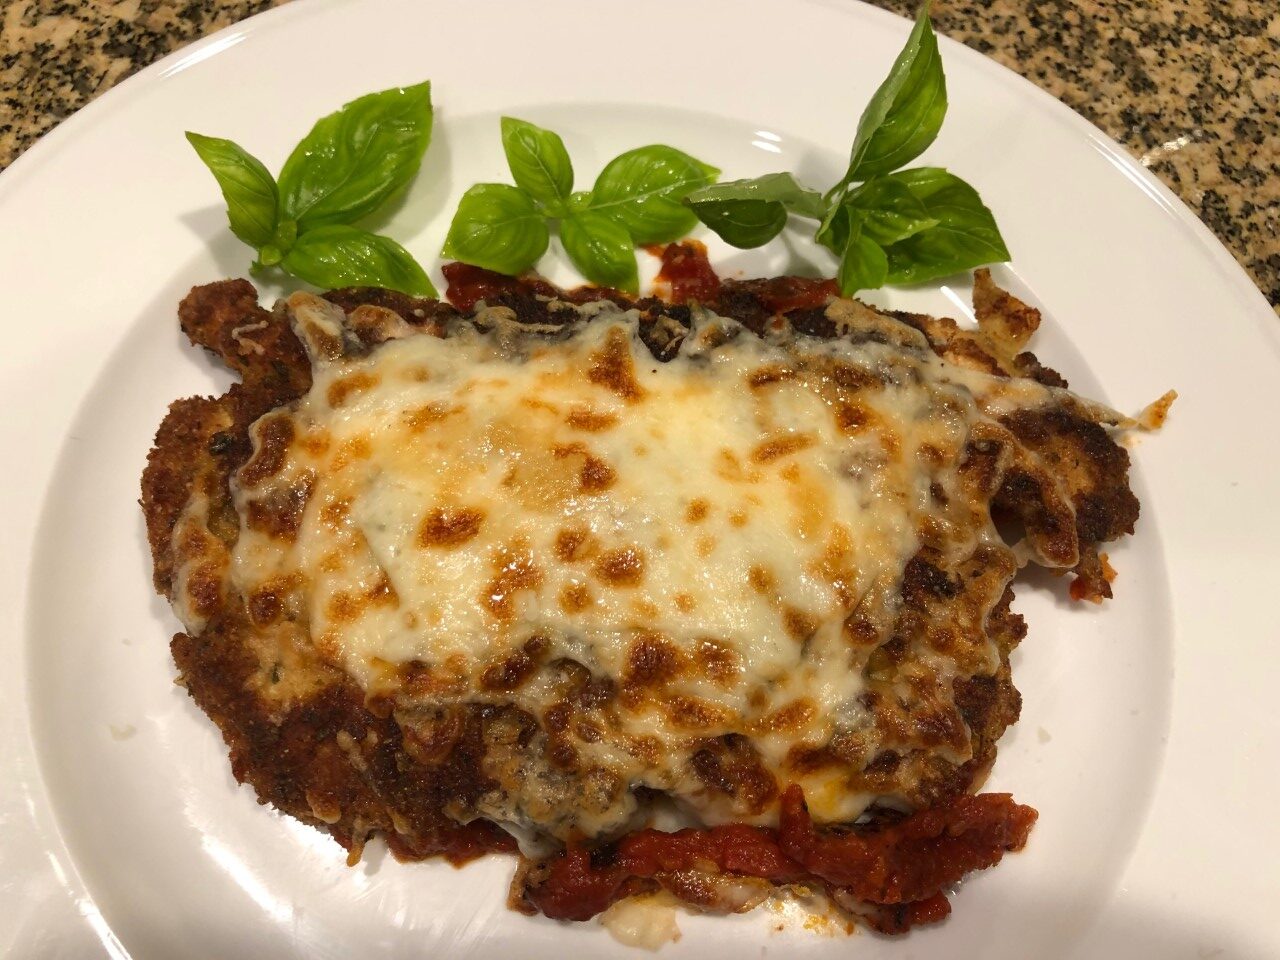
I love chicken Parmesan. The crispy crust covering the chicken and melted cheese are a hard combination to beat. This isn’t the soggy homemade chicken Parmesan covered with the stuff from that green cylinder that you’ve probably had. This is the chicken Parmesan you had at an Italian restaurant.

While this isn’t a difficult recipe to make, it does take a little time and planning. The chicken needs to be butterflied and pounded. You could probably buy it prepped, but try going through the process. Also, if you want to go all out, you’ll have either make homemade tomato sauce or have some already made. I wouldn’t fault anyone for using a good jarred sauce.

Once you’ve got the chicken and sauce ready to go, you’re most of the way there. Here’s a bonus for you. If you use an extra chicken breast, you can use that extra cooked chicken for an awesome sandwich. I bought some pepperoni and re-heated a piece of the chicken with some pepperoni and mozzarella under the broiler – OMG! It was AWESOME! The prepared chicken is also the beginning of chicken saltimbocca, but that will be another post.

I hope you’ll try this recipe and let you know what you think!

Chicken Parmesan

1 Star2 Stars3 Stars4 Stars5 Stars (No Ratings Yet)
Loading...
By Patrick Dulmage Serves: 4
Prep Time: 30 minutes Cooking Time: 30 minutes Total Time: 1 hour

Chicken Parmesan

Ingredients

  • 2-3 boneless, skinless chicken breasts, butterflied and pounded thin (about 1/8” thick)
  • 2 teaspoons Kosher salt
  • 1 cup breadcrumbs (plain or Italian seasoned)
  • 20 grams salt and vinegar potato chips, crushed finely
  • 2 teaspoons dried oregano
  • 2 teaspoons dried parsley
  • 1 ½ teaspoons garlic powder
  • 2/3 all-purpose flour
  • 3 large eggs, beaten
  • 4 tablespoons butter, divided
  • 2 tablespoons olive oil, divided
  • 1 cup tomato sauce, jarred or home made
  • 2 oz low-moisture mozzarella, shredded
  • 2 oz Italian fontina, shredded
  • Chopped fresh flat-leaf parsley or basil for garnishing

Instructions

1

Cut the butterflied and pounded breasts into 6-8 even pieces.

2

Season with the salt on both sides and place on a rack inside a sheet pan. Cover and refrigerate for 30 minutes.

3

Combine the breadcrumbs, potato chips, oregano, parsley, and garlic powder in a gallon zip-top bag and crush.

4

Set up breading station. Put the flour in one pan, the eggs in the next, and the breadcrumb mix in the third pan. Also have a wire rack over a sheet pan to put the breaded pieces as you work.

5

Get the chicken from the fridge and pat it dry with paper towels.

6

Dredge the chicken in the flour, shake off excess flour, then dip into the eggs and drain the excess.

7

Finally, coat with the breadcrumbs and then place on the rack.

8

Pre-heat the broiler on high.

9

Pre-heat a large pan over medium heat with 1 tablespoon of the olive oil and 2 tablespoon of butter.

10

When the butter foams, add about half the chicken – don’t crowd the pan, leave room between the pieces.

11

Cook until golden brown, about 2 minutes on each side. Try not to move it around as it cooks but you can peak at about a minute and 30 seconds to make sure the breading isn’t burning.

12

Repeat on the other side.

13

After you have removed all the chicken, wipe the pan clean with paper towels and repeat cooking process for the remaining chicken.

14

Spread about a cup of the sauce on the bottom of a 13x9 baking dish and broil until the sauce bubbles and begins to caramelize. Time will depend on your oven and how far the dish is from the burner. Don’t walk away, watch it.

15

Remove the dish from the oven and arrange the chicken pieces in a single layer.

16

Put a dollup of sauce on each piece of chicken. Don’t completely cover the chicken with sauce. You took the time to make a nice crispy crust, don’t make it soggy now.

17

Spread the shredded cheeses over the sauce and chicken.

18

Put the pan under the broiler until the cheese is bubbly and brown.

19

Once finished, garnish with the parsley or basil. (Note, if you use basil serve it quickly as the heat will discolor the basil)

Chicken

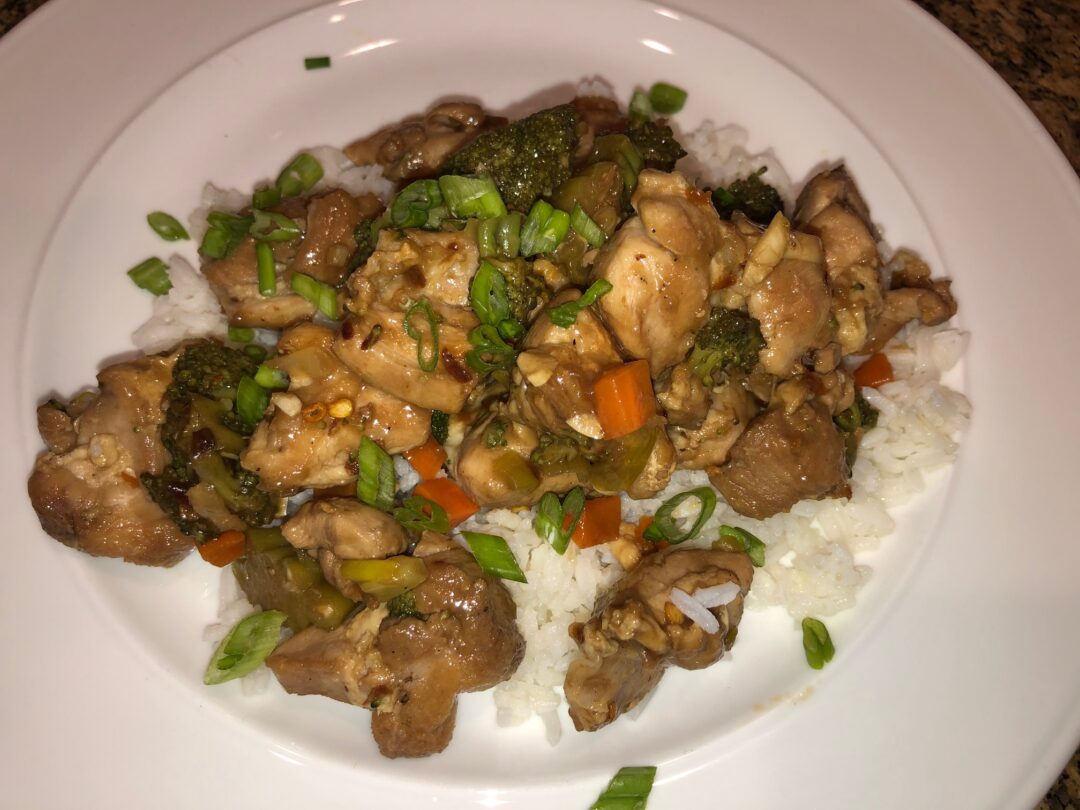
Stir Fry Chicken and Broccoli

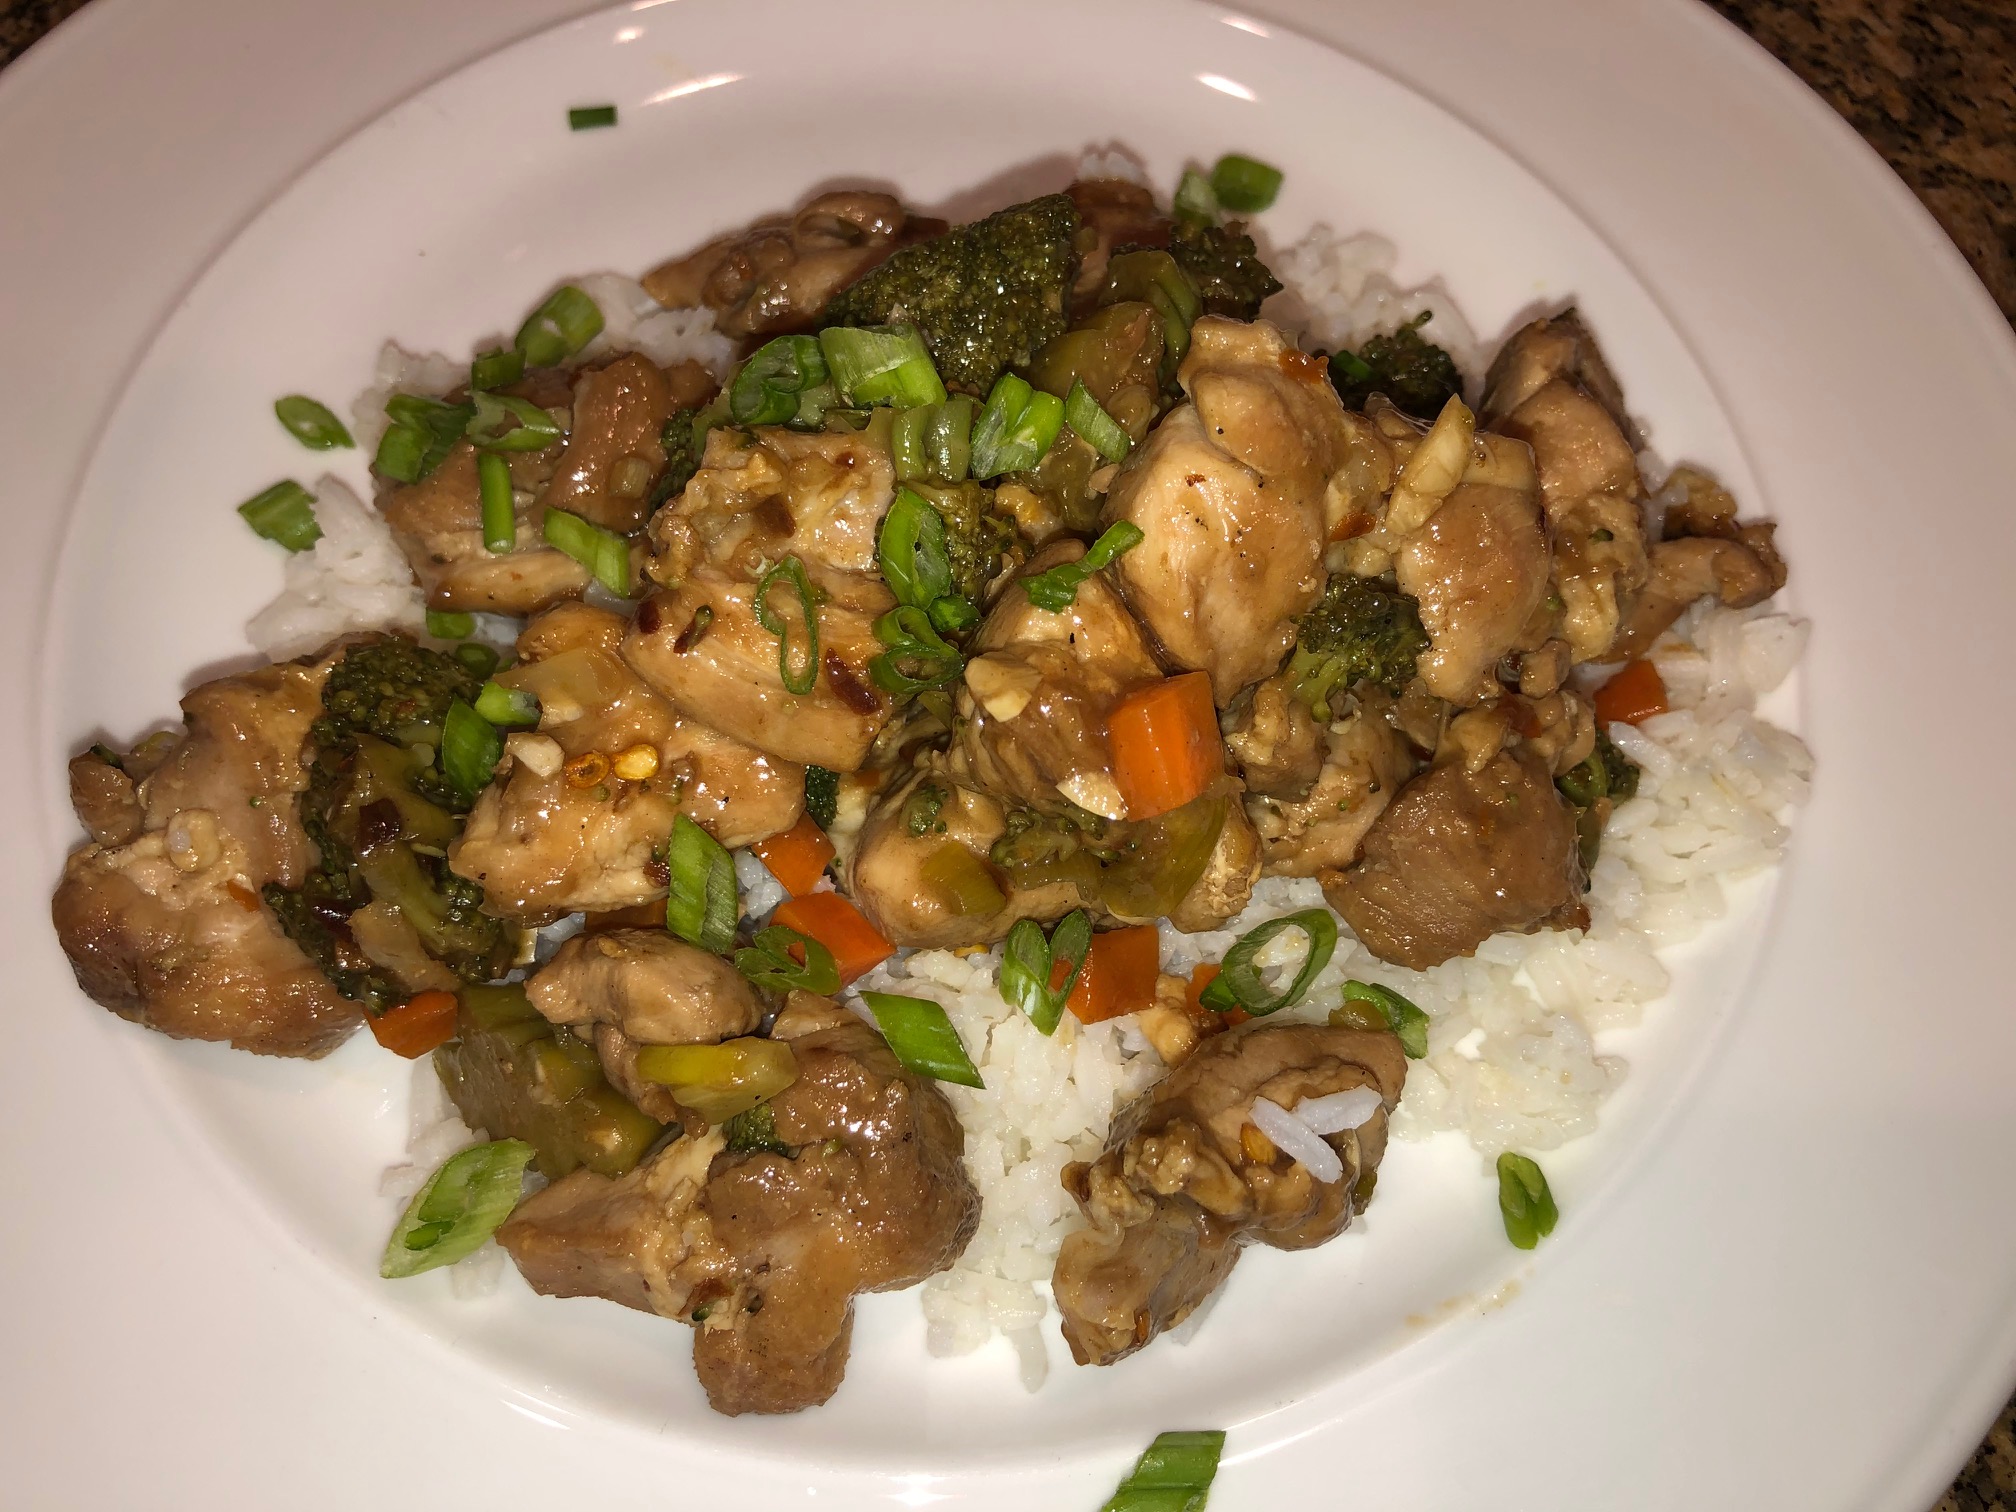
On the menu tonight – Stir Fry Chicken and Broccoli!

I love Chinese food, but it can get expensive going out or ordering take out frequently. Luckily, you can make your own take out favorites in the time it takes to wait on delivery. Chicken and Broccoli is one of my go-to take out meals.

This version only takes about 25 minutes to make. Preparation is key to getting it done quickly. Start by cooking the rice since it will take the most time. You’ll have the meal finished in about the same time as it would take to order and wait for it to arrive.

The next time you’re craving Chinese take out, try making this Stir Fry Chicken and Broccoli. Let me know how it turns out.

Stir Fry Chicken and Broccoli

1 Star2 Stars3 Stars4 Stars5 Stars (No Ratings Yet)
Loading...
By Patrick Dulmage Serves: 4-6
Prep Time: 5 minutes Cooking Time: 20 minutes Total Time: 25 minutes

Stir Fry Chicken and Broccoli

Ingredients

  • 4 tablespoons soy sauce (I use low sodium)
  • 2 tablespoons orange juice
  • 2 tablespoons brown sugar (light or dark)
  • 1-2 tablespoons rice wine vinegar
  • ½ tablespoon corn starch
  • ½ tablespoon sesame oil
  • 1 teaspoon crushed red pepper flakes
  • 1-2 tablespoons oil for cooking chicken and veggies (peanut or vegetable oil)
  • 1 lb boneless, skinless chicken thigh, cut into bite size pieces
  • 2 tablespoons peeled and chopped fresh ginger or 1 teaspoon dried ground ginger
  • 4 cloves garlic, minced
  • 1 carrot, finely diced
  • 4 green onions, sliced
  • 4 cups broccoli, pre-cooked
  • Salt and pepper
  • 1 cup rice

Instructions

1

Pre-cook the broccoli.

2

Pre-cook the rice. (see my Cilantro Rice recipe to perfectly cook your rice)

3

In a mixing bowl, whisk together the soy sauce, orange juice, brown sugar, rice wine vinegar, cornstarch, sesame oil, and red pepper flakes.

4

Pre-heat a wok or large pan with oil.

5

When the oil shimmers, add the chicken in batches. Don’t crowd the pan.

6

Stir-fry until the chicken is cooked through, about 4 minutes depending on the size of the pieces.

7

Transfer to a plate or bowl and continue with the rest of the chicken.

8

Once all the chicken is cooked, add a little more oil to the wok or pan and add the ginger, carrot, garlic, and green onions.

9

Add the chicken back to the pan with the broccoli and stir to combine.

10

Pour in the sauce and stir until the sauce thickens.

11

Transfer to a serving dish.

12

Serve over cooked rice. Check out my Cilantro Lime Rice recipe to make the perfect rice.

Chicken

Chicken Marsala

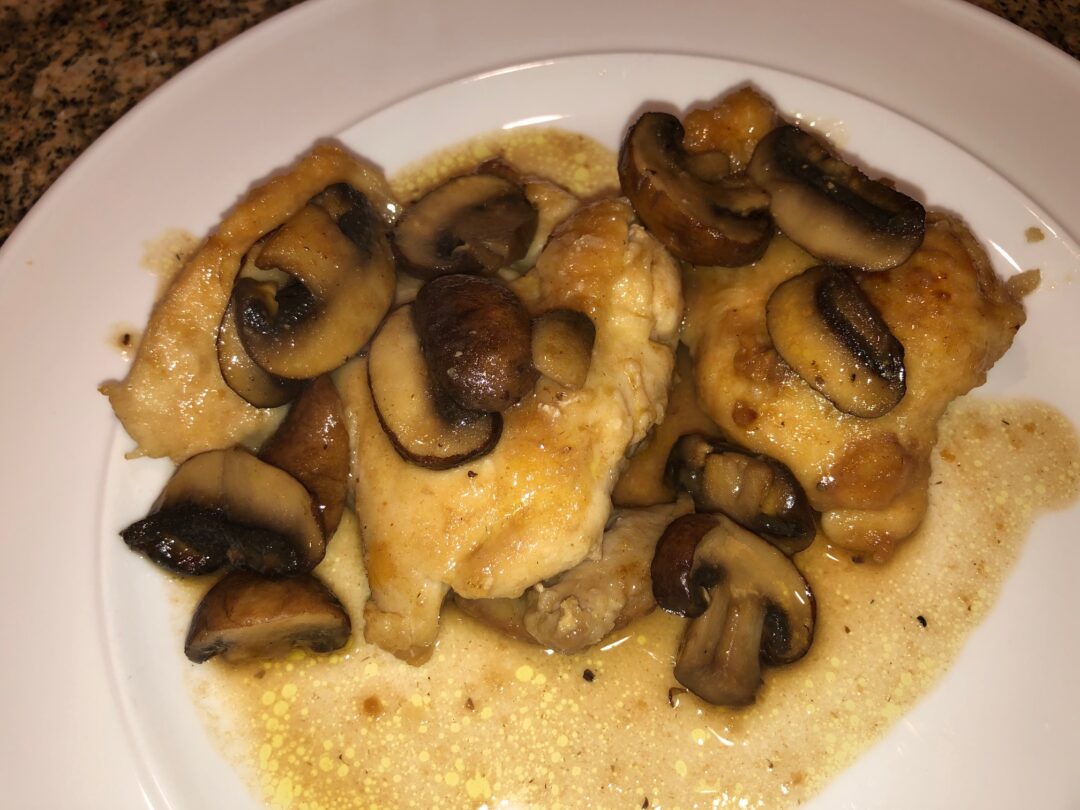
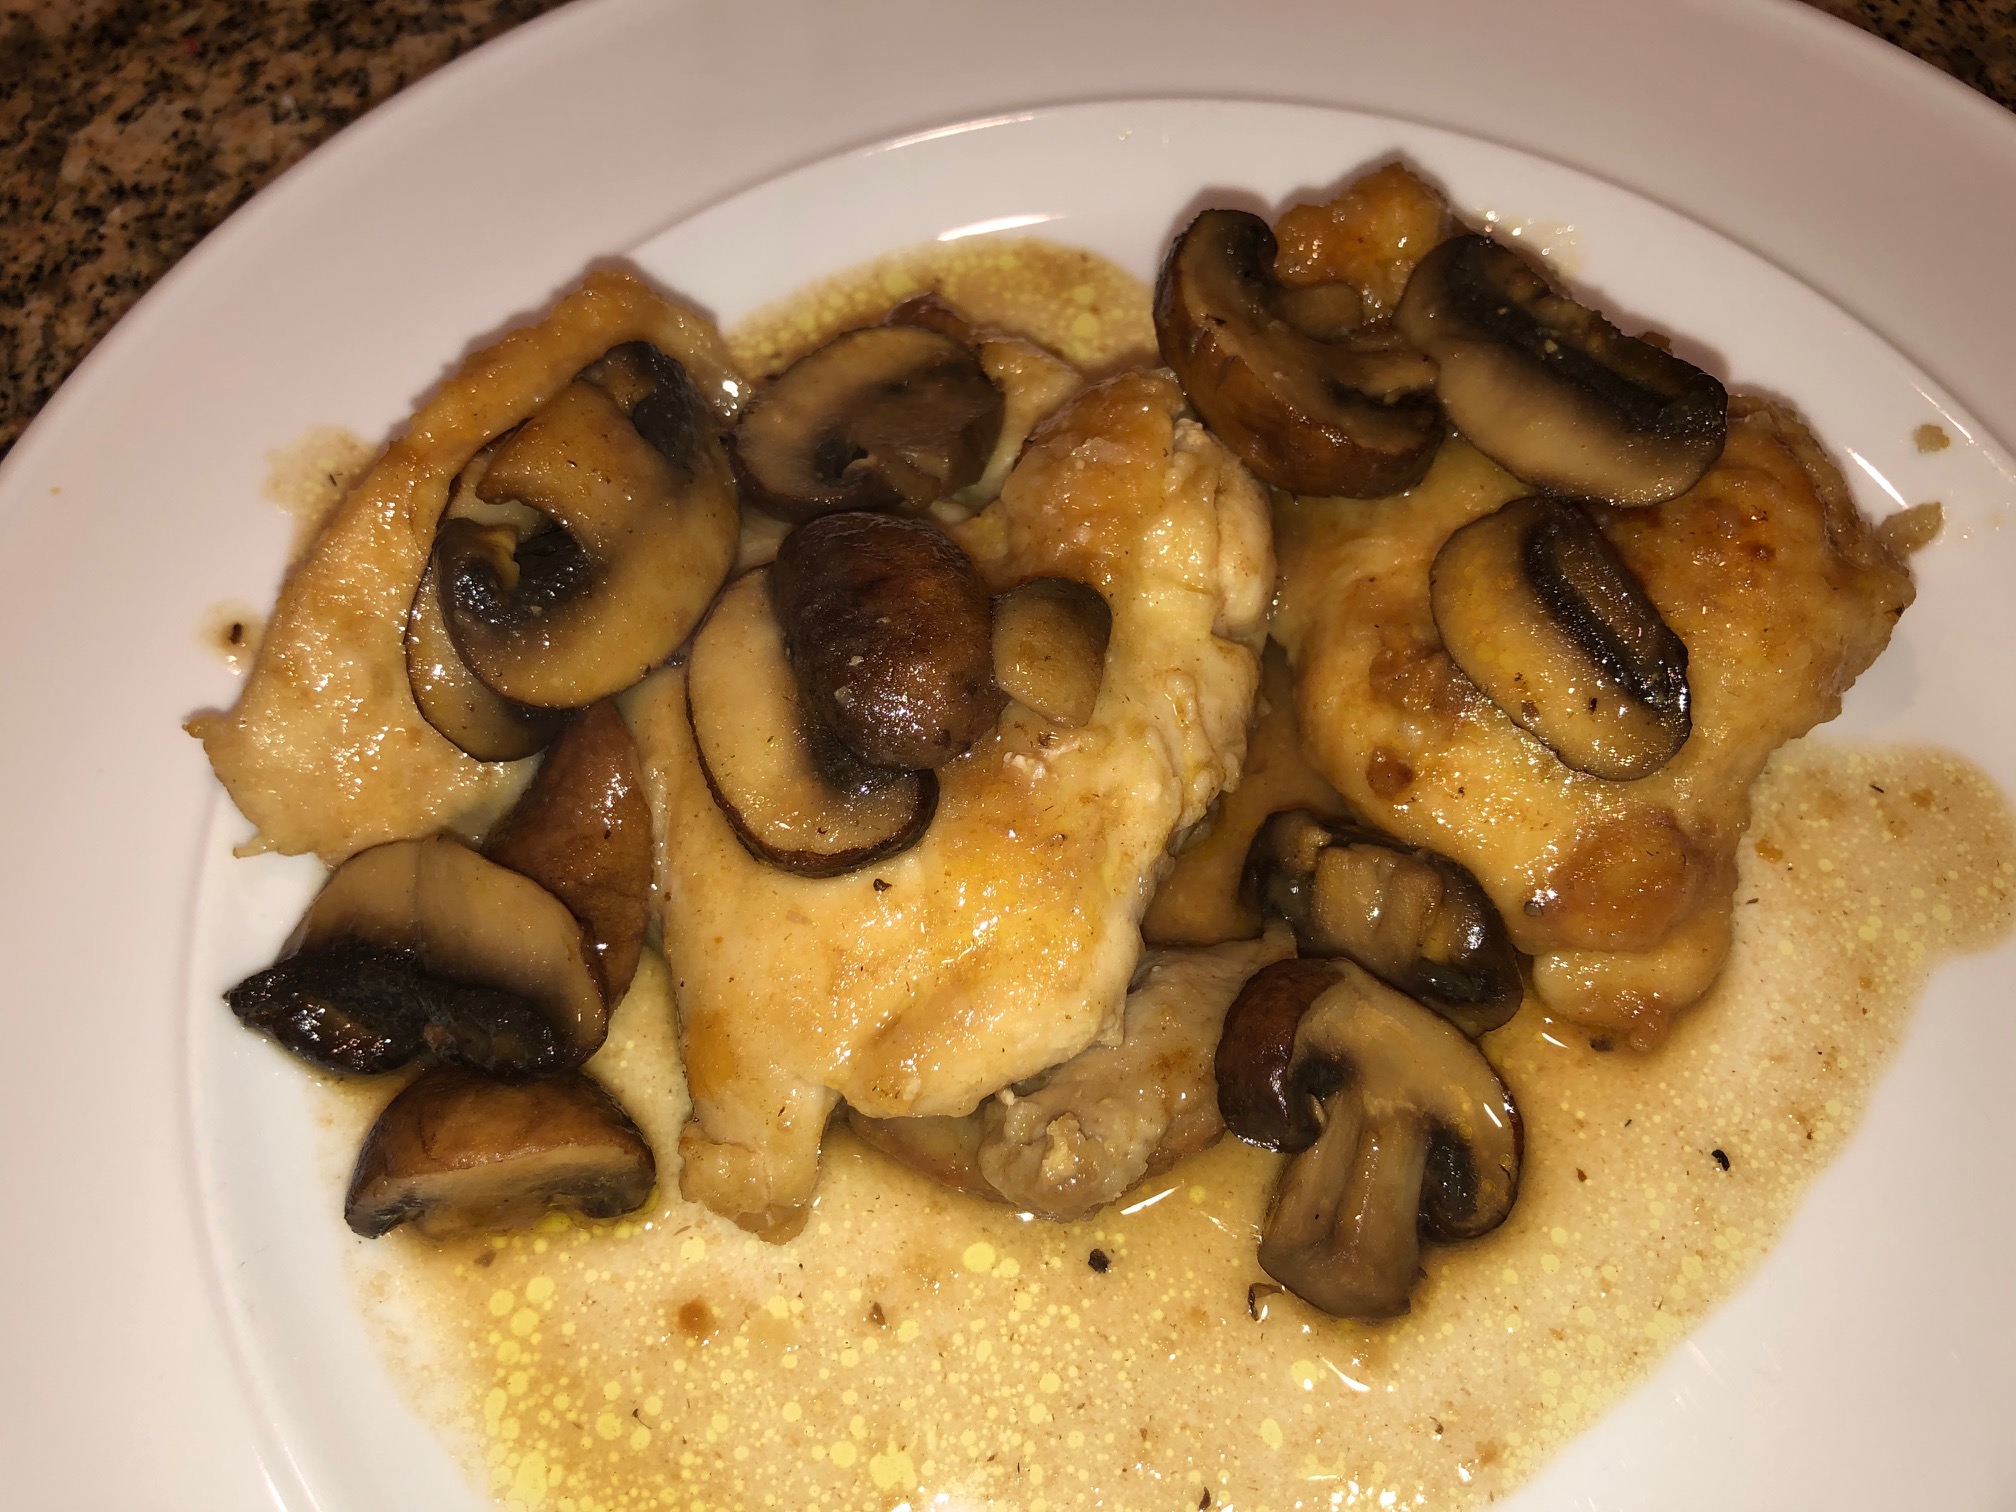
On the menu tonight – Chicken Marsala!

This was another dish on the menu for the cooking class. OMG! It’s SO good! They called for chicken breast, I hardly use chicken breast. I used chicken thighs for this recipe- my favorite. They are more flavorful and don’t dry out like the breast meat. I’m definitely adding this to my easy to make chicken meals. From start to finish I think I was done in about 45 minutes and only because I did the chicken in small batches. Check out the recipe below and make your version!

Chicken Marsala

1 Star2 Stars3 Stars4 Stars5 Stars (No Ratings Yet)
Loading...
By Unknown Serves: 4-6
Prep Time: 15 Cooking Time: 30 minutes Total Time: 45

Chicken Marsala

Ingredients

  • 2 Boneless, skinless chicken breast OR 4-6 boneless, skinless chicken thighs
  • 8 oz porcini, portabella or crimini mushroom
  • ½ Cup Marsala Wine
  • ½ Chicken Stock
  • ¼ Cup Basil
  • 2Tbsp Butter
  • AP Flour, to dredge
  • Salt
  • 2 Tbsp Olive Oil

Instructions

1

Heat Large Sauté Pan over Medium High Heat, and add 2 T of olive Oil.

2

Dredge chicken in Flour, and gently place in to pan and sear on both sides for 4-5 min or until golden brown.

3

Remove Chicken from pan, and place on tray lined with paper town to absorb extra grease.

4

Now add mushrooms to pan, add pinch of salt, and sauté until nice and tender 3-4 min.

5

Deglaze pan with marsala wine, and let cook down until reduced by half of liquid amount.

6

Add chicken stock to pan and bring up to light simmer.

7

Add Chicken back to pan, and add butter.

8

Turn heat off and swirl around.

9

Garnish with Basil

Notes

For the meat, you can use chicken breast or thighs. I prefer thighs as they have more flavor, in my opinion, and don't dry out as easily as the breast meat.

Chicken

Buttermilk Fried Chicken

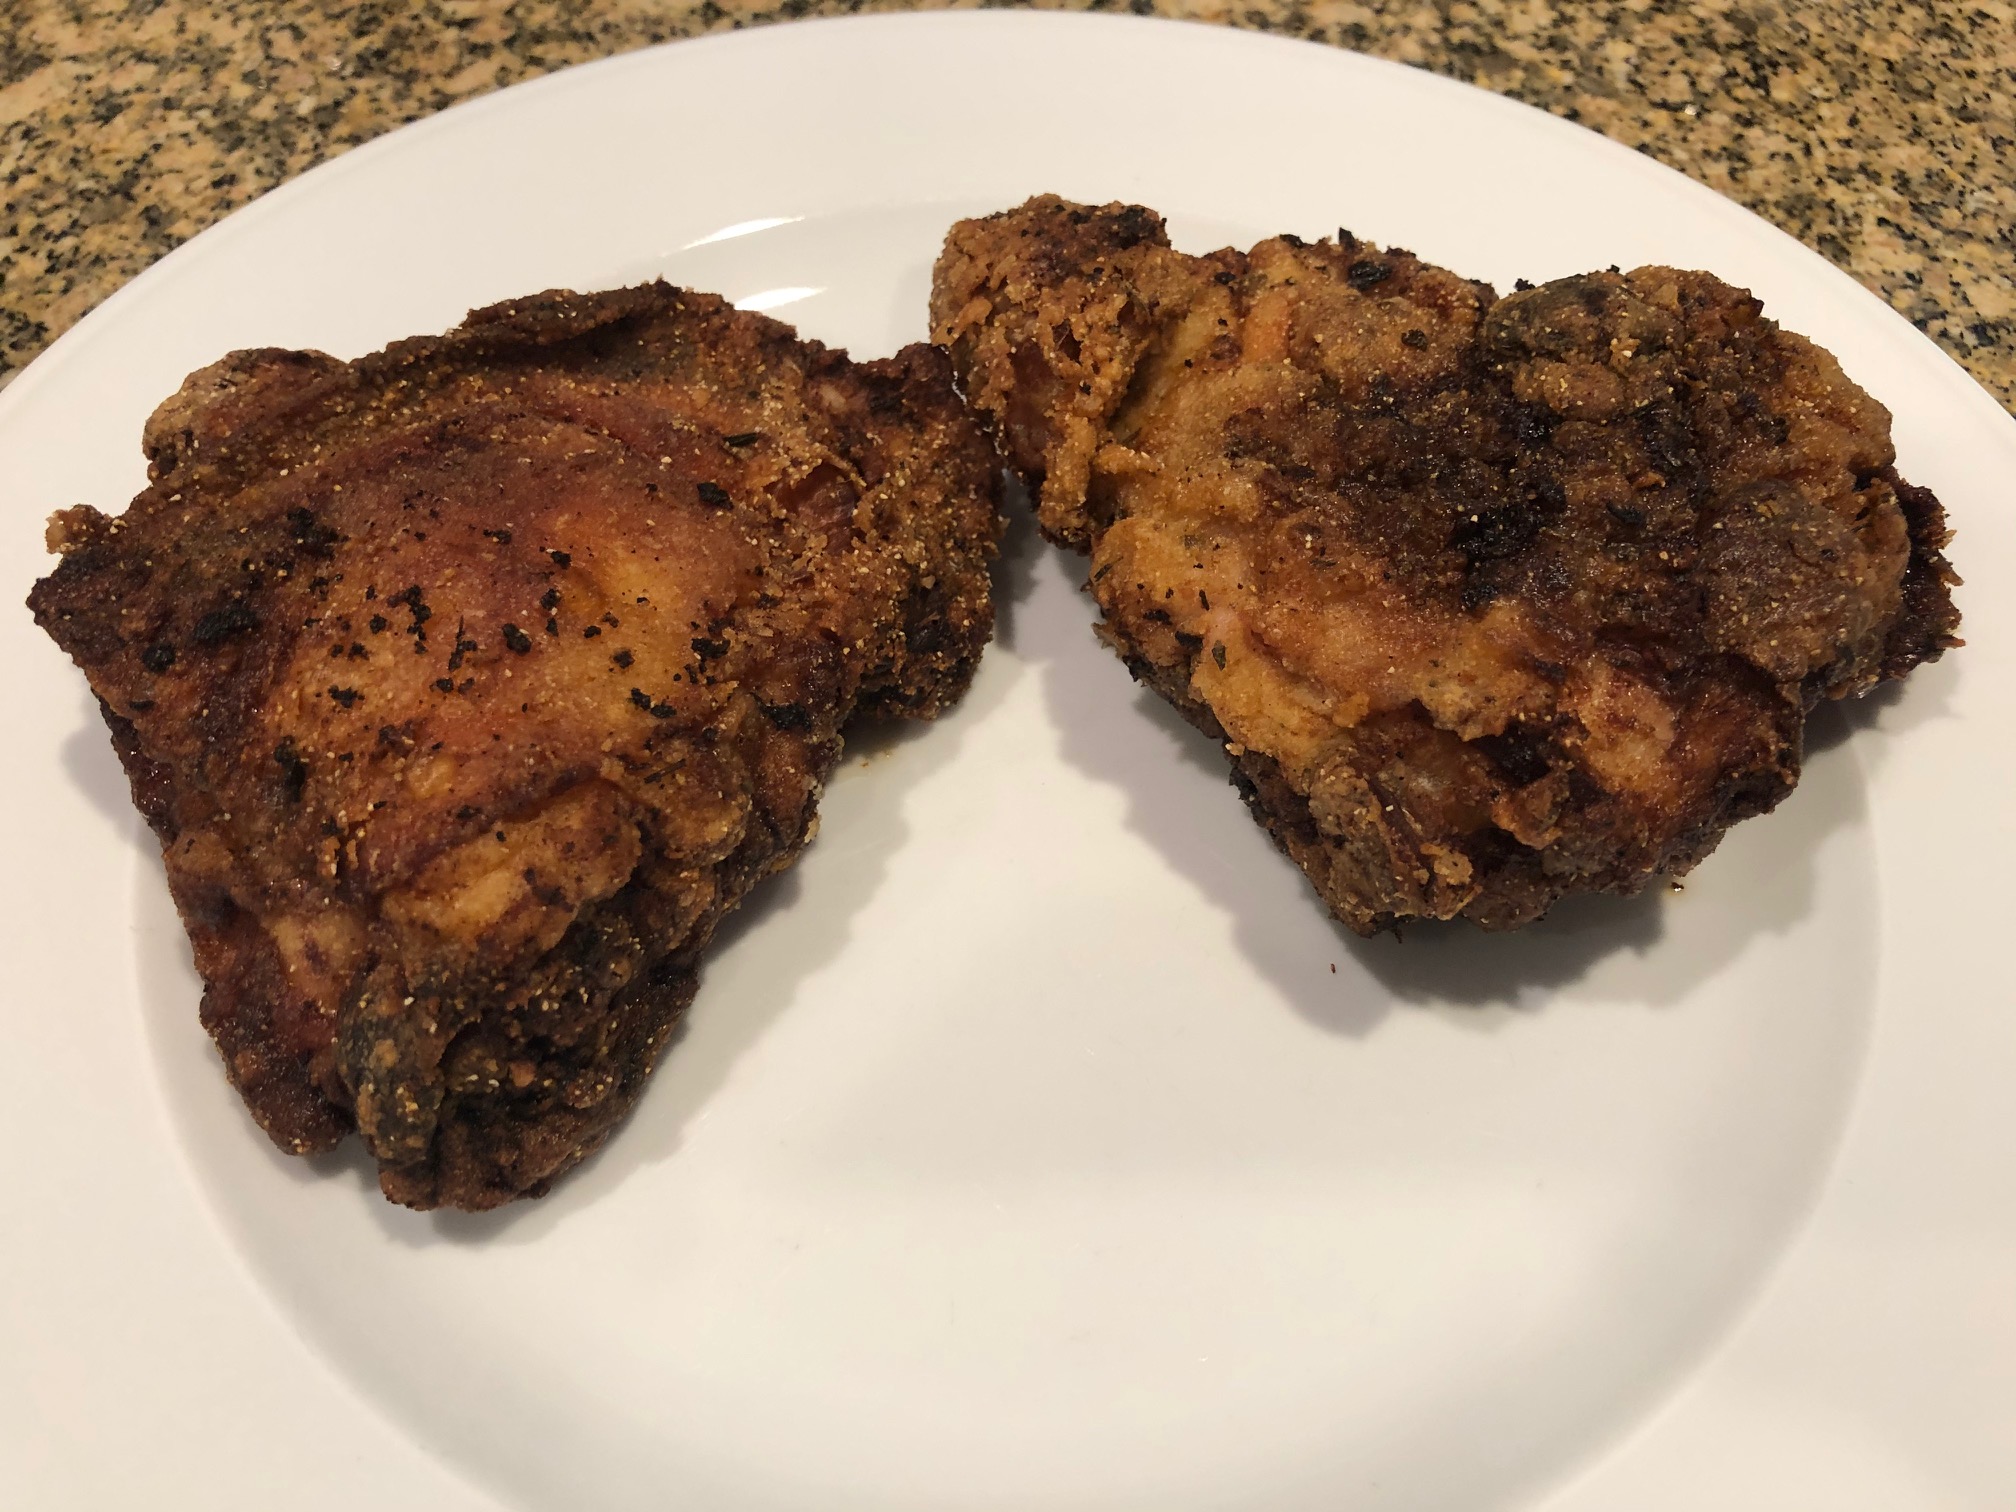
One of the things on the menu today – Southern Fried Chicken! I’ve been wanting to make this for a while and I finally did it!

I started making this yesterday by marinating the chicken overnight in buttermilk and a little hot sauce. Today, I brought it to room temperature as I prepped the spice mix, flour mix, and brought the oil to temperature. The hardest part about making this chicken was keeping the oil at the right temperature. I used a large cast iron skillet with about an inch to inch and a half of oil – much more than that wouldn’t have been safe. Next time, I’ll use a Dutch Oven so I can use a little more oil.

Overall, it turned out well. The skin is a little darker than I wanted it. I also had to finish it in the oven to make sure it was cooked all the way through. The piece I tasted was really good. It was nice and juicy, not oily. The skin had a nice crunch to it and the spices came through nicely. Let me know your tips for making fried chicken.

Buttermilk Fried Chicken

1 Star2 Stars3 Stars4 Stars5 Stars (No Ratings Yet)
Loading...
By Patrick Dulmage Serves: 4
Prep Time: 30 minutes Cooking Time: 1 hour Total Time: 1 hour 30 minutes

Buttermilk Fried Chicken

Ingredients

  • 1 3-5 lb broiler chicken, cut into pieces
  • 2 cups buttermilk
  • 2-3 tbsp of your favorite hot sauce
  • 1 cup flour
  • 1 cup cornstarch
  • 2 tbsp paprika
  • 1 tbsp kosher salt
  • ½ tsp cayenne pepper
  • 1 tbsp garlic powder
  • 1 tbsp onion powder
  • 1 tbsp dried parsley
  • 1 tbsp dried thyme
  • 1 tsp celery salt
  • 1 tsp black pepper
  • Vegetable or peanut oil for frying

Instructions

1

Put the chicken in a gallon zip lock bag and pour in the buttermilk and hot sauce. Let it marinate in the fridge about 4 hours or as long as overnight.

2

About an hour before you want to cook, bring the chicken out of the fridge and let it come to room temperature.

3

Whisk the spices together in a small mixing bowl.

4

Whisk the flour and cornstarch in a large mixing bowl.

5

Pre-heat a dutch oven with about 2-3 inches of oil to 350 – 360 degrees.

6

Drain the chicken in a colander and transfer to a rimmed baking sheet.

7

Generously season your chicken with the spice mix.

8

Then coat the chicken with the flour mixture.

9

Choose your method of coating the chicken. Some people use a large paper bag (the old school grocery bags) to shake and coat the chicken. Others put the dry mix on a baking sheet or in a pie tin. Whichever method you use, coat the chicken thoroughly.

10

LET THE CHICKEN REST 2-3 minutes after coating. The coating will adhere better to the chicken.

11

Fry the chicken, adjusting the burner as necessary to maintain the oil temperature between 300 and 325 degrees for about 13 - 15 minutes, to a deep golden brown, cooked throughout and very crisp.

12

Remove the chicken to a wire rack or a tray lined with paper towels and sprinkle with salt.

13

Check the internal temp on the chicken to confirm it’s cooked through. You want a temperature of 165 degrees. If it isn’t, you can put the chicken in the oven at 350 for about 25-30 minutes to finish cooking.

Casserole/ Chicken

Chicken & Broccoli Casserole

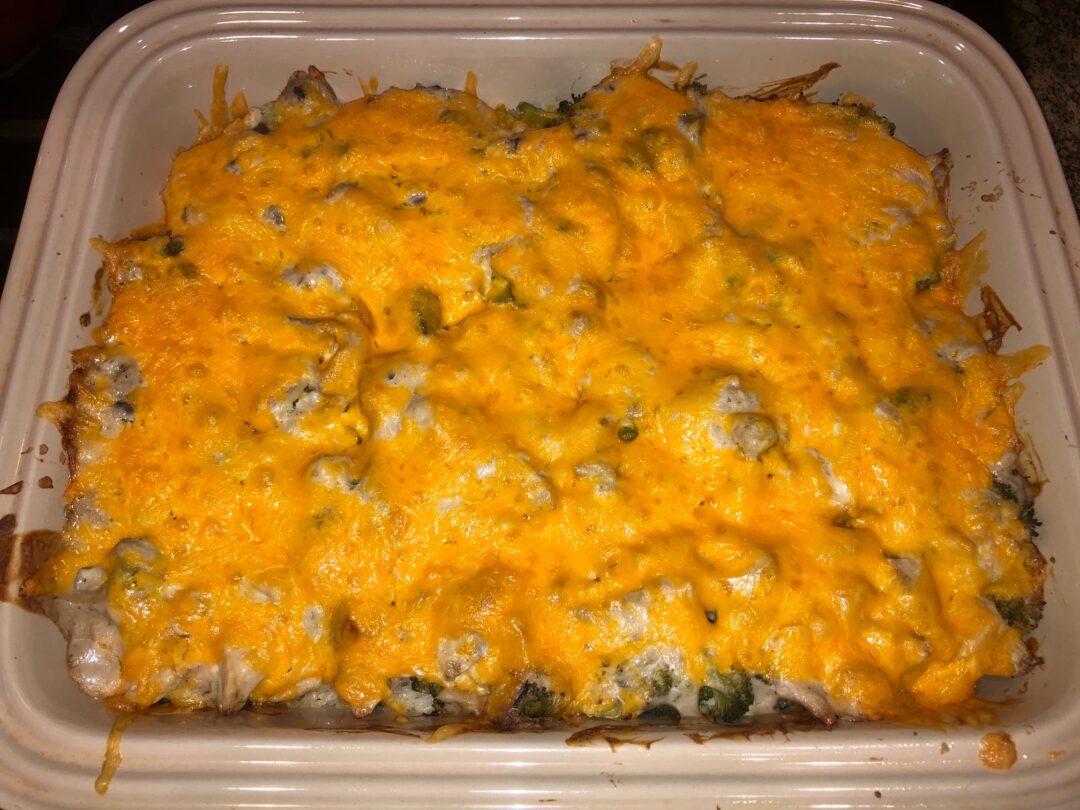
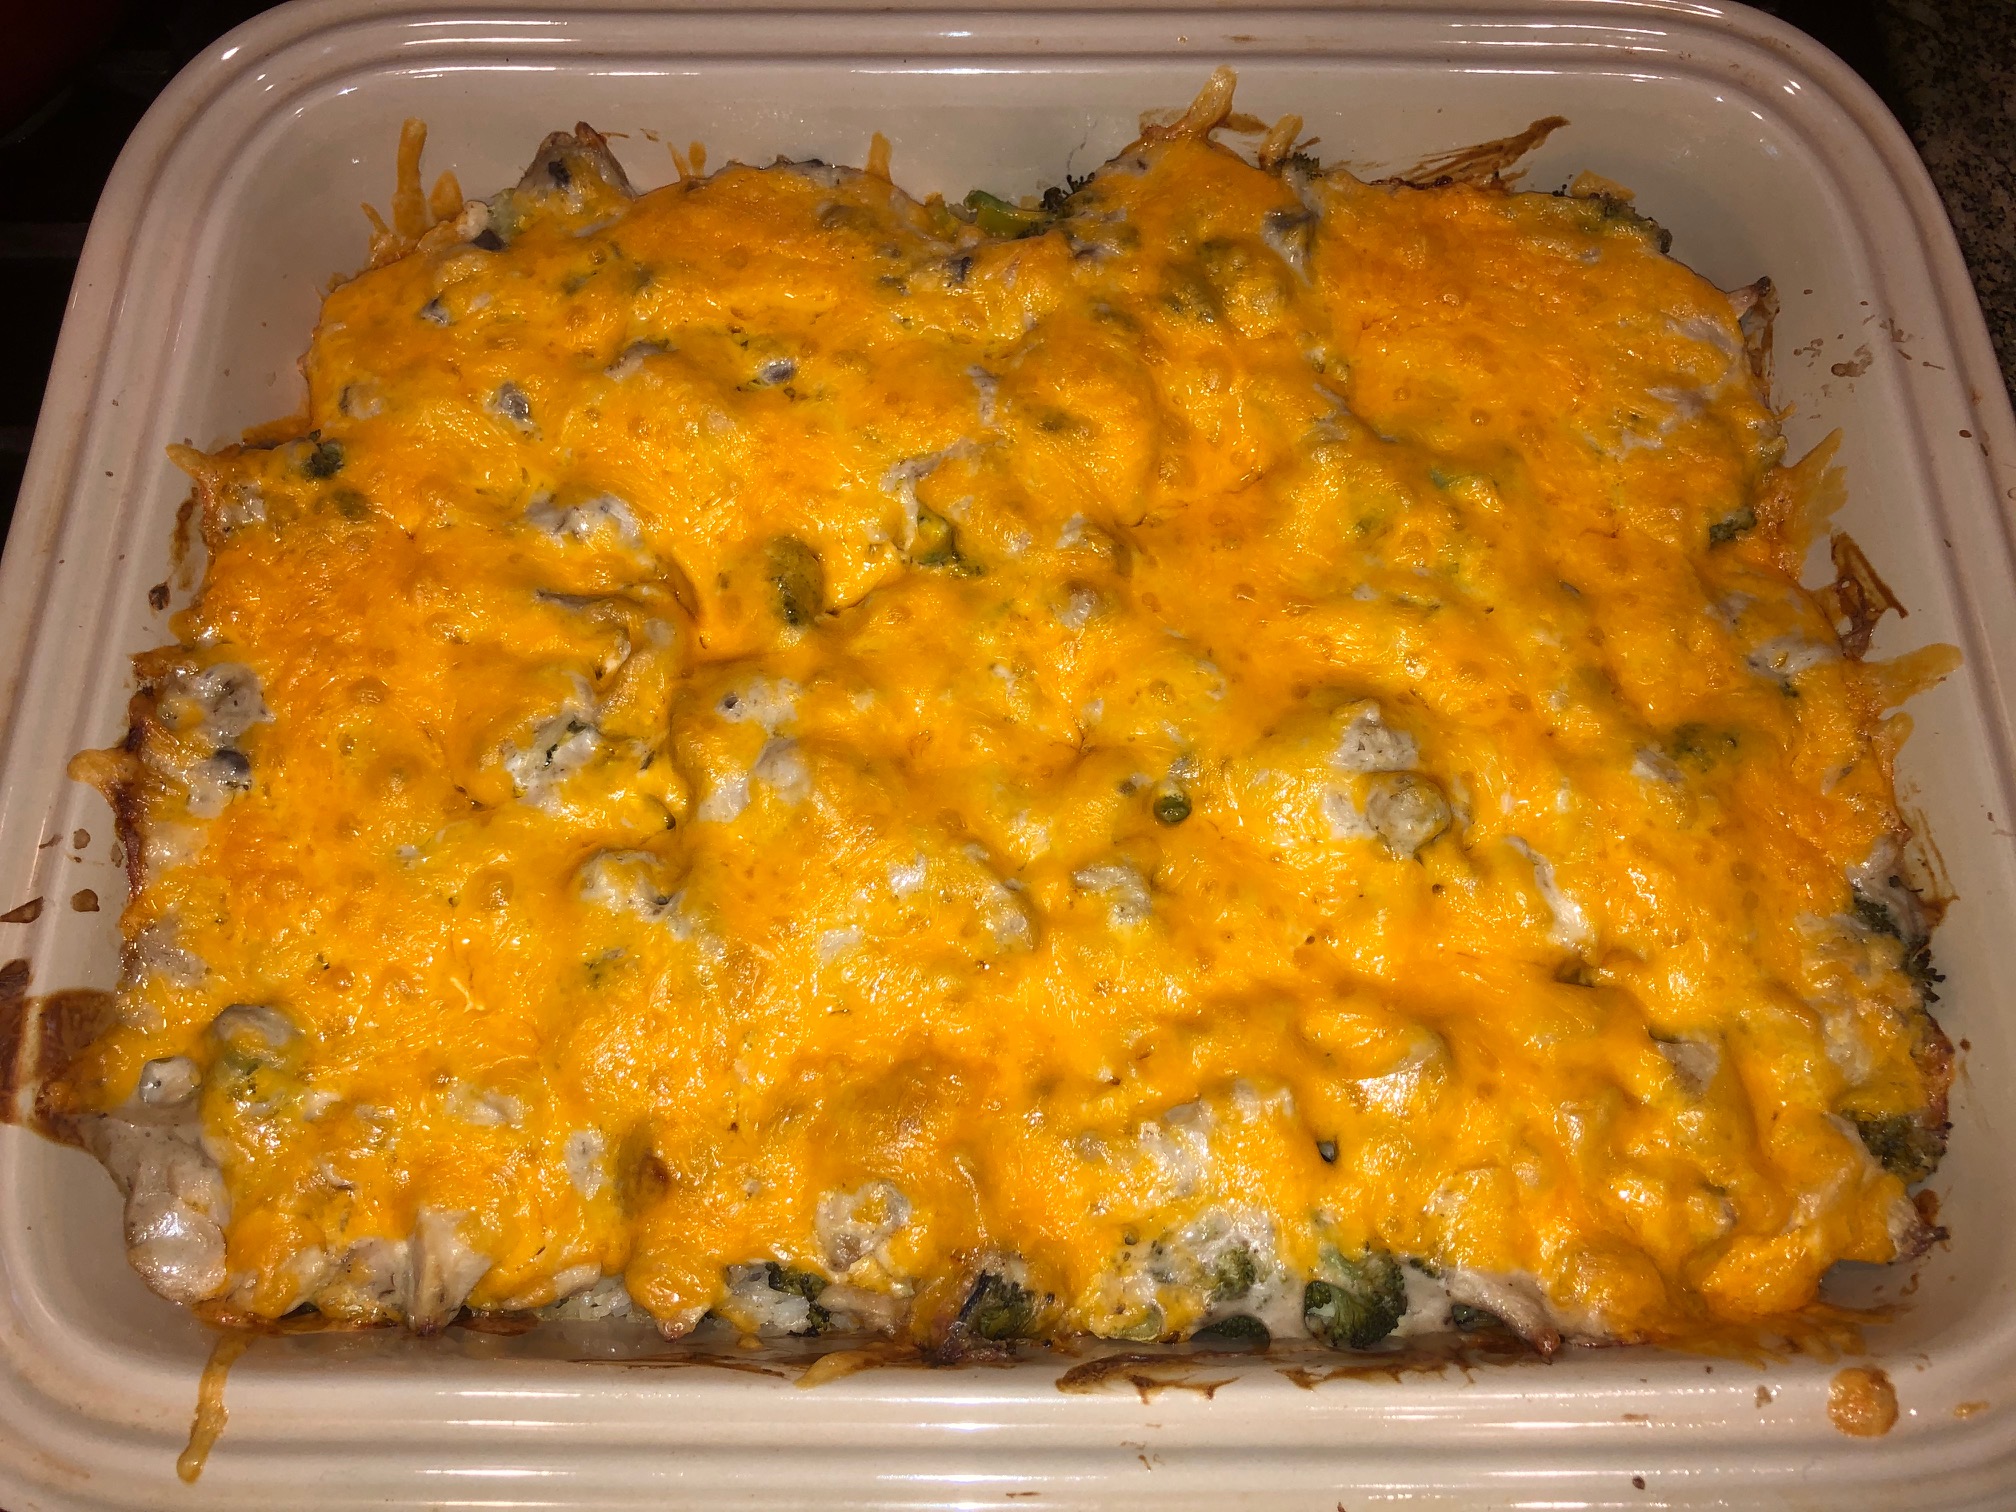
I’ve eaten this dish a lot over the years but I don’t think I’ve ever made it. I don’t know why either because I love it and Chicken & Broccoli Casserole isn’t hard to make. While it isn’t a quick meal to make, it will feed a crowd! And if you don’t have a crowd to feed, it makes for great leftovers.

Since I hadn’t made this casserole before, I searched the internet for recipes. This one sounded most like the ones I’ve eaten and liked. Trisha Yearwood made this on her cooking show. The thing that takes a little longer to make is that you have to cook the chicken separately from the rice. In planning the dish, I knew it was going to take a while, so I cooked the chicken ahead of time and stored it in the fridge. You could also use a store bought rotisserie chicken if you didn’t feel like making the chicken. And if you wanted to take another shortcut, you could use left over rice from another meal.

I hope you’ll make this casserole and let me know what you think.

Chicken & Broccoli Casserole

1 Star2 Stars3 Stars4 Stars5 Stars (No Ratings Yet)
Loading...
By Trisha Yearwood Serves: 10-12
Prep Time: 40 minutes Cooking Time: 2 hours Total Time: 2 hours 40 minutes

Chicken & Broccoli Casserole

Ingredients

  • Nonstick cooking spray or butter, for the baking dish
  • 4 boneless, skinless chicken breasts
  • Kosher salt and freshly ground black pepper
  • 1 medium head broccoli, cut into small florets
  • 2 cups cooked white rice
  • One 10-ounce can condensed cream of chicken soup
  • 1 cup sour cream
  • 1/2 cup mayonnaise
  • 1 tablespoon lemon juice
  • 10 ounces Cheddar, grated (about 2 1/2 cups)

Instructions

1

Preheat the oven to 350 degrees F.

2

Grease a 9-by-13-by-2-inch baking

3

dish with nonstick cooking spray or butter.

4

Place the chicken in a large pot with water to cover.

5

Add some salt, bring to a boil, then reduce the heat to a low

6

simmer and cook the chicken until tender, about 45 minutes. Drain the chicken, cover, and refrigerate until cool, or up to 24 hours.

7

Shred.

8

Meanwhile, bring a medium pot of generously salted water to a boil.

9

Add the broccoli florets, and boil until crisp-tender, 2 to 3 minutes.

10

Spread the rice in an even layer in the baking dish.

11

Make a second layer with the broccoli.

12

In a large bowl, mix the chicken soup, the sour cream, mayonnaise, lemon juice, shredded chicken, half the Cheddar and some salt and pepper.

13

Pour the mixture over the broccoli and top with the remaining Cheddar.

14

Bake for 40 minutes; let stand for 5 minutes before serving.

Chicken

Lemon and Garlic Roasted Chicken

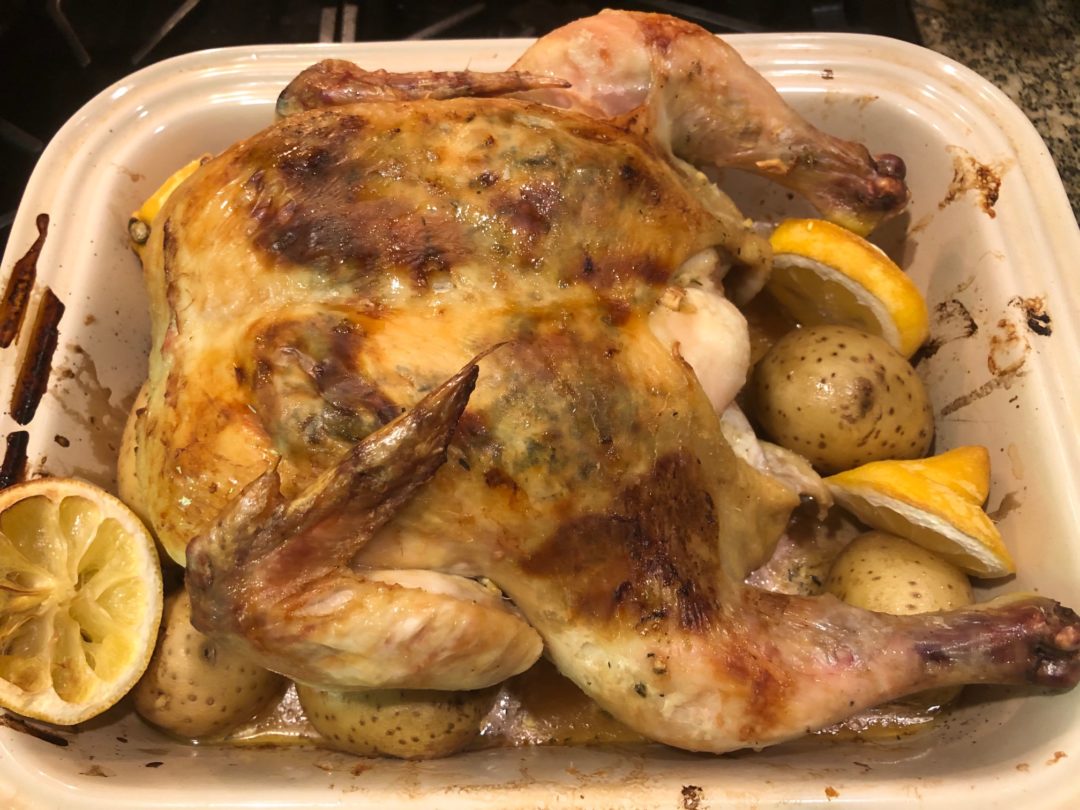
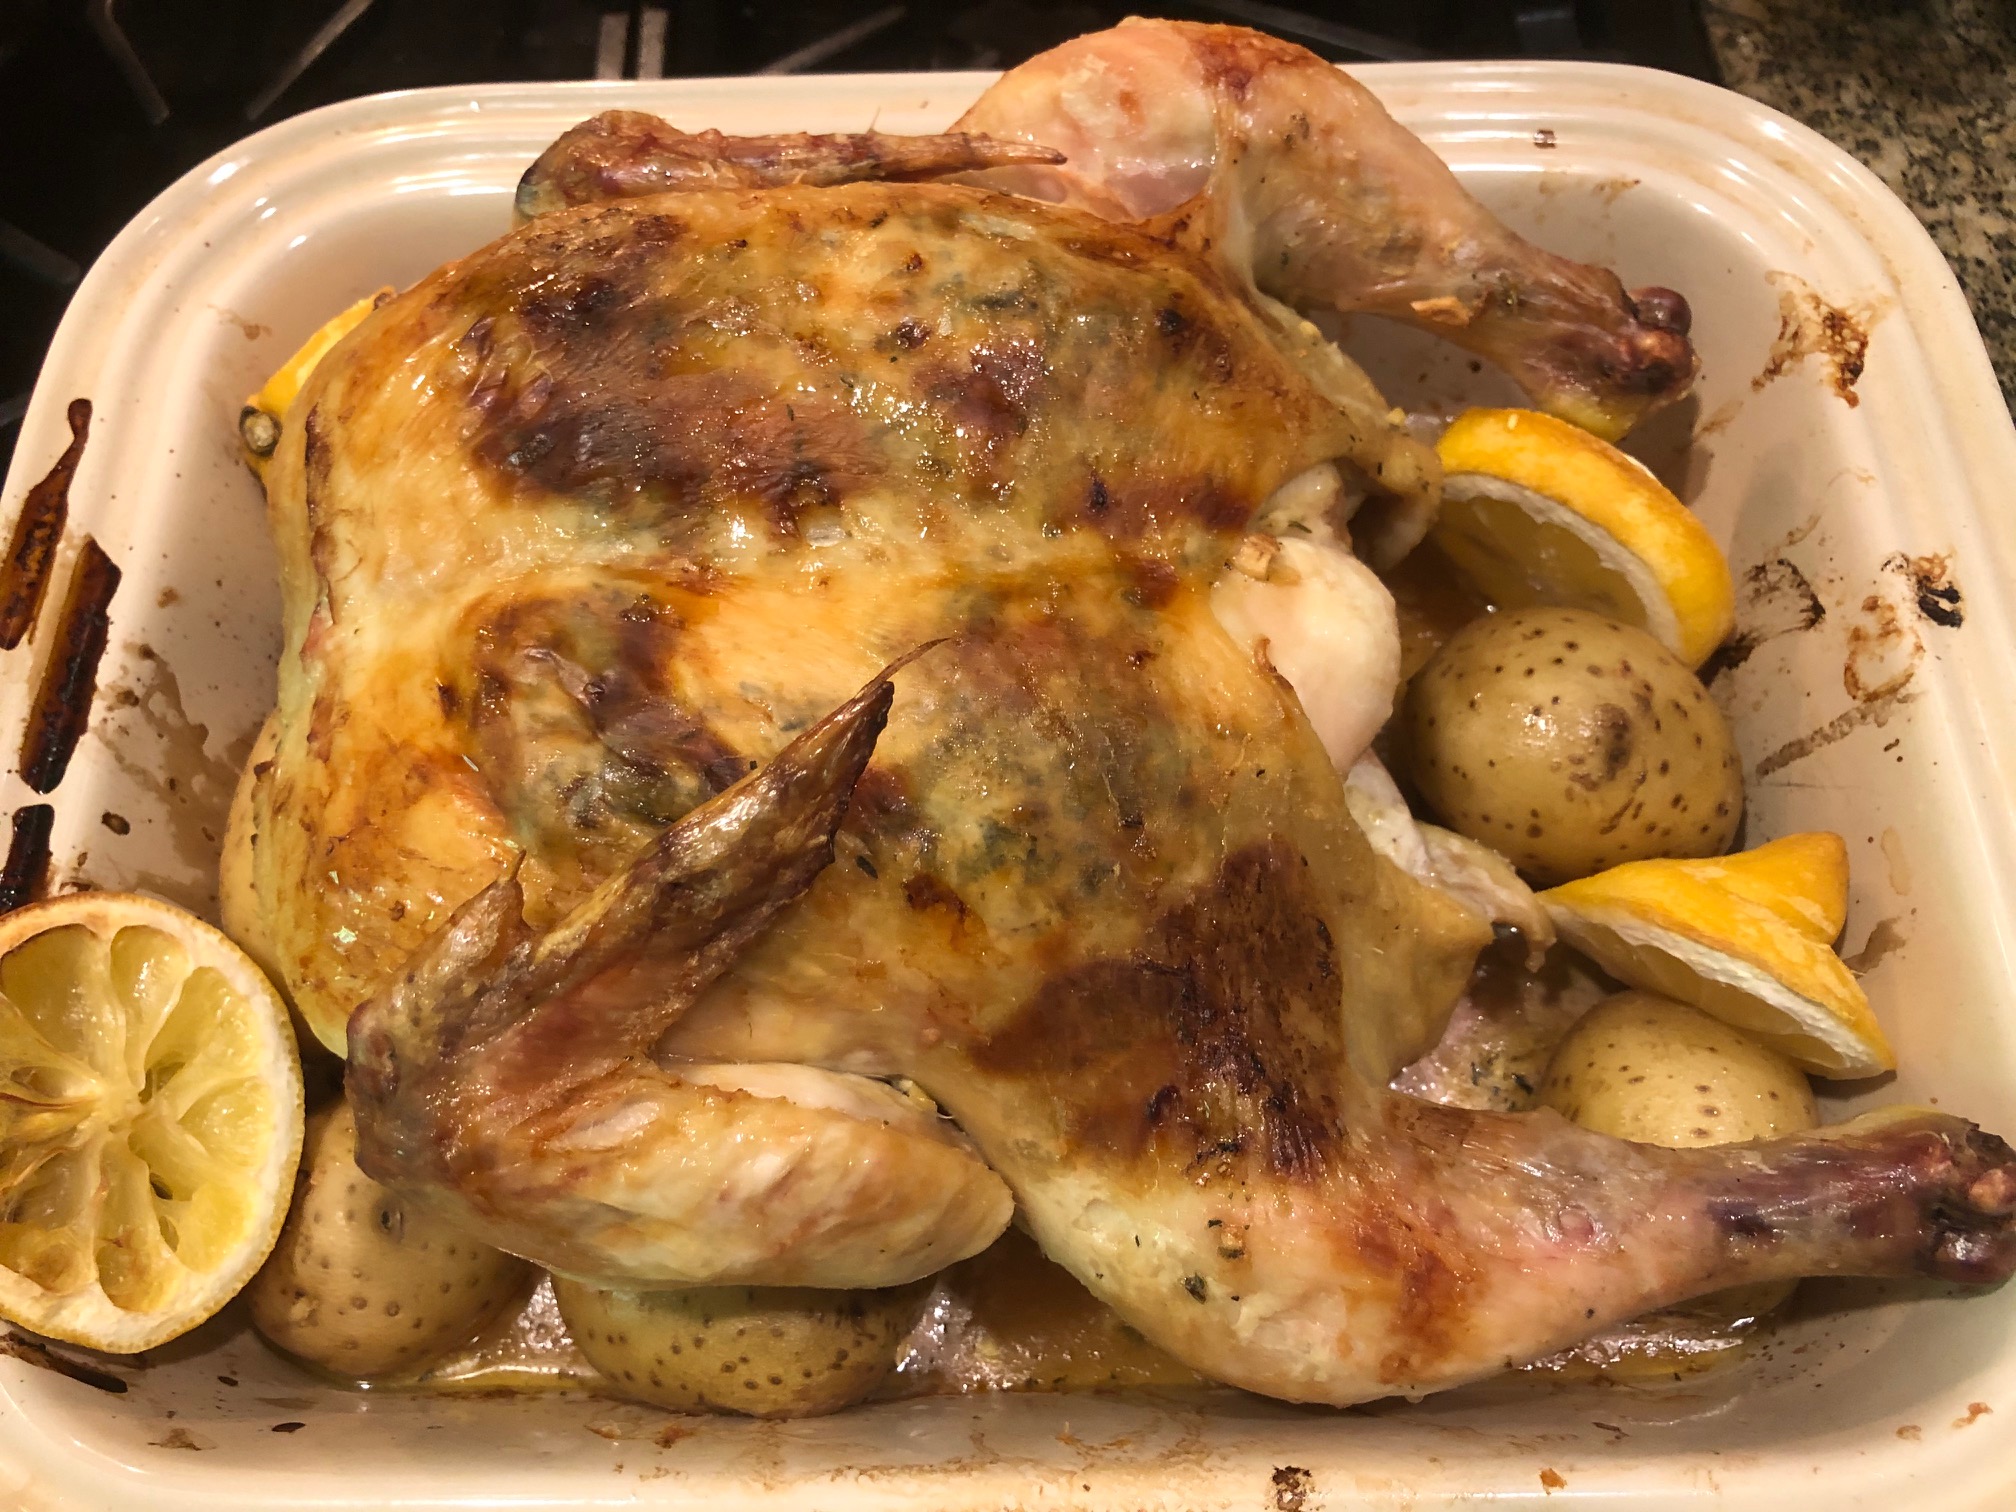
On the menu tonight – Lemon and Garlic Roasted Chicken! Everyone needs a good roasted chicken recipe in their meal rotation. This is another really easy, yet delicious meal you can put together in no time. Rather than leaving the chicken whole, I spatchcock mine so it cooks more evenly and a little quicker. Spatchcock? What the heck is that?! It just means to cut the backbone out and lay the chicken flat.

Back to the recipe… There are are only a handful of ingredients, chicken, butter, lemon, garlic, thyme, salt and pepper. That’s it! The chicken comes out juicy and full of flavor. The next time you make chicken, try this dish and let me know how it turns out.

Lemon and Garlic Roasted Chicken

1 Star2 Stars3 Stars4 Stars5 Stars (No Ratings Yet)
Loading...
By Patrick Dulmage Serves: 4-6
Prep Time: 10 minutes Cooking Time: 1 hour 15 minutes Total Time: 1 hour 25 minutes

Lemon and Garlic Roasted Chicken

Ingredients

  • 1 3-5 lb Whole Chicken
  • 4-6 tbsp butter (room temperature)
  • 2 lemons
  • 6 cloves garlic, minced
  • 1-2 tsp thyme
  • Kosher salt
  • Ground pepper

Instructions

1

Pre-heat oven to 375 degrees

2

Cut the backbone out of the chicken.

3

Rinse the chicken off, then dry the chicken as best you can with paper towels.

4

Set the chicken in a baking dish. Leave room for potatoes, carrots, or whatever else you want to go with your chicken.

5

In a small mixing bowl, mix together the butter, thyme, and minced garlic.

6

Smear some of the butter mixture on the chicken skin.

7

Put the rest of the butter mixture under the skin of the chicken.

8

If you are cooking the chicken with veggies, put those in the baking dish.

9

Place chicken in baking dish breast side down.

10

Put in the oven and bake for 30 minutes.

11

Turn the chicken over, breast side up and bake for another 40-45 minutes until chicken is done.

12

Let the chicken rest at least 5 minutes before cutting.

Notes

I recommend baking the chicken on a bed of potatoes and some carrots for a fantastic side dish.

Chicken

Chicken Pot Pie

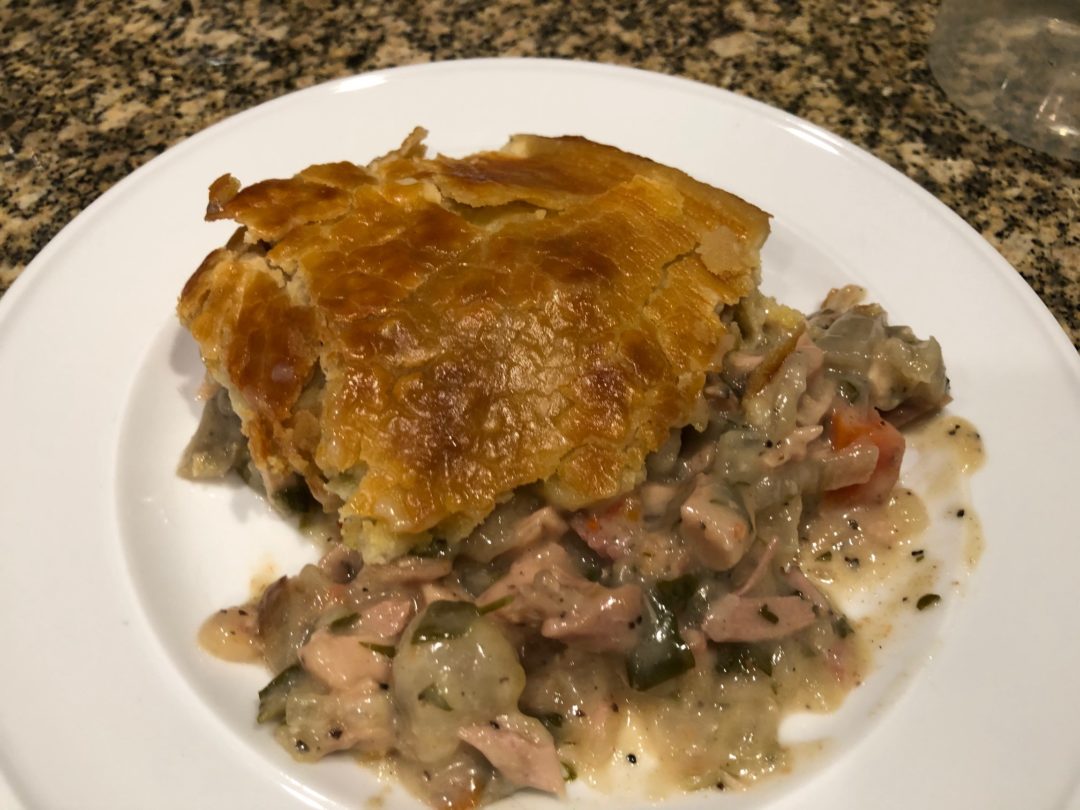
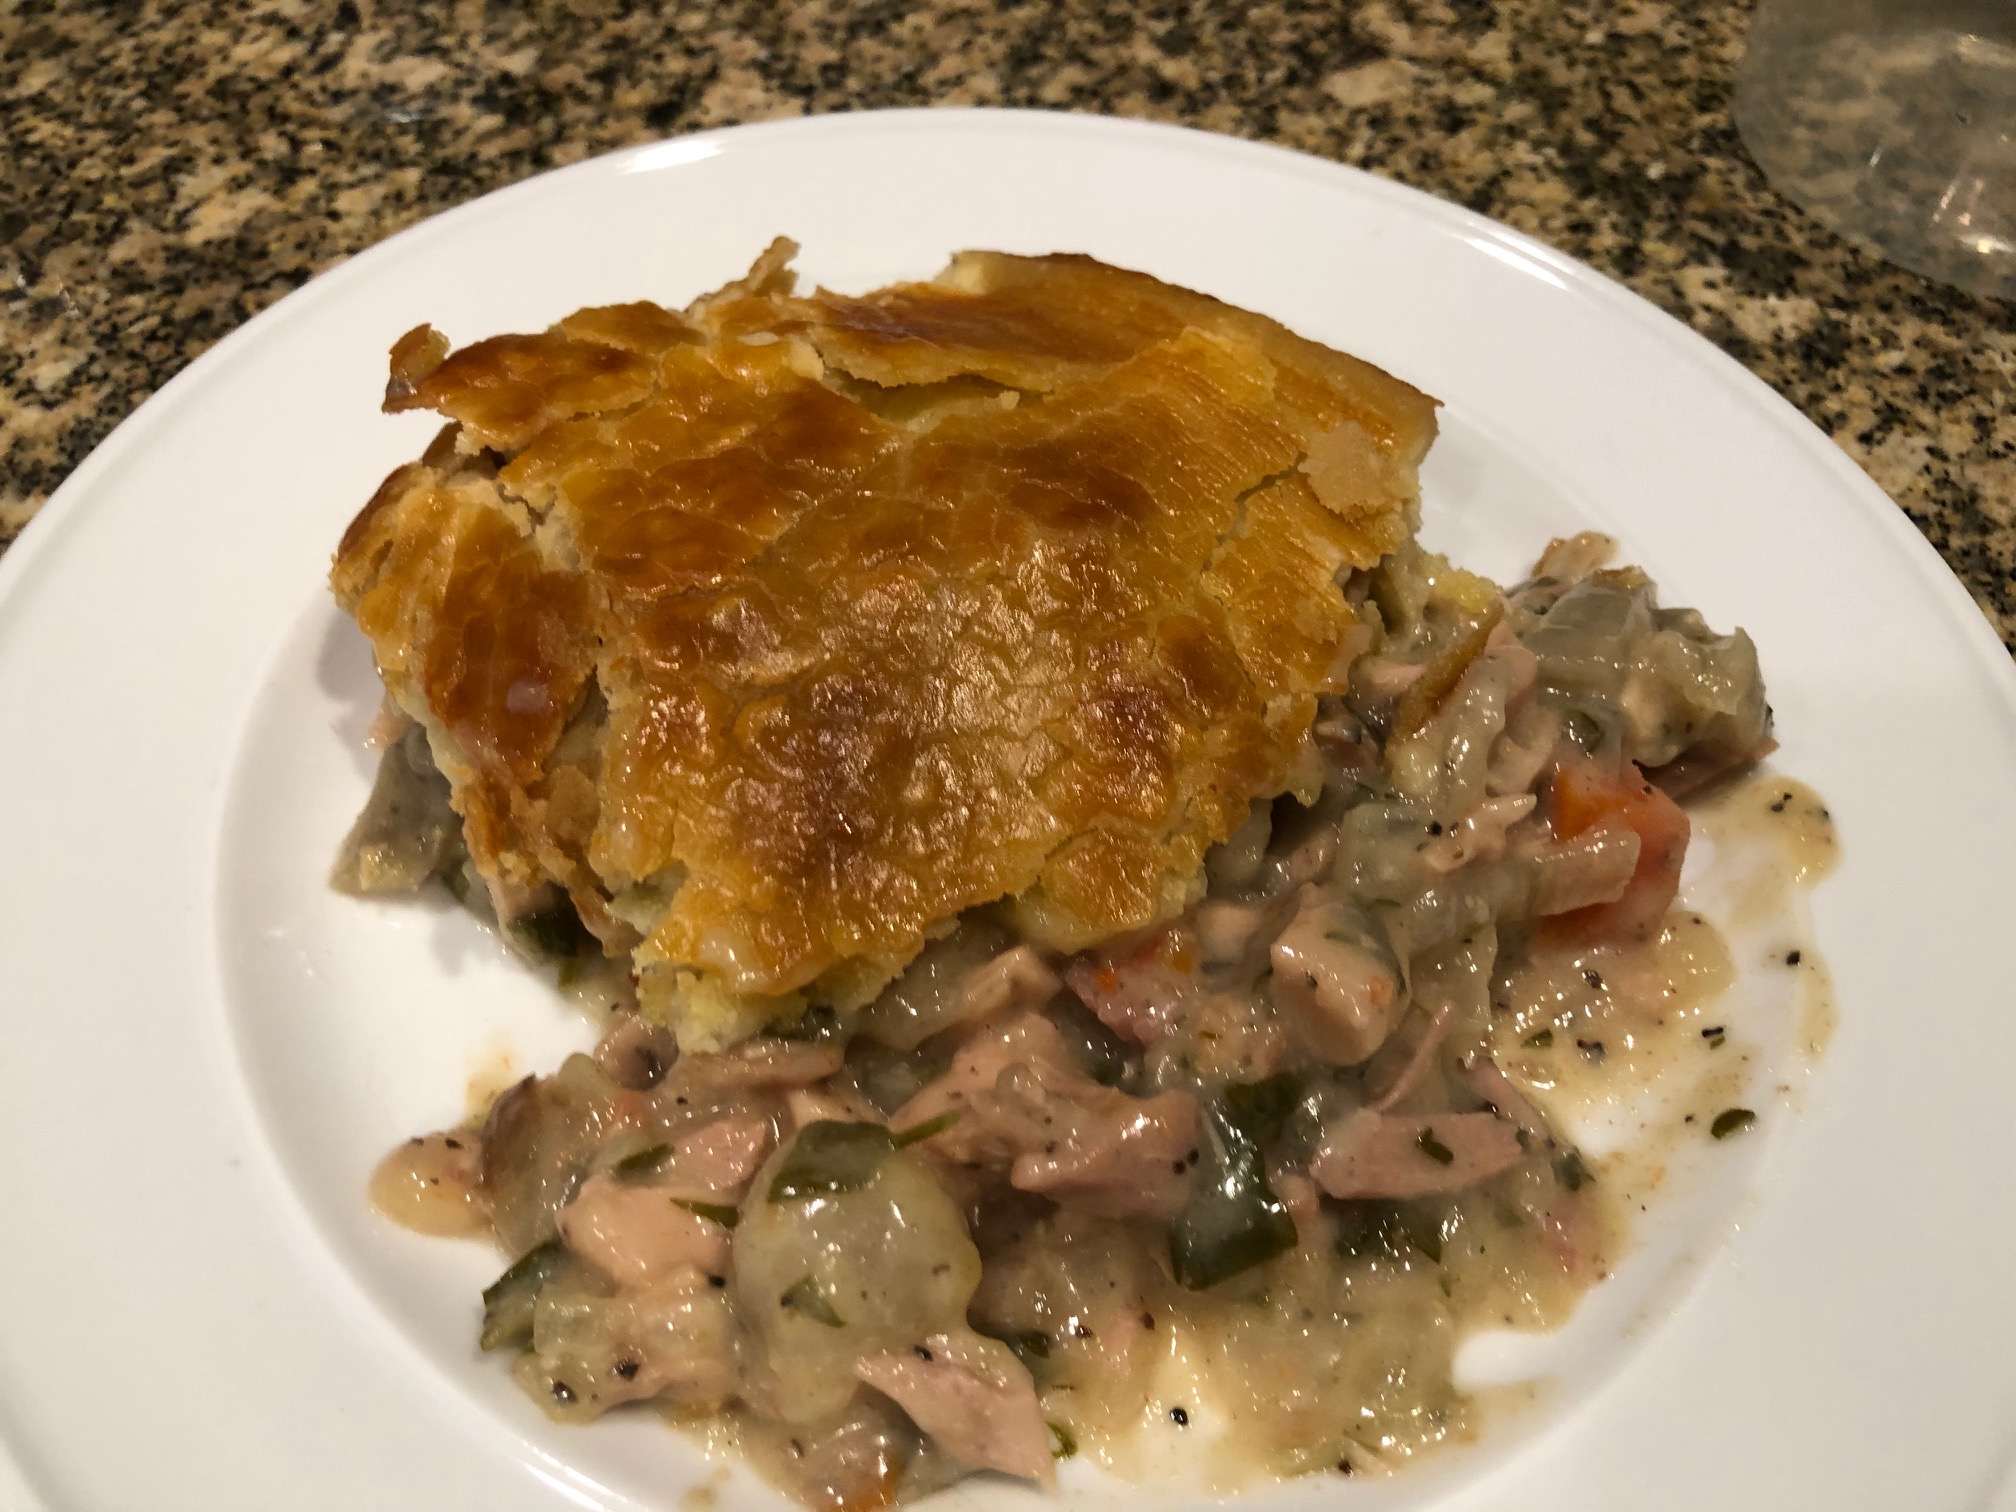
On the menu tonight – Chicken Pot Pie! There aren’t many dishes more comforting than Chicken Pot Pie. I researched a lot of recipes and tried Ina Garten’s recipe. The only liberties I took with her recipe was the chicken and the way I cooked the veggies. Her recipe calls for chicken breast and I used chicken thighs. I roasted the carrots and onion with the chicken thighs. Otherwise, I stayed pretty true to her recipe and it was AWESOME.

In making this recipe, there is enough food to take half and freeze for ready to go meals at a later date. You can make one big pot pie, as I did, or you can make several smaller pies. The thick, creamy sauce is so rich and delicious. Every bite is like a big hug from your grandma. The next time it gets a little chilly outside, make this pot pie.

Chicken Pot Pie

1 Star2 Stars3 Stars4 Stars5 Stars (No Ratings Yet)
Loading...
By Patrick Dulmage Serves: 8-10
Prep Time: 30 minutes Cooking Time: 55 minutes Total Time: 1 hour 30 minutes

Chicken Pot Pie

Ingredients

  • 3 whole chicken breasts (bone-in, skin-on) or 6 chicken thighs (bone-in, skin-on)
  • 3 tablespoons Olive oil
  • Kosher salt
  • black pepper
  • 5 cups chicken stock
  • 2 chicken bouillon cubes
  • 1 1/2 sticks of butter (12 tablespoons)
  • 2 cups chopped onions (yellow or Vidalia)
  • 3/4 cup all purpose flour
  • 1/4 cup heavy cream
  • 2 cups diced carrot (blanched for 2 minutes)
  • 1 10 oz pkg frozen peas
  • 1 1/2 cup frozen small whole onions
  • 1/2 cup minced parsley leaves
  • 1 pkg pie crust or home made

Instructions

1

Pre-heat oven to 350 degrees.

2

Place the chicken, whole onions, and carrots on a baking sheet.

3

Rub with olive oil, then season with salt and pepper.

4

Roast the chicken and veggies for 35-40 minutes or until cooked.

5

Set aside until cool enough to handle, then remove from the bone. Discard the skin and bones.

6

Cut the chicken into large pieces.

7

In a small sauce pan, heat the chicken stock and dissolve the bouillon cubes in the stock.

8

In a large pot or Dutch oven, melt the butter and saute the diced onions over medium-low heat until translucent.

9

Add the flour and stir constantly for 2-3 minutes.

10

Add the chicken stock slowly, stirring constantly to avoid lumps.

11

Stir until thick.

12

Add about 1/2 teaspoon of pepper. Check the sauce to see if it needs salt. The stock and bouillon have a lot of salt, so check if it needs any more.

13

Add the chicken and the rest of your veggies, and mix well.

14

If you're making the pastry, now is the time to start that. If you are using a packaged pie dough you can start assembling the pie.

15

Pour the filling into the vessel(s) of choice, then cover with the pie dough.

16

Brush the top of the pie with an egg wash (1-2 scrambled eggs and a tablespoon or two of water) to give the dough that golden color.

17

Press the sides of the dough down around the edges of the vessel and cut a few slits in the top of the crust.

18

Sprinkle with sea salt or kosher salt and a few turns of freshly ground pepper.

19

Place on a baking sheet and bake for 1 hour at 375 degrees or until the top is golden brown.

Chicken

Chicken Shawarma

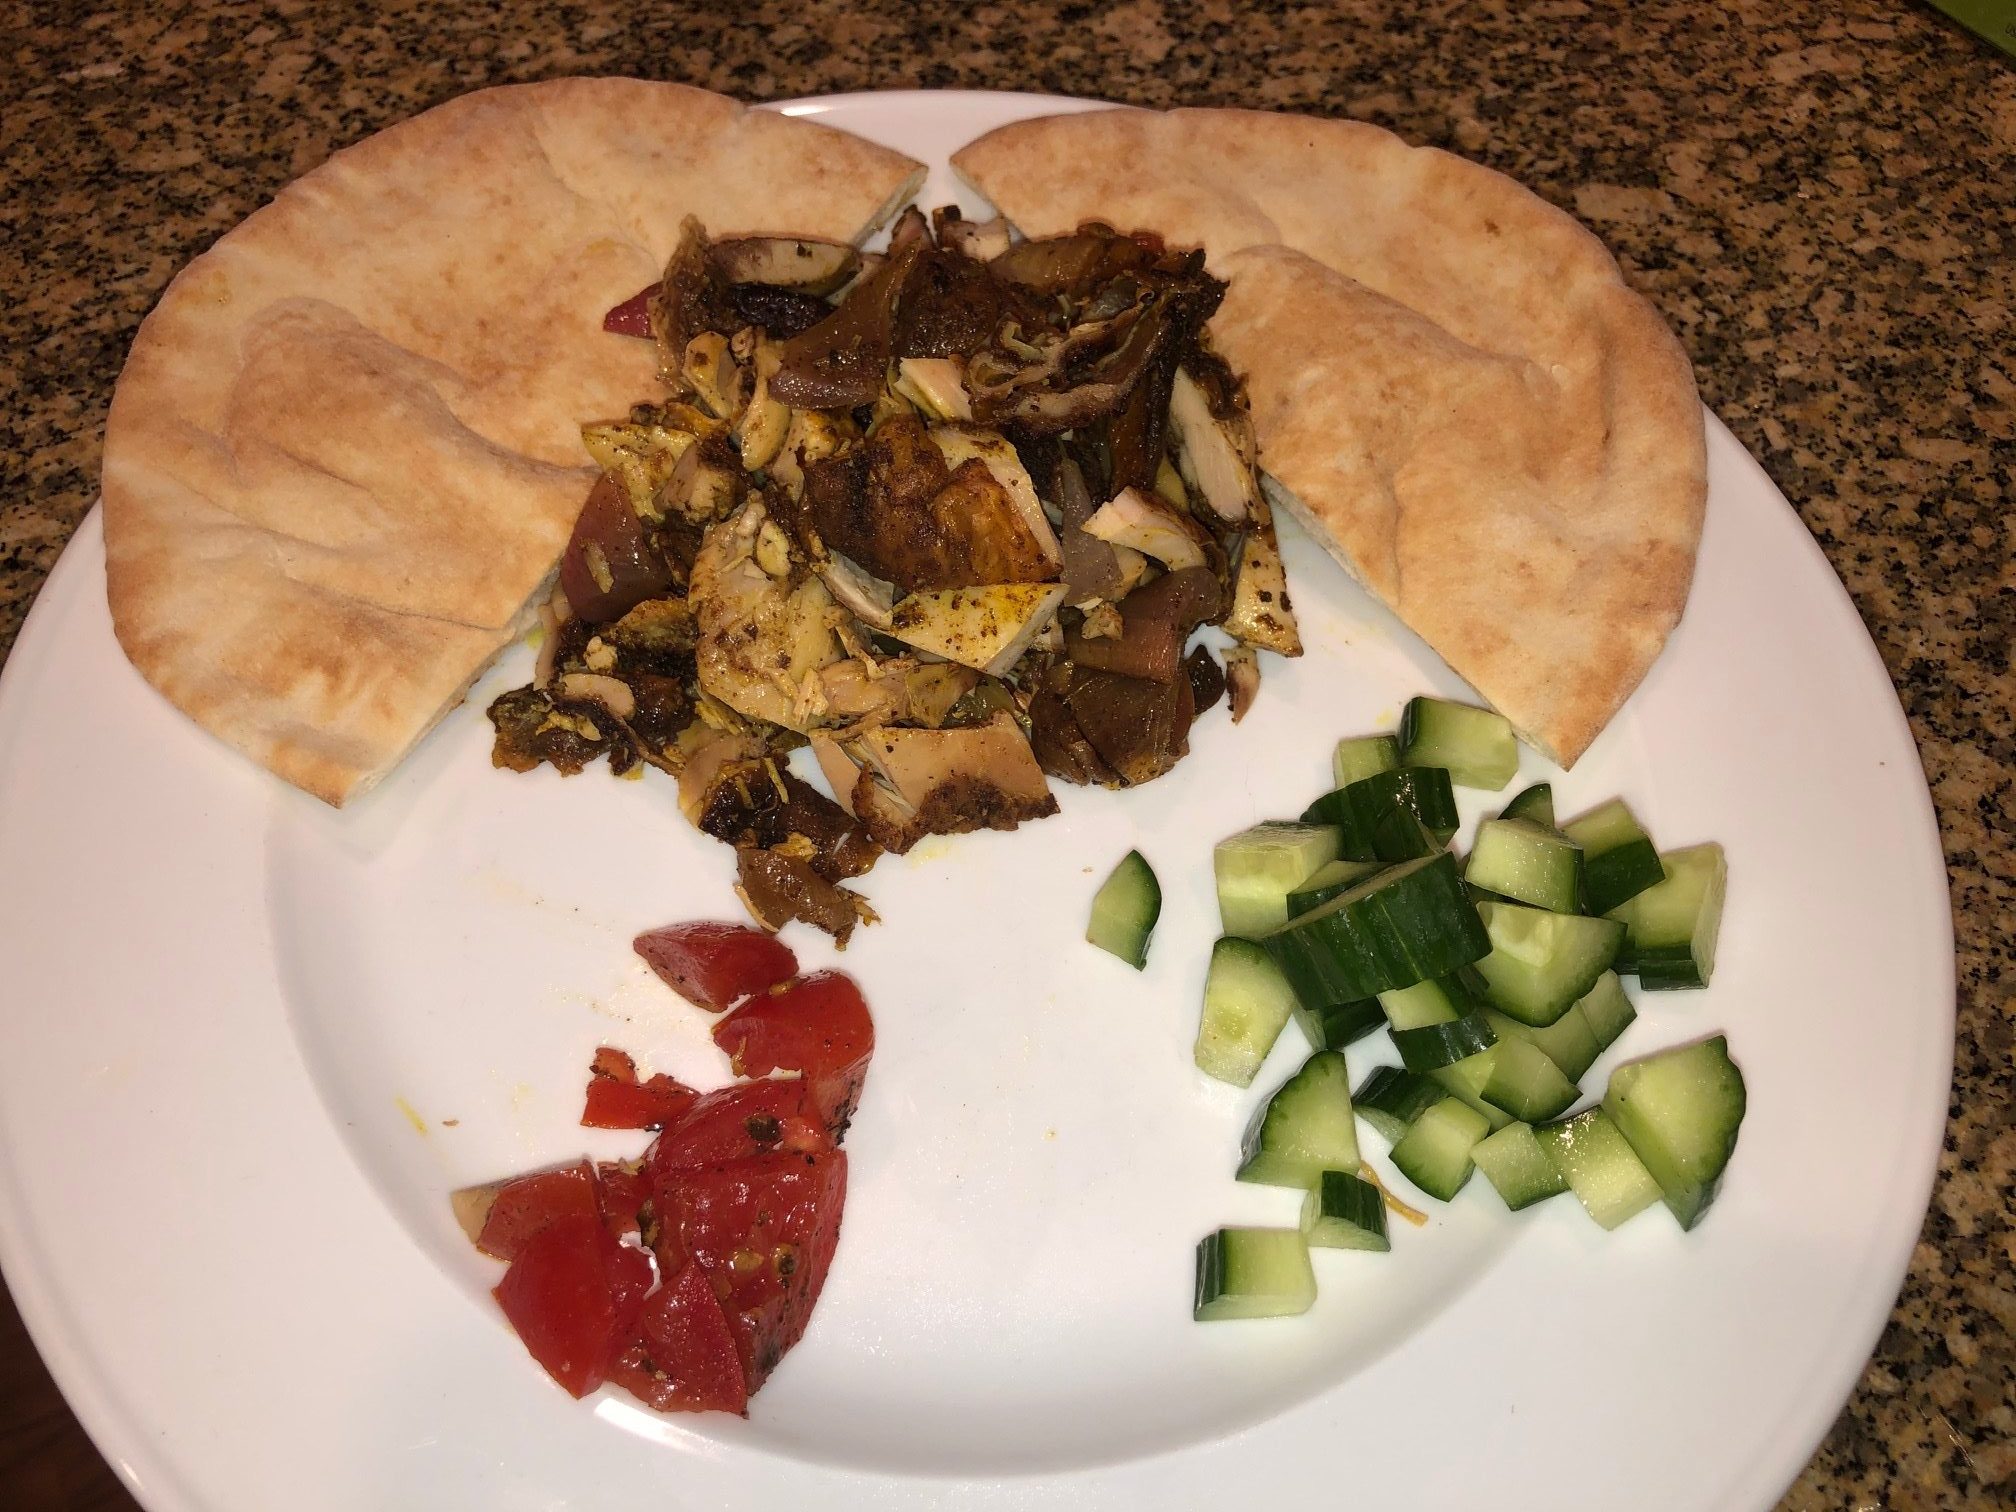
On the menu tonight – Chicken Shawarma! What the heck is Shawarma you ask? It is a really popular Middle Eastern dish cooked on a vertical rotisserie. As the meat cooks, it’s sliced off and served on pita bread accompanied with cucumber, tomato, and tahini sauce among other things. It is SOOO Good! There are so many spices that add a depth of flavor you aren’t going to find at your local fast food joint.

Not many of us have a vertical rotisserie, so you can make this either on the grill or in the oven. Check out the recipe below and make your version of Shawarma!

Chicken Shawarma

1 Star2 Stars3 Stars4 Stars5 Stars (1 votes, average: 5.00 out of 5)
Loading...
By Patrick Dulmage Serves: 4-6
Prep Time: 30 minutes Cooking Time: 1 hour Total Time: 1 hour 30 minutes

Chicken Shawarma

Ingredients

  • 4 chicken thighs (with or without bone and skin)
  • 2 red onion, quartered and then separate the layers
  • 2-4 Portobello mushrooms, cut into 1/8 or 1/4 wedges
  • 8 oz Shitake mushrooms
  • 4 cloves of garlic
  • 1 lemon (zested and juiced)
  • 6 – 8 tablespoons Olive oil
  • 1 teaspoon ground cumin
  • 1 teaspoon smoked paprika
  • 1 teaspoon allspice
  • 1 tablespoon sumac
  • 1 teaspoon turmeric
  • ½ teaspoon cinnamon
  • 1/8 teaspoon cayenne pepper
  • 1 tablespoon kosher salt
  • 1 tablespoon pepper
  • For Serving:
  • Pita bread, warmed/toasted
  • Tomato cubed
  • ½ cucumber (preferably seedless), cubed
  • Tahini (for spreading on the pita)
  • Tzatziki sauce

Instructions

1

In a large mixing bowl, combine the olive oil, lemon zest and juice, and the spices. Mix well.

2

Add the chicken, onion and mushrooms to the bowl and mix to coat them.

3

Transfer to a one gallon zip lock bag and put in the fridge for at least two hours, overnight would be better.

4

You can prepare this a couple of ways, on a vertical rotisserie (if you have one!), on skewers and grilled, or on a sheet pan in the oven. Preheat the rotisserie, grill, or oven. If cooking in the oven, preheat to 450 degrees.

5

If cooking on the grill or rotisserie, begin skewering the mushrooms and onions, alternating Portobello, onion, shitake. Keep them tight on the skewer. Skewer the chicken separately as it will take longer to cook. Or simply grill the chicken pieces whole and then slice later.

6

Once on the grill, be sure to turn the skewers every 3-4 minutes to ensure each side gets grilled. Remove after each side has been grilled and veggies are cooked through.

7

If cooking in the oven, simply put the chicken on a small sheet pan. Spread the mushrooms and onions evenly on a large sheet pan. Bake for 20 minutes, then remove and flip the veggies with a spatula.

8

Cook for an additional 15-20 minutes and remove the veggies.

9

Let the chicken continue to cook an addition 15-20 minutes.

10

While the veggies are cooking, warm the pita. If you’re grilling, toss the pita in any open spot. I love those toasty, charred bits from grilled pita. Otherwise put in the oven or microwave oven to warm through.

11

Cut the pita in half and then spread a little tahini inside.

12

Fill the pita halves with the mushroom/onion mixture along with some cucumber and tomato.

13

Top with a little tahini sauce and enjoy!

Notes

Tahini sauce is as simple as taking some tahini paste, adding some water, and lemon juice.

Chicken

Chicken Enchiladas

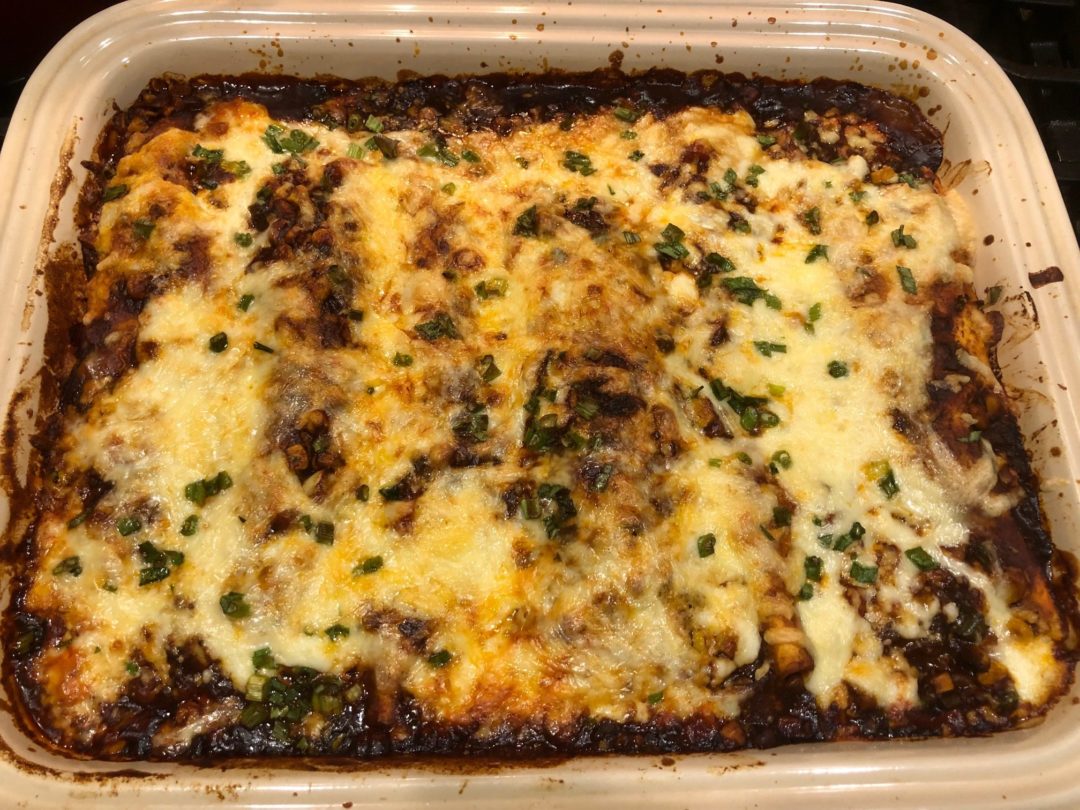
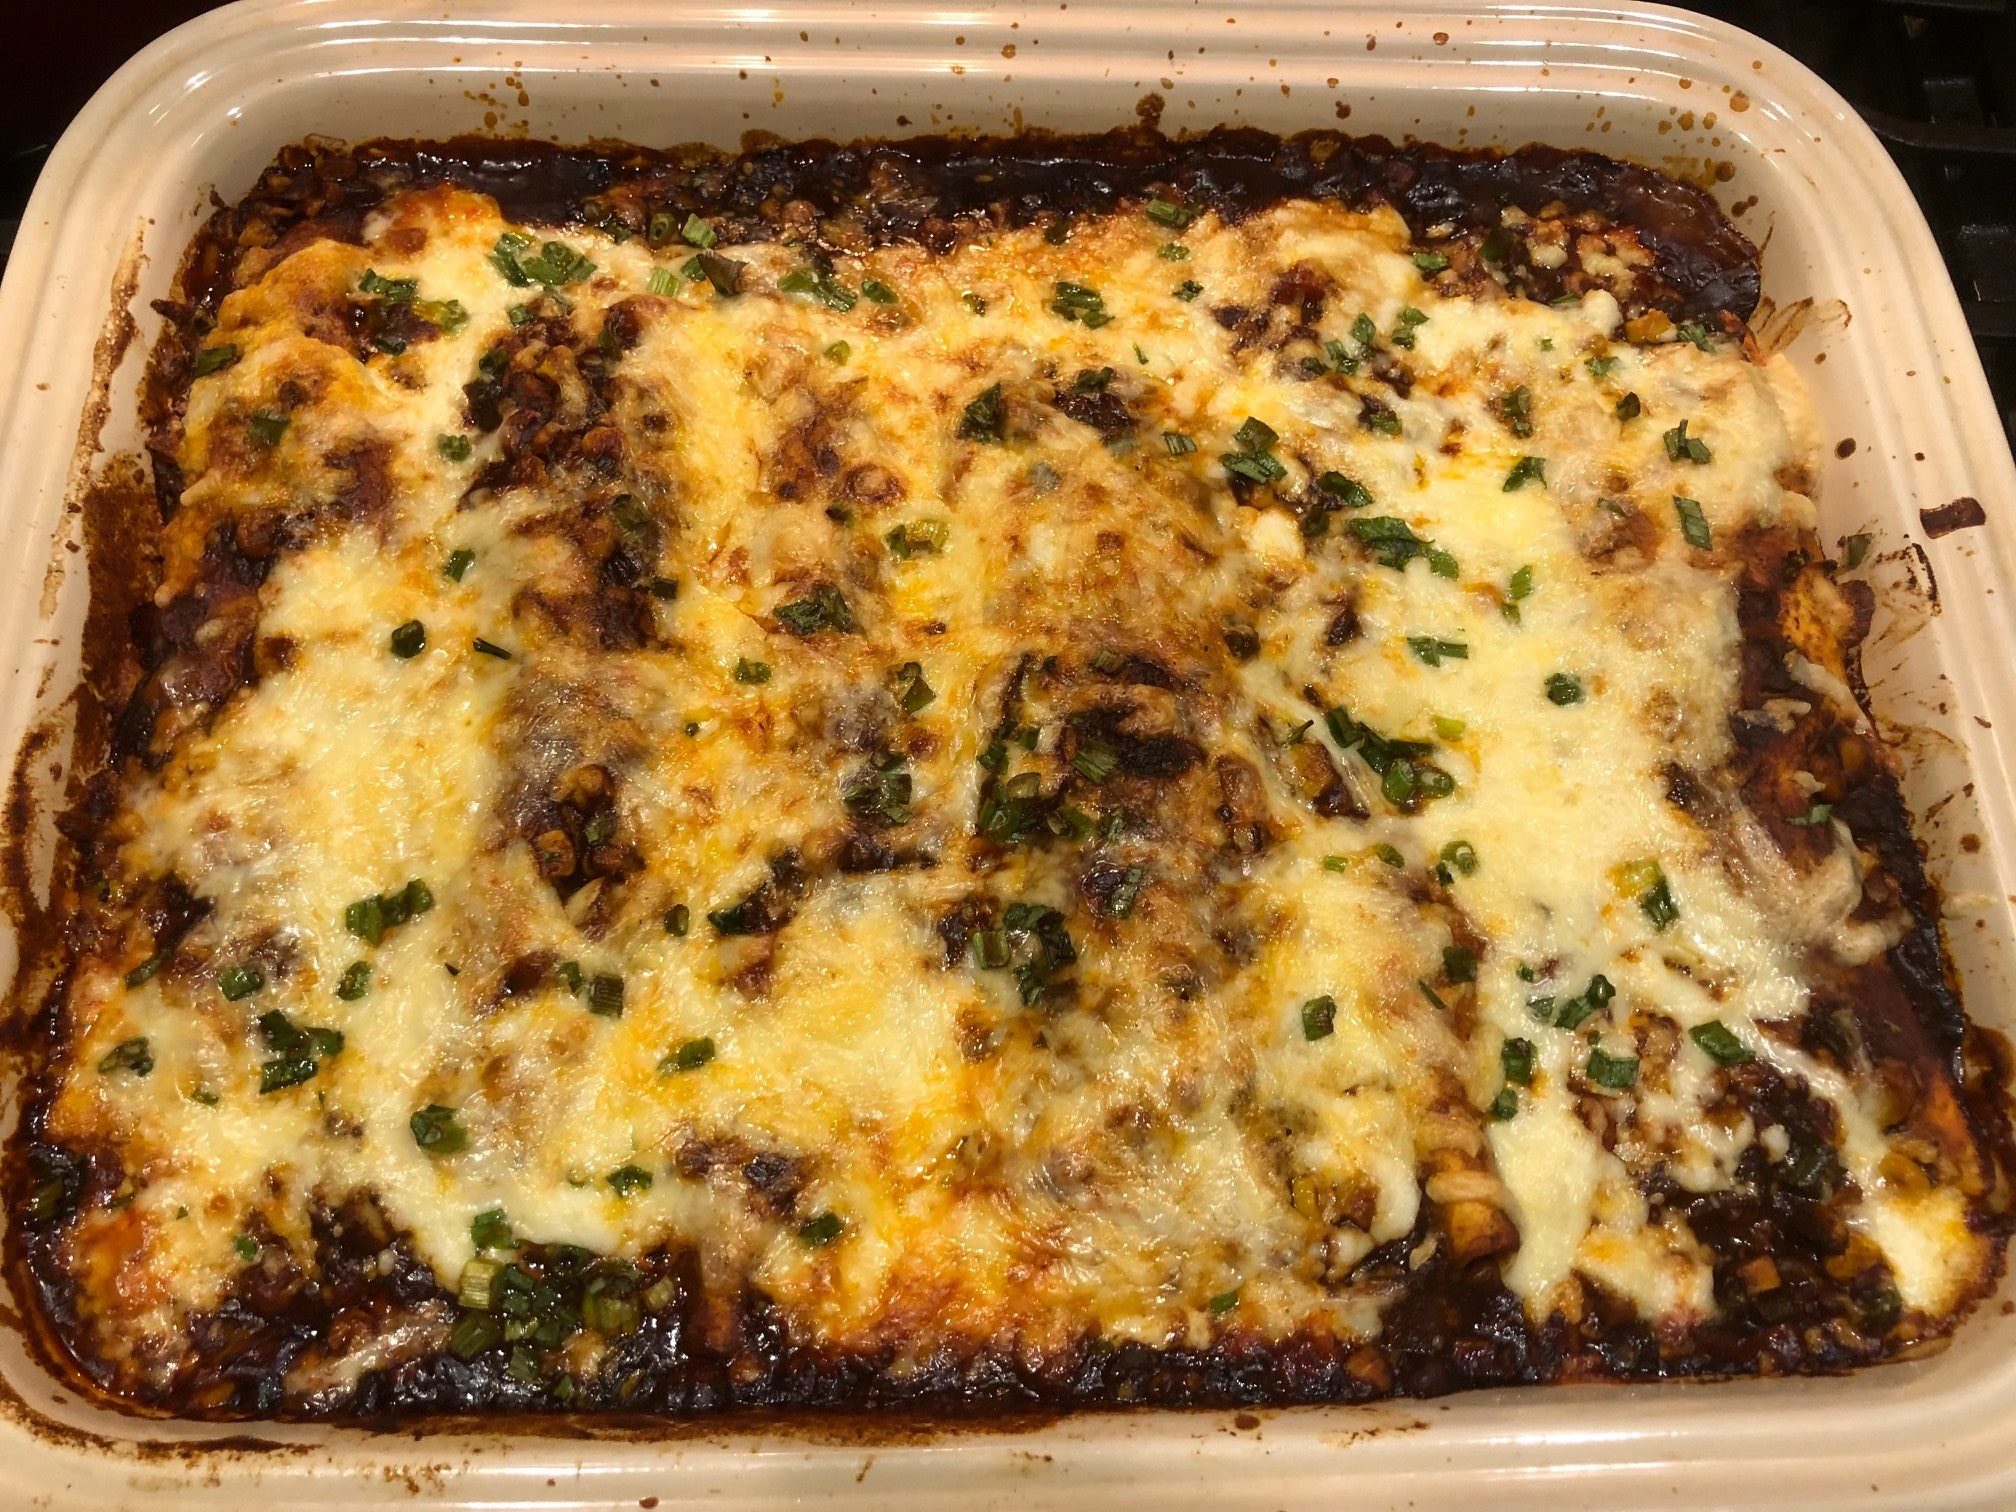
On The Menu Tonight – Chicken Enchiladas! I recently made some chicken soup and had a BUNCH of leftover cooked chicken. So, I decided to make enchiladas. You could easily use rotisserie chicken. If you de-bone the chicken right when you get home, it comes right off the bone. If you like Mexican food, you’ll have to try this dish. Let me know how your version turns out.

Chicken Enchiladas

1 Star2 Stars3 Stars4 Stars5 Stars (No Ratings Yet)
Loading...
Chicken Mexican
By Patrick Dulmage Serves: 6-8
Prep Time: 25 minutes Cooking Time: 1 hour Total Time: 1 hour 25 minutes

Chicken Enchiladas

Ingredients

  • 1 ½ lbs. boneless chicken (pre-cooked or rotisserie)
  • 8 - 16 flour tortillas, large
  • 1 28 oz. can enchilada sauce (red or green)
  • 1 15 oz. can refried beans
  • 2 jalapeno, fresh very finely diced
  • 1 8oz block Monterey Jack cheese
  • 1 8 oz. block Cheddar Jack cheese
  • 1 8 oz. block Cojita cheese
  • 1 red onion, diced
  • 2 cloves garlic, fine chop
  • 1 cup corn
  • 2 tsp cumin powder
  • 2 tsp garlic powder
  • 1-2 tbsp. olive oil
  • Salt & pepper to taste
  • Sour cream for garnish
  • Green onions, chopped for garnish

Instructions

1

Chop/shred the chicken. I used leftover baked chicken, so all I had to do was chop it up.

2

Shred your cheese on a box grater. I know you’ll be tempted to buy pre-shredded. Don’t. The shredded cheese has anti-caking agents on it.

3

Pre-heat a pan over medium heat, put in your olive oil, jalapeno, and the onions.

4

When the onions are translucent, reduce the heat to low, add the garlic, corn, and enchilada sauce.

5

Put the refried beans in a microwave safe bowl and add a few spoonfuls of the enchilada sauce.

6

Put in microwave for 30 – 45 seconds. Incorporate the beans and enchilada sauce. If it’s still too thick repeat until fully incorporated.

7

Put the flour tortillas in microwave oven for 30 seconds to a minute to warm them up and make them more pliable.

8

Arrange ingredients for assembly.

9

Ladle enough of the enchilada sauce to cover the bottom of your baking dish (13x9).

10

Dip a flour tortilla in the enchilada sauce, coating both sides. I use tongs and don’t worry about the little uncovered bit where the tongs hold the tortilla.

11

Lay the tortilla in the baking dish and spoon in about ¼ cup of the chicken, enough refried beans to lightly cover the chicken, and then sprinkle in some of each cheese.

12

Tightly roll the enchilada up and leave the seam down.

13

Repeat until the baking dish is full.

14

Cover the tortillas with the enchilada sauce you made.

15

Sprinkle the rest of your cheese on top along with the green onions.

16

Bake for 40 minutes, then put the broiler on high to give the cheese a nice golden brown color.

17

Let rest for about 10 minutes before serving.

Notes

You definitely want to let this dish rest after cooking. It will be like lava if you cut into it too soon.