All Posts By:

patrickdulmage

Vegetarian

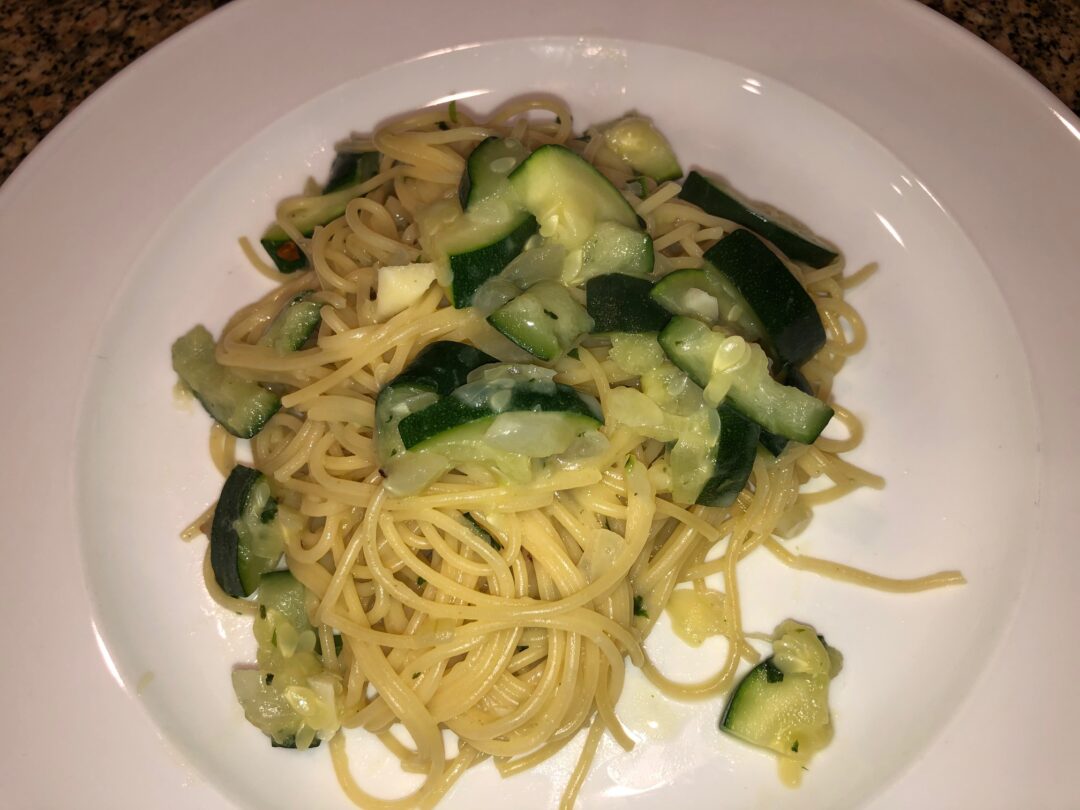
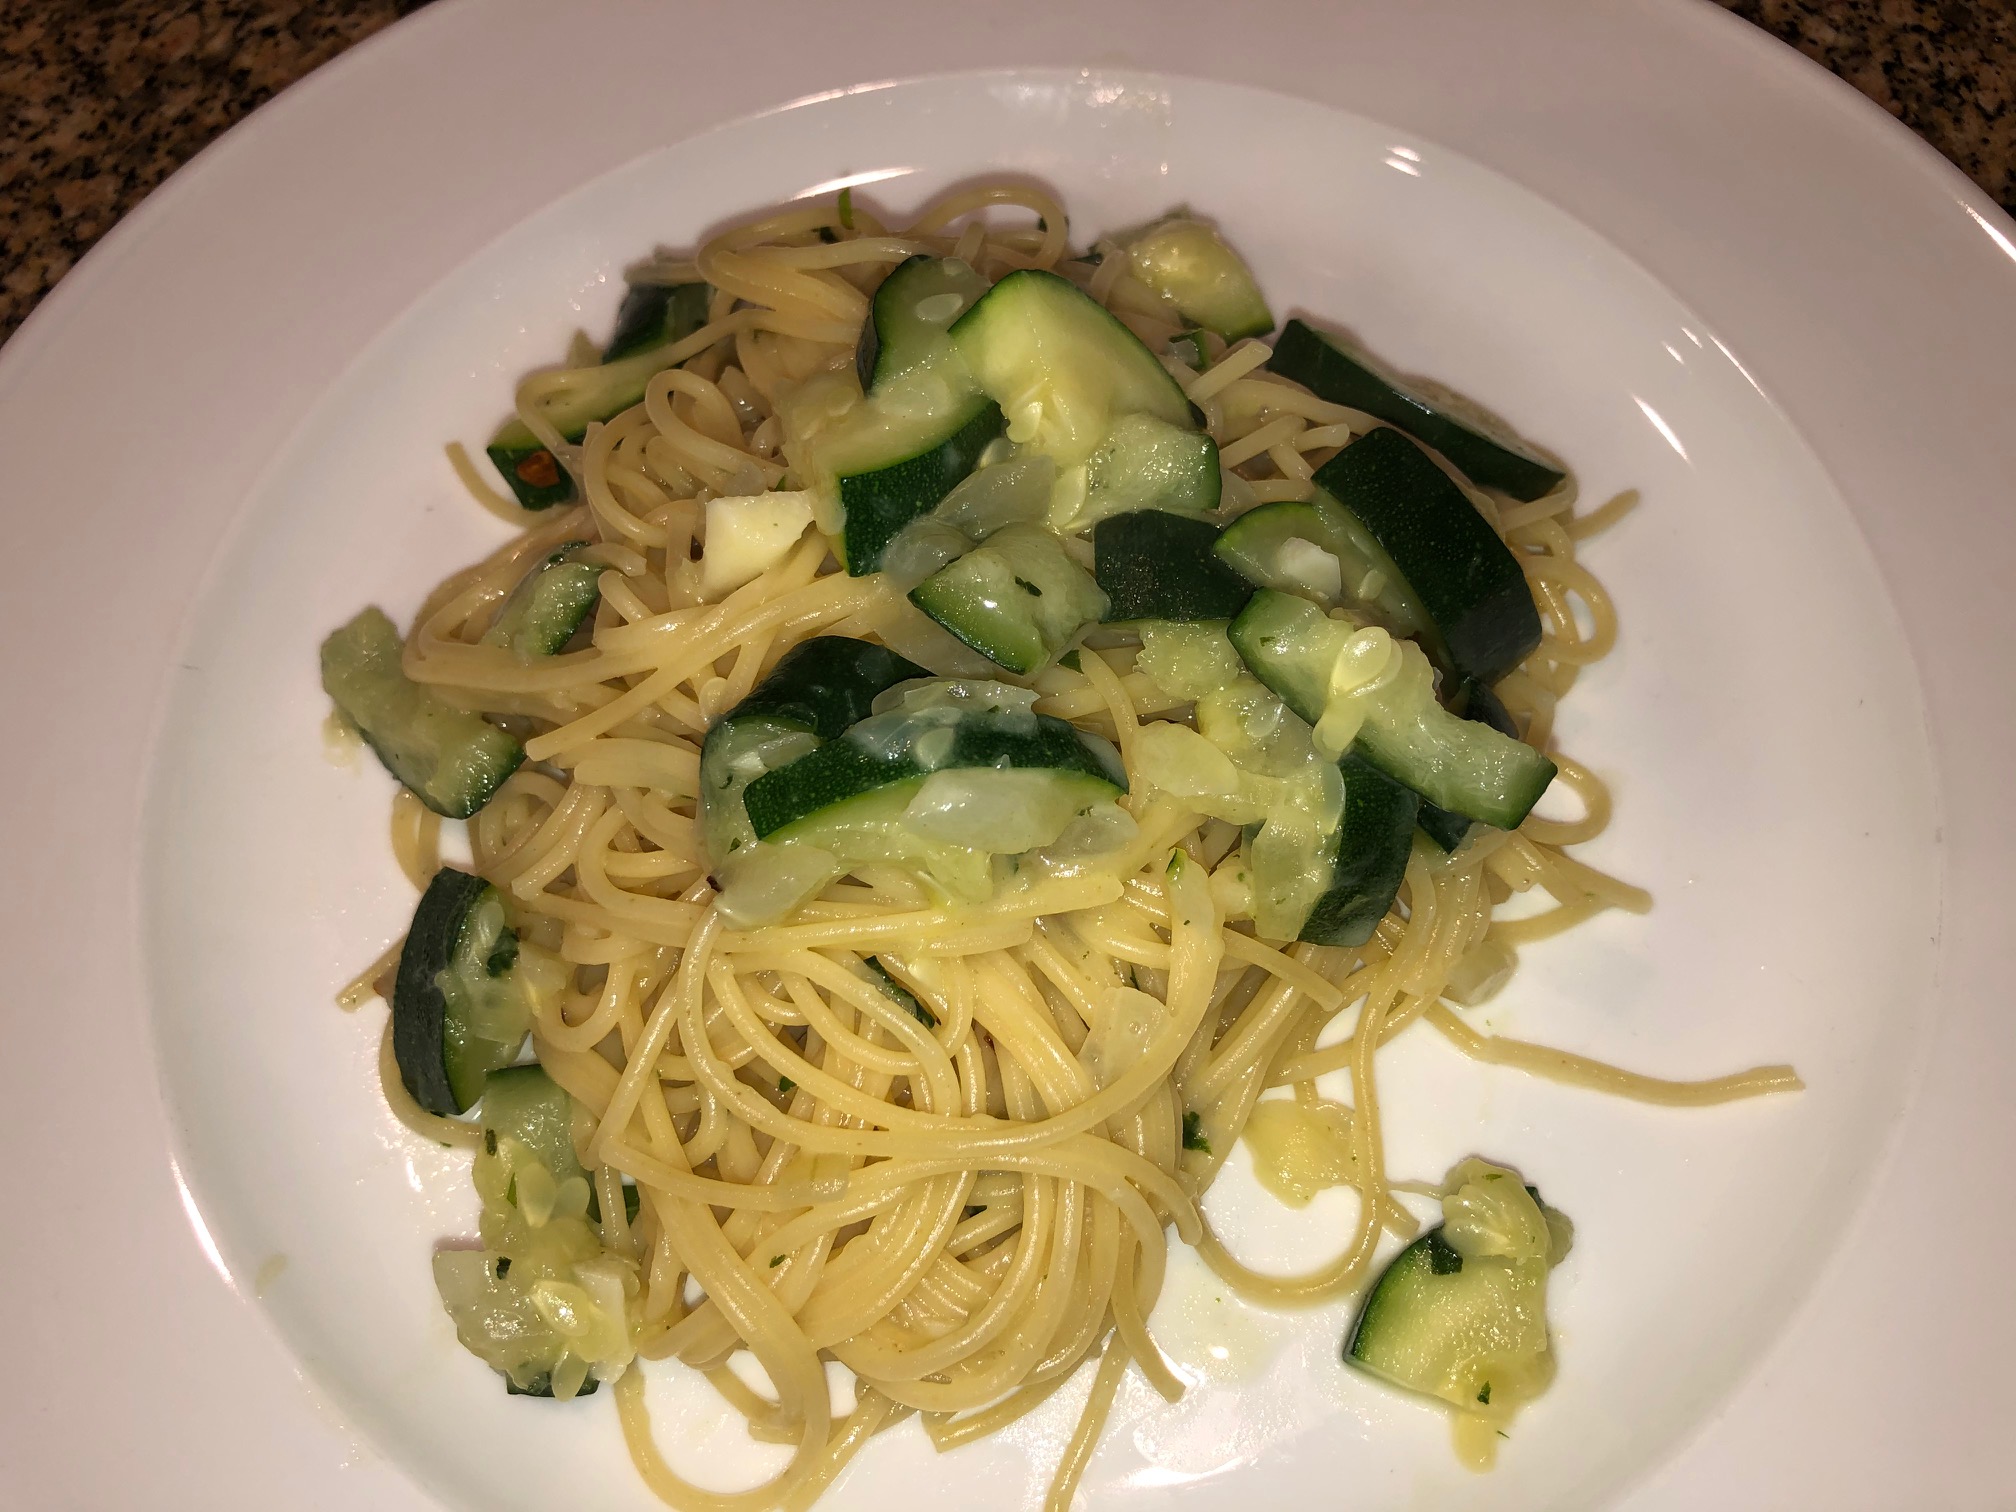
Pasta with Zucchini Basil Sauce

On the menu tonight – Pasta with Zucchini Basil Sauce!

First, I apologize for posting a couple of days late. We had some internet issues and what would have been cooking time was taken up by troubleshooting internet/networking issues. That said – this recipe comes from a cooking class that Audrey and I were supposed to take last week. We both ended up having to work late, so we didn’t get to attend. Luckily for us, I can follow a recipe! In this version, I used Angel Hair pasta. You can use whatever pasta you like, but you probably wouldn’t want to use a big thick pasta for this dish.

There aren’t too many ingredients and it doesn’t take too long either, so it’s another one of those pasta dishes you can file away for quick weeknight dinner. Check out the recipe and make your own version of Pasta with Zucchini Basil Sauce.

Pasta with Zucchini Basil Sauce

1 Star2 Stars3 Stars4 Stars5 Stars (No Ratings Yet)
Loading...
By unknown Serves: 8
Prep Time: 15 minutes Cooking Time: 30 minutes Total Time: 45 minutes

Pasta with Zucchini Basil Sauce

Ingredients

  • 4 Zucchini, cut into half moons or quartered depending on size of zucchini
  • ½ onion, small diced
  • 4 cloves garlic, minced
  • 3 leaves of basil, chiffonade
  • ¼ Cup Cream
  • 1-2 tsp crushed red pepper flakes
  • 2 Tbsp Olive Oil
  • (Can Also Add Pancetta here for fun Flavor)

Instructions

1

In Small Sauce pot, over medium heat, add 2Tbsp of Olive oil to coat the bottom of the pot.

2

Add onion and pinch of salt and stir to be coated evenly. Let sauté for 3-4 min or until translucent.

3

Add garlic and stir, cook for 30-45 seconds or until garlic becomes aromatic.

4

Add Zucchini and stir.

5

Add ¼ cup water and now cover pot and let simmer. Zucchini will break down into softer form while releasing liquid, this is what we want.

6

Keep Stirring occasionally.

7

After 15 min, add cream and basil and stir.

8

Use your wooden spoon to mash up any additional larger pieces if you desire.

9

Cook Pasta using pasta method, and retain ¼ cup of the pasta water.

10

Add pasta and reserved pasta water into sauce pot.

11

Add crushed red pepper flakes and stir to combine.

12

Serve w/ fresh Parmesan cheese.

Chicken

Buttermilk Fried Chicken

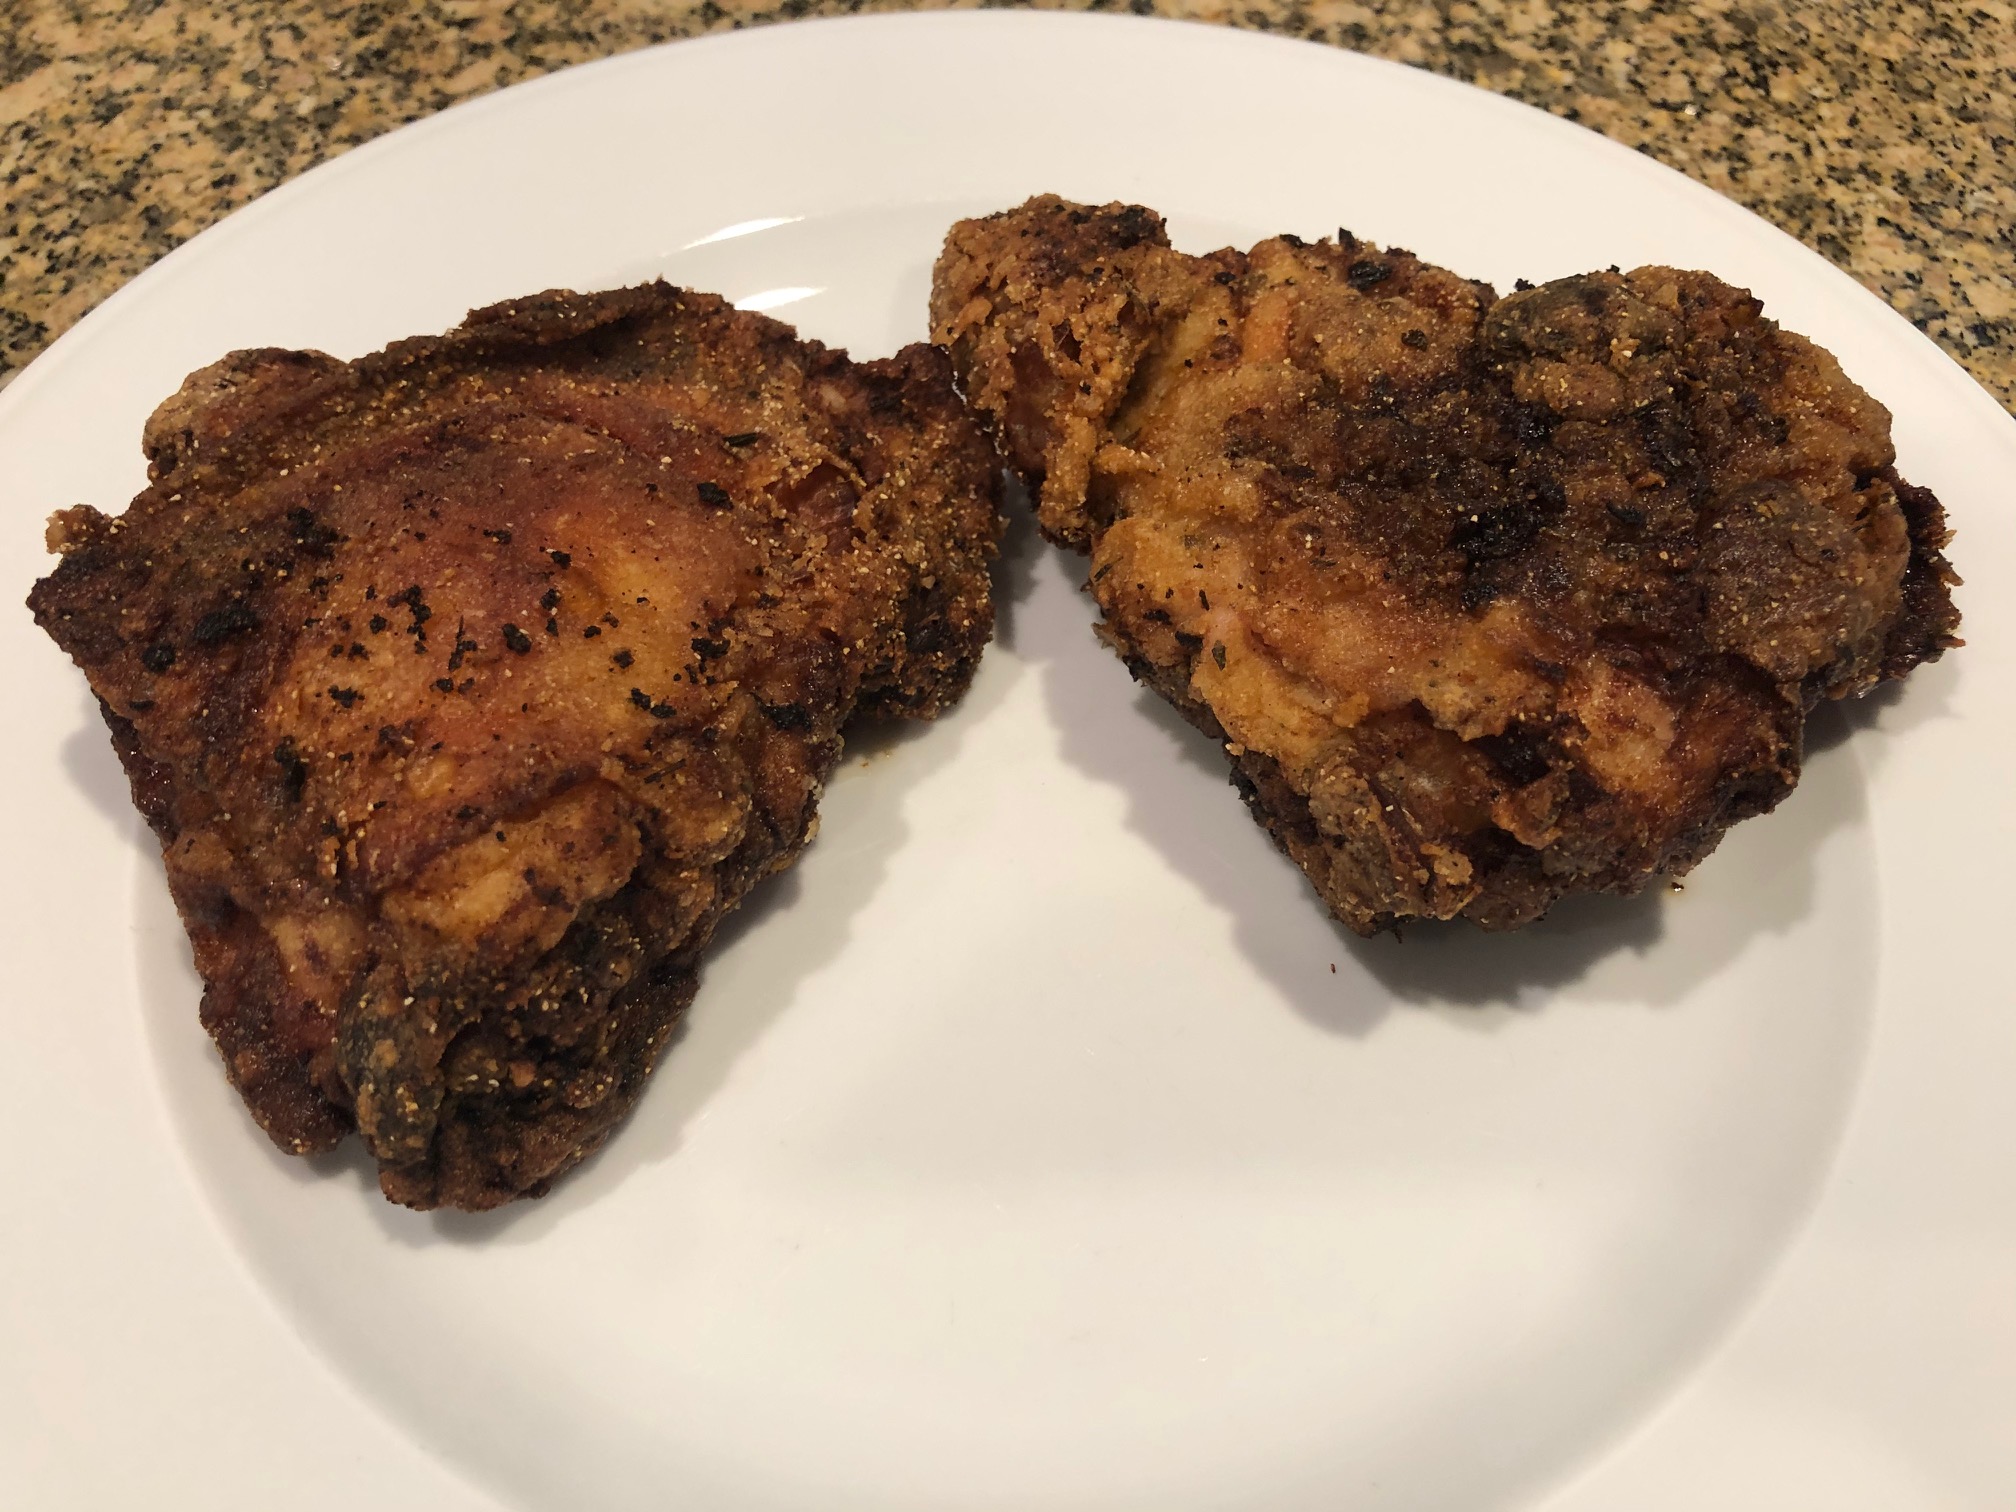
One of the things on the menu today – Southern Fried Chicken! I’ve been wanting to make this for a while and I finally did it!

I started making this yesterday by marinating the chicken overnight in buttermilk and a little hot sauce. Today, I brought it to room temperature as I prepped the spice mix, flour mix, and brought the oil to temperature. The hardest part about making this chicken was keeping the oil at the right temperature. I used a large cast iron skillet with about an inch to inch and a half of oil – much more than that wouldn’t have been safe. Next time, I’ll use a Dutch Oven so I can use a little more oil.

Overall, it turned out well. The skin is a little darker than I wanted it. I also had to finish it in the oven to make sure it was cooked all the way through. The piece I tasted was really good. It was nice and juicy, not oily. The skin had a nice crunch to it and the spices came through nicely. Let me know your tips for making fried chicken.

Buttermilk Fried Chicken

1 Star2 Stars3 Stars4 Stars5 Stars (No Ratings Yet)
Loading...
By Patrick Dulmage Serves: 4
Prep Time: 30 minutes Cooking Time: 1 hour Total Time: 1 hour 30 minutes

Buttermilk Fried Chicken

Ingredients

  • 1 3-5 lb broiler chicken, cut into pieces
  • 2 cups buttermilk
  • 2-3 tbsp of your favorite hot sauce
  • 1 cup flour
  • 1 cup cornstarch
  • 2 tbsp paprika
  • 1 tbsp kosher salt
  • ½ tsp cayenne pepper
  • 1 tbsp garlic powder
  • 1 tbsp onion powder
  • 1 tbsp dried parsley
  • 1 tbsp dried thyme
  • 1 tsp celery salt
  • 1 tsp black pepper
  • Vegetable or peanut oil for frying

Instructions

1

Put the chicken in a gallon zip lock bag and pour in the buttermilk and hot sauce. Let it marinate in the fridge about 4 hours or as long as overnight.

2

About an hour before you want to cook, bring the chicken out of the fridge and let it come to room temperature.

3

Whisk the spices together in a small mixing bowl.

4

Whisk the flour and cornstarch in a large mixing bowl.

5

Pre-heat a dutch oven with about 2-3 inches of oil to 350 – 360 degrees.

6

Drain the chicken in a colander and transfer to a rimmed baking sheet.

7

Generously season your chicken with the spice mix.

8

Then coat the chicken with the flour mixture.

9

Choose your method of coating the chicken. Some people use a large paper bag (the old school grocery bags) to shake and coat the chicken. Others put the dry mix on a baking sheet or in a pie tin. Whichever method you use, coat the chicken thoroughly.

10

LET THE CHICKEN REST 2-3 minutes after coating. The coating will adhere better to the chicken.

11

Fry the chicken, adjusting the burner as necessary to maintain the oil temperature between 300 and 325 degrees for about 13 - 15 minutes, to a deep golden brown, cooked throughout and very crisp.

12

Remove the chicken to a wire rack or a tray lined with paper towels and sprinkle with salt.

13

Check the internal temp on the chicken to confirm it’s cooked through. You want a temperature of 165 degrees. If it isn’t, you can put the chicken in the oven at 350 for about 25-30 minutes to finish cooking.

Seafood/ Vegetarian

Homemade Lox

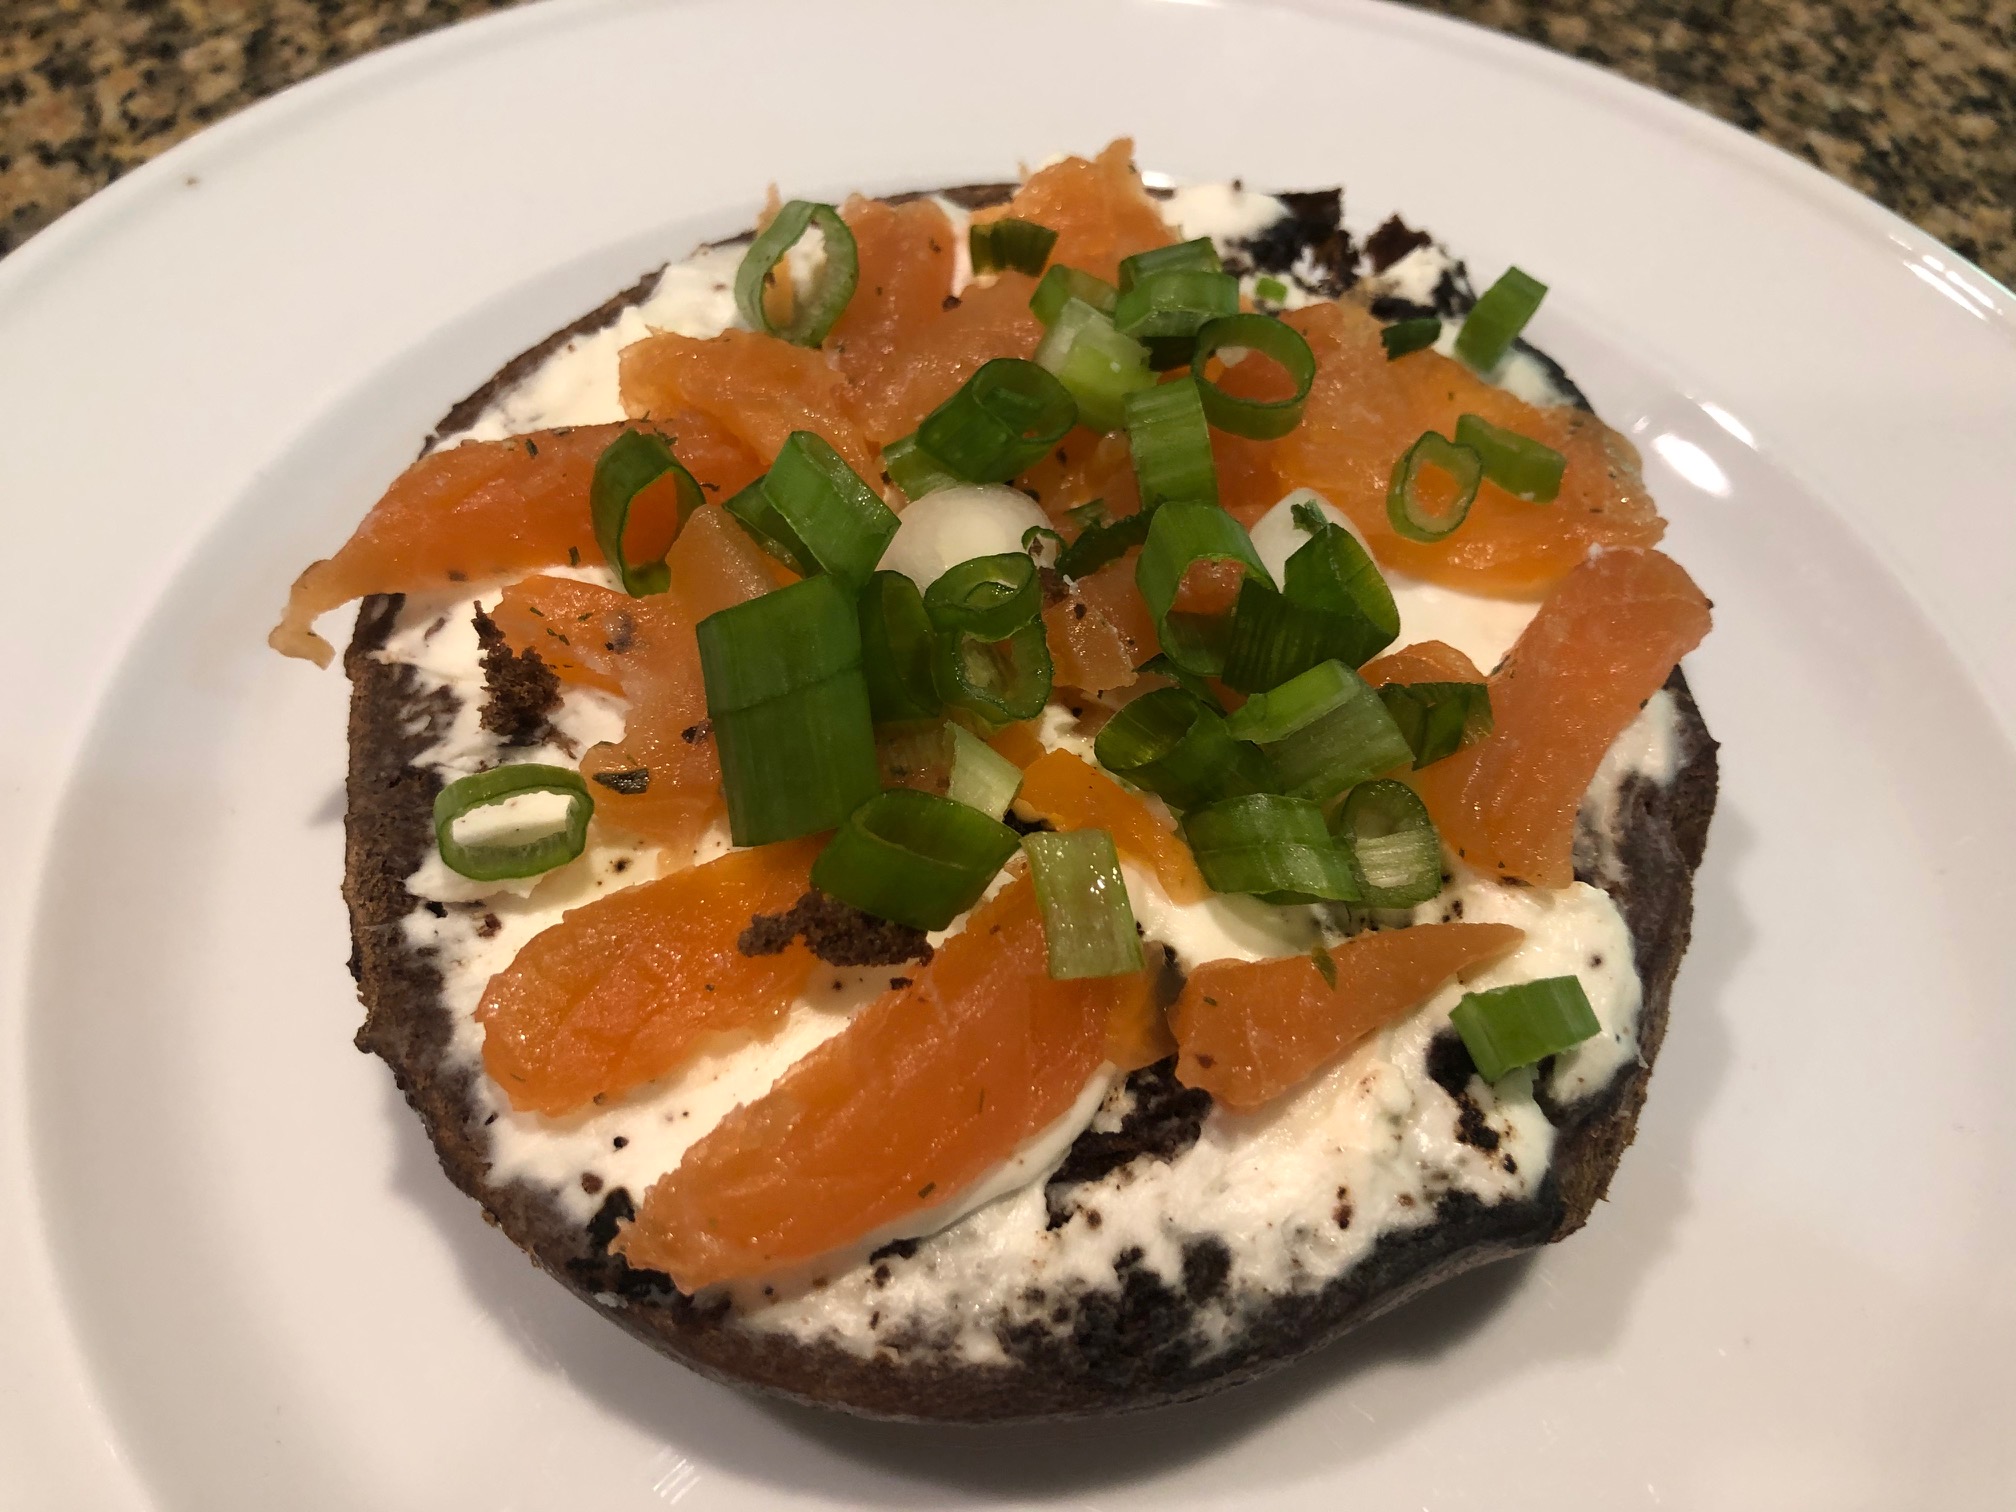
Last week, when I went to the market I wanted to buy lox but they were out. I remember having seen videos on how to make lox, so I decided to try it. I found a nice piece of salmon, picked up some fresh dill and went to work.

It was surprisingly easy to make and it turned out great! The hardest part was waiting for it to cure. So, whether your market is out of lox or you just want to make your own, check out the recipe and make it!

Homemade Lox

1 Star2 Stars3 Stars4 Stars5 Stars (No Ratings Yet)
Loading...
By Patrick Dulmage Serves: 8-10
Prep Time: 15 minutes Total Time: 15 minutes

Homemade Lox

Ingredients

  • 1 lb Salmon
  • 3-5 tbsp fresh Dill
  • 1 cup Salt
  • 1 cup Sugar
  • 1-2 tbsp White pepper and black pepper

Instructions

1

In a large bowl, mix the salt, sugar, pepper, and dill.

2

Trim the salmon into pieces of equal thickness. Whatever the thickness of your salmon, it will taper on one side and lengthwise as you get down toward the tail.

3

Set the thinner pieces aside.

4

spread out a piece of plastic wrap large enough to wrap two pieces of the salmon.

5

Coat the salmon on both sides generously with the spice mix.

6

Stack two pieces of coated salmon and wrap tightly in the plastic wrap.

7

Put the wrapped salmon on something that will capture the liquid that will leak out.

8

Put in the refrigerator for 3-4.

9

After 3-4 days, unwrap the newly created lox and rinse it thoroughly, pat it dry and enjoy!

Seafood/ Vegetarian

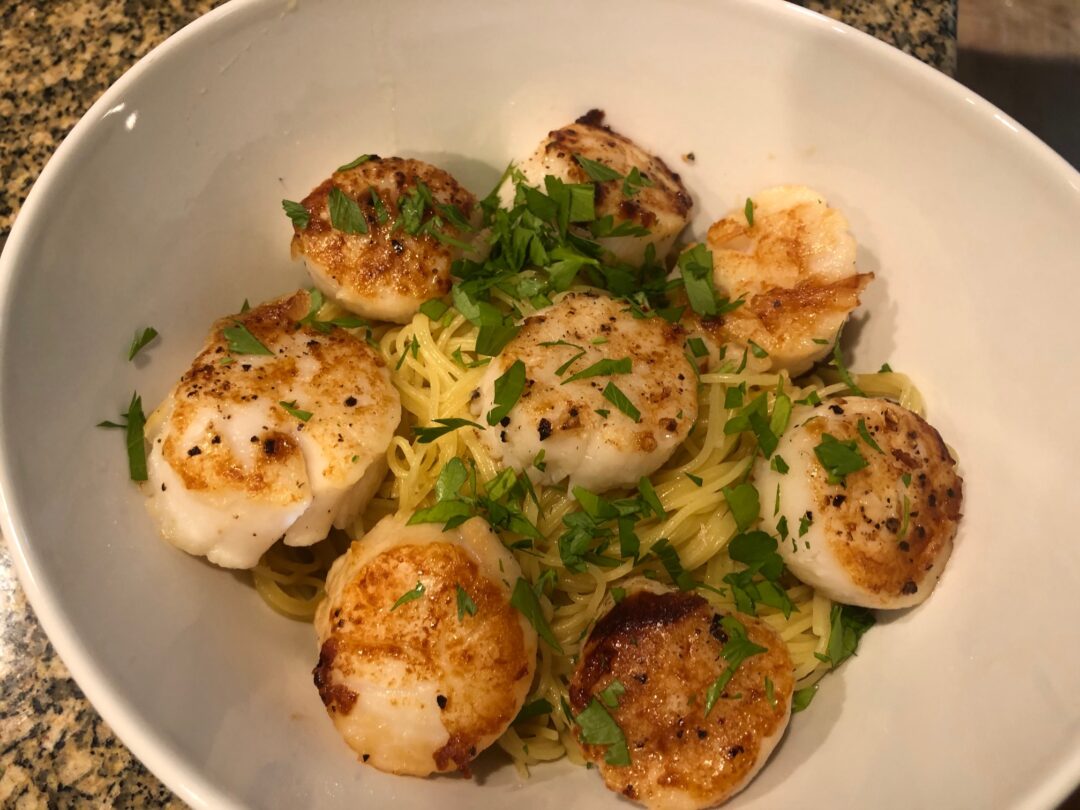
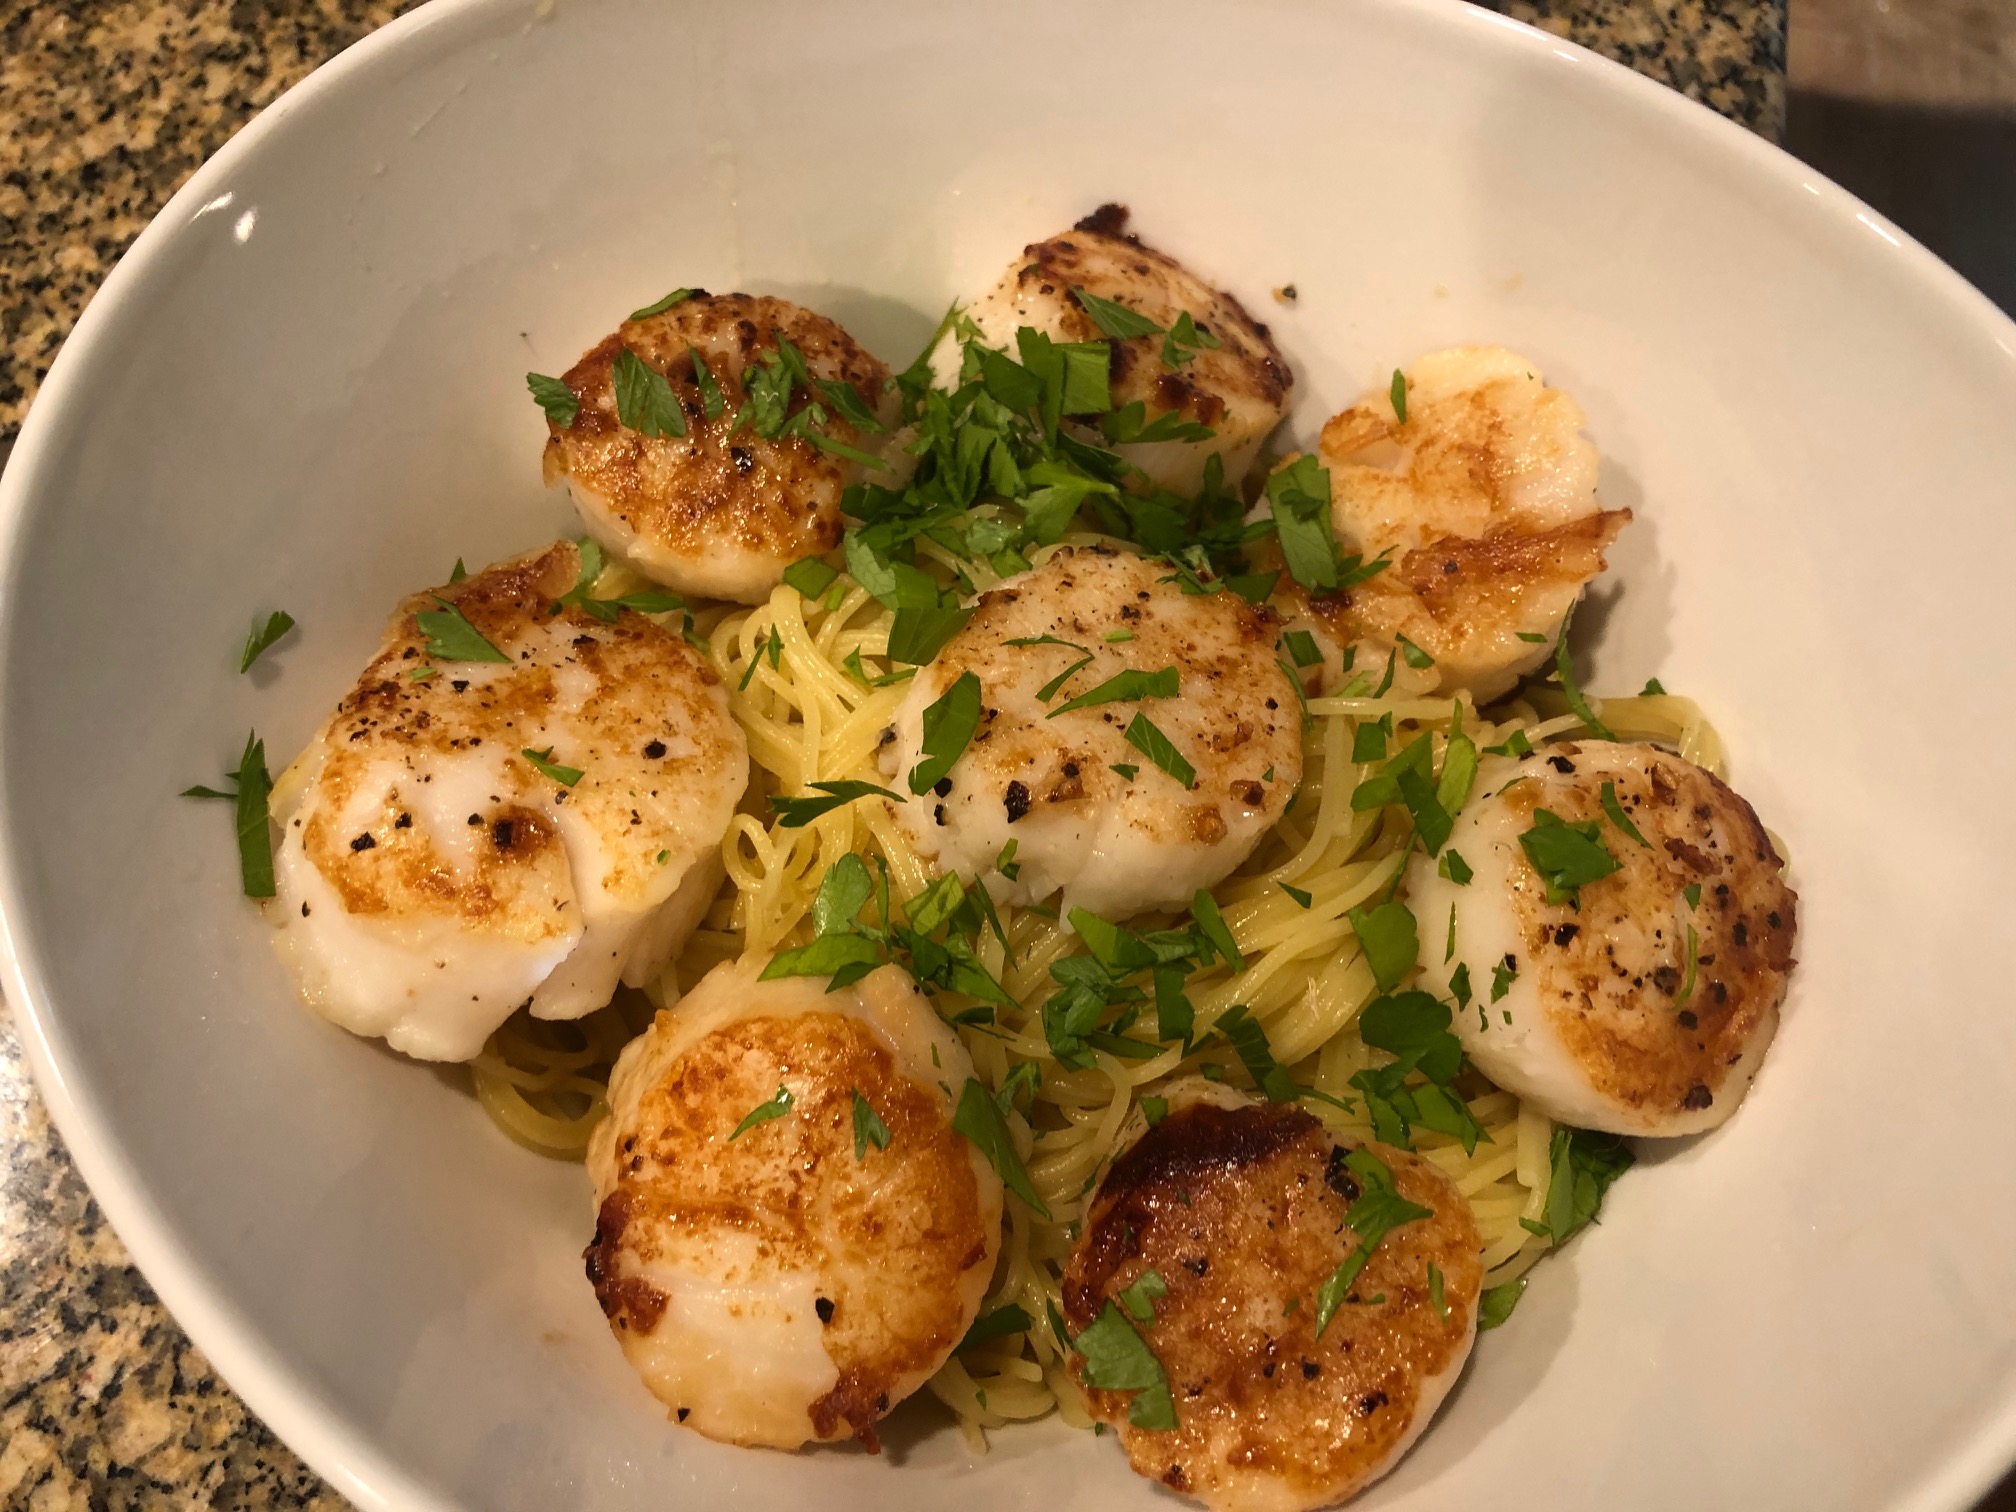
Spaghetti Aglio e Olio (with Garlic and Olive Oil) and Seared Scallops

On the menu tonight – Spaghetti Aglio e Olio (with Garlic and Olive Oil) with Seared Scallops!

The first time I had Spaghetti Aglio e Olio, I couldn’t believe how simple yet delicious it was. Literally just five ingredients, spaghetti, olive oil, garlic, and crushed red pepper. Garnish with some fresh Italian Parsley. That’s it! Done right, you’ve got a super delicious and inexpensive meal. Add some seared scallops or shrimp and you’ve got something really special.

With so few ingredients there isn’t much room to hide behind a sauce or a layer of cheese. The pasta has to be cooked perfectly, the olive oil has to be good and of course fresh garlic and parsley. The trick is don’t over cook the pasta or the garlic. Over cooked garlic is going to make the dish bitter. We’re going for garlicky goodness. A lot of recipes have you slice the garlic very thinly – think Pauli in Goodfellas. If you don’t have the time to slice your garlic with a razor blade, you can smash the cloves and chop into big chunks and fish out before it gets burned and bitter.

The seared scallops also have to be done right. Over cooked scallops are rubbery and not very good. The trick to good scallops, well there are a few. Start with good fresh scallops. After pulling off that tough muscle, pat them dry and season with salt and pepper. I used a fine sea salt in this dish. The pan – I used a non-stick pan. Pre-heat the pan with a little olive oil, barely enough to cover the bottom of the pan. Once it’s hot, place the scallops in one at a time around the pan. Remember the order you put them in because that’s the order you’ll take them out. I start at the top of the pan and go clockwise. The scallops should cook for about a minute and a half to a minute and 45 seconds depending on the heat of your pan. Once finished, there should be a nice golden sear. Flip them and cook another 90 seconds. That’s it! Take them off the heat or they become rubbery.

I hope you’ll try this dish and let me know how it turns out.

Spaghetti Aglio e Olio (with Garlic and Olive Oil) and Seared Scallops

1 Star2 Stars3 Stars4 Stars5 Stars (No Ratings Yet)
Loading...
Seafood
By Patrick Dulmage Serves: 4-6
Prep Time: 5 minutes Cooking Time: 15 - 20 minutes Total Time: 20 - 25 minutes

Spaghetti Aglio e Olio (with Garlic and Olive Oil) and Seared Scallops

Ingredients

  • Kosher Salt
  • Freshly ground pepper
  • 1 pound dried pasta (Angel Hair or Spaghetti)
  • ½ cup extra-virgin olive oil
  • 1 tsp crushed red pepper flakes
  • 6 cloves garlic, smashed or thinly sliced
  • ½ cup fresh parsley, chopped
  • 12-18 Sea Scallops

Instructions

1

Bring pot of salted water to a boil.

2

Also pre-heat a non-stick skillet over medium-high heat.

3

Prepare your scallops by patting them dry. Get them as dry as you can to get that beautiful sear.

4

Season the scallops with salt and freshly ground pepper. Set aside for now.

5

Drizzle about a tablespoon or two of olive oil in the skillet.

6

Place 6 – 8 scallops in the pan one a time. Start at the 12 o’clock position and work your way around the pan. After 90 seconds, the first scallop should be ready to flip. If it doesn’t have that nice sear, let them cook another 15 seconds.

7

Work your way around the pan flipping the scallops in the order you put them in.

8

After another 90 seconds, remove the scallops to a serving dish and repeat until they are all cooked.

9

After the first batch of scallops is when I drop my pasta into the boiling water. Cook the pasta about ¾ of the time the package says.

10

Don’t forget to save some pasta water!

11

The Sauce – in a large saute pan, heat the ½ cup of olive oil over medium heat.

12

Add the crushed red pepper flakes and the garlic. If you want to get your inner Pauli going, you’ve thinly sliced your garlic. While I do that sometimes, usually I will smash the garlic cloves and drop them in the oil. Just as the garlic starts to turn brown I remove it before it gets bitter.

13

Take a ladle of the pasta water and add it to the olive oil.

14

About this time, the pasta should be ready too. Add the pasta to your olive oil sauce you just created and cook a few minutes longer.

15

Season with salt if needed and transfer to a serving dish along with your scallops.

16

Drizzle a little bit more olive oil on top and serve immediately.

Casserole/ Chicken

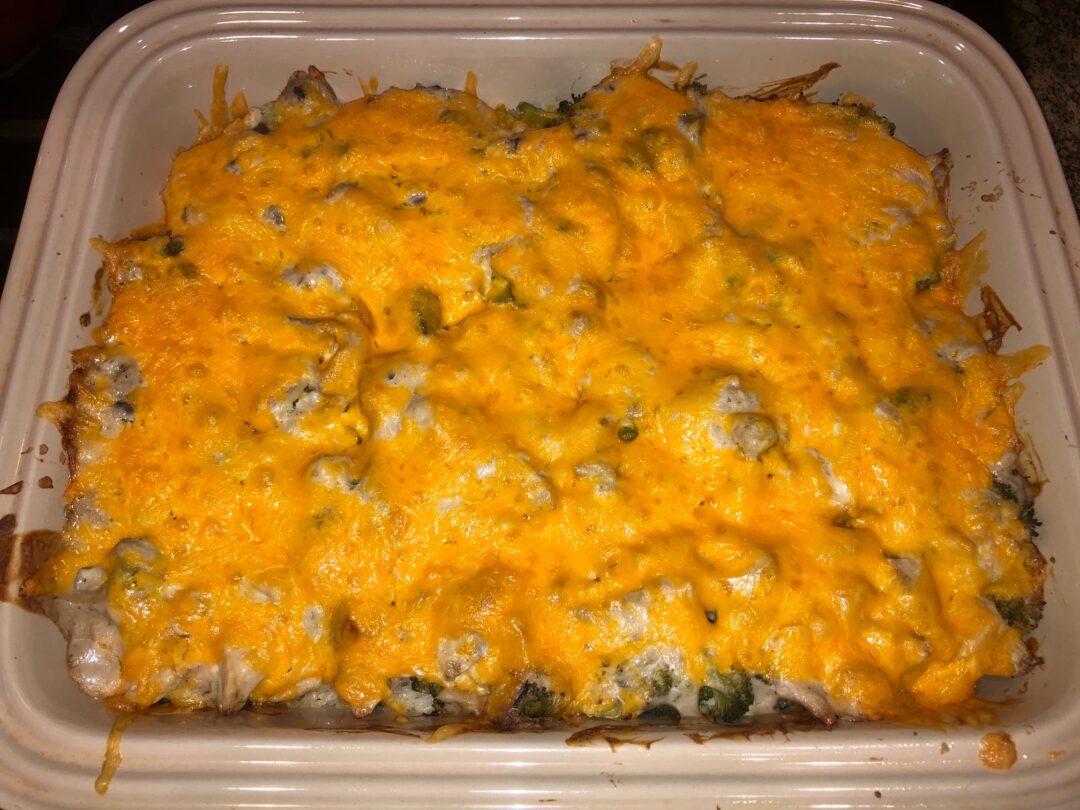
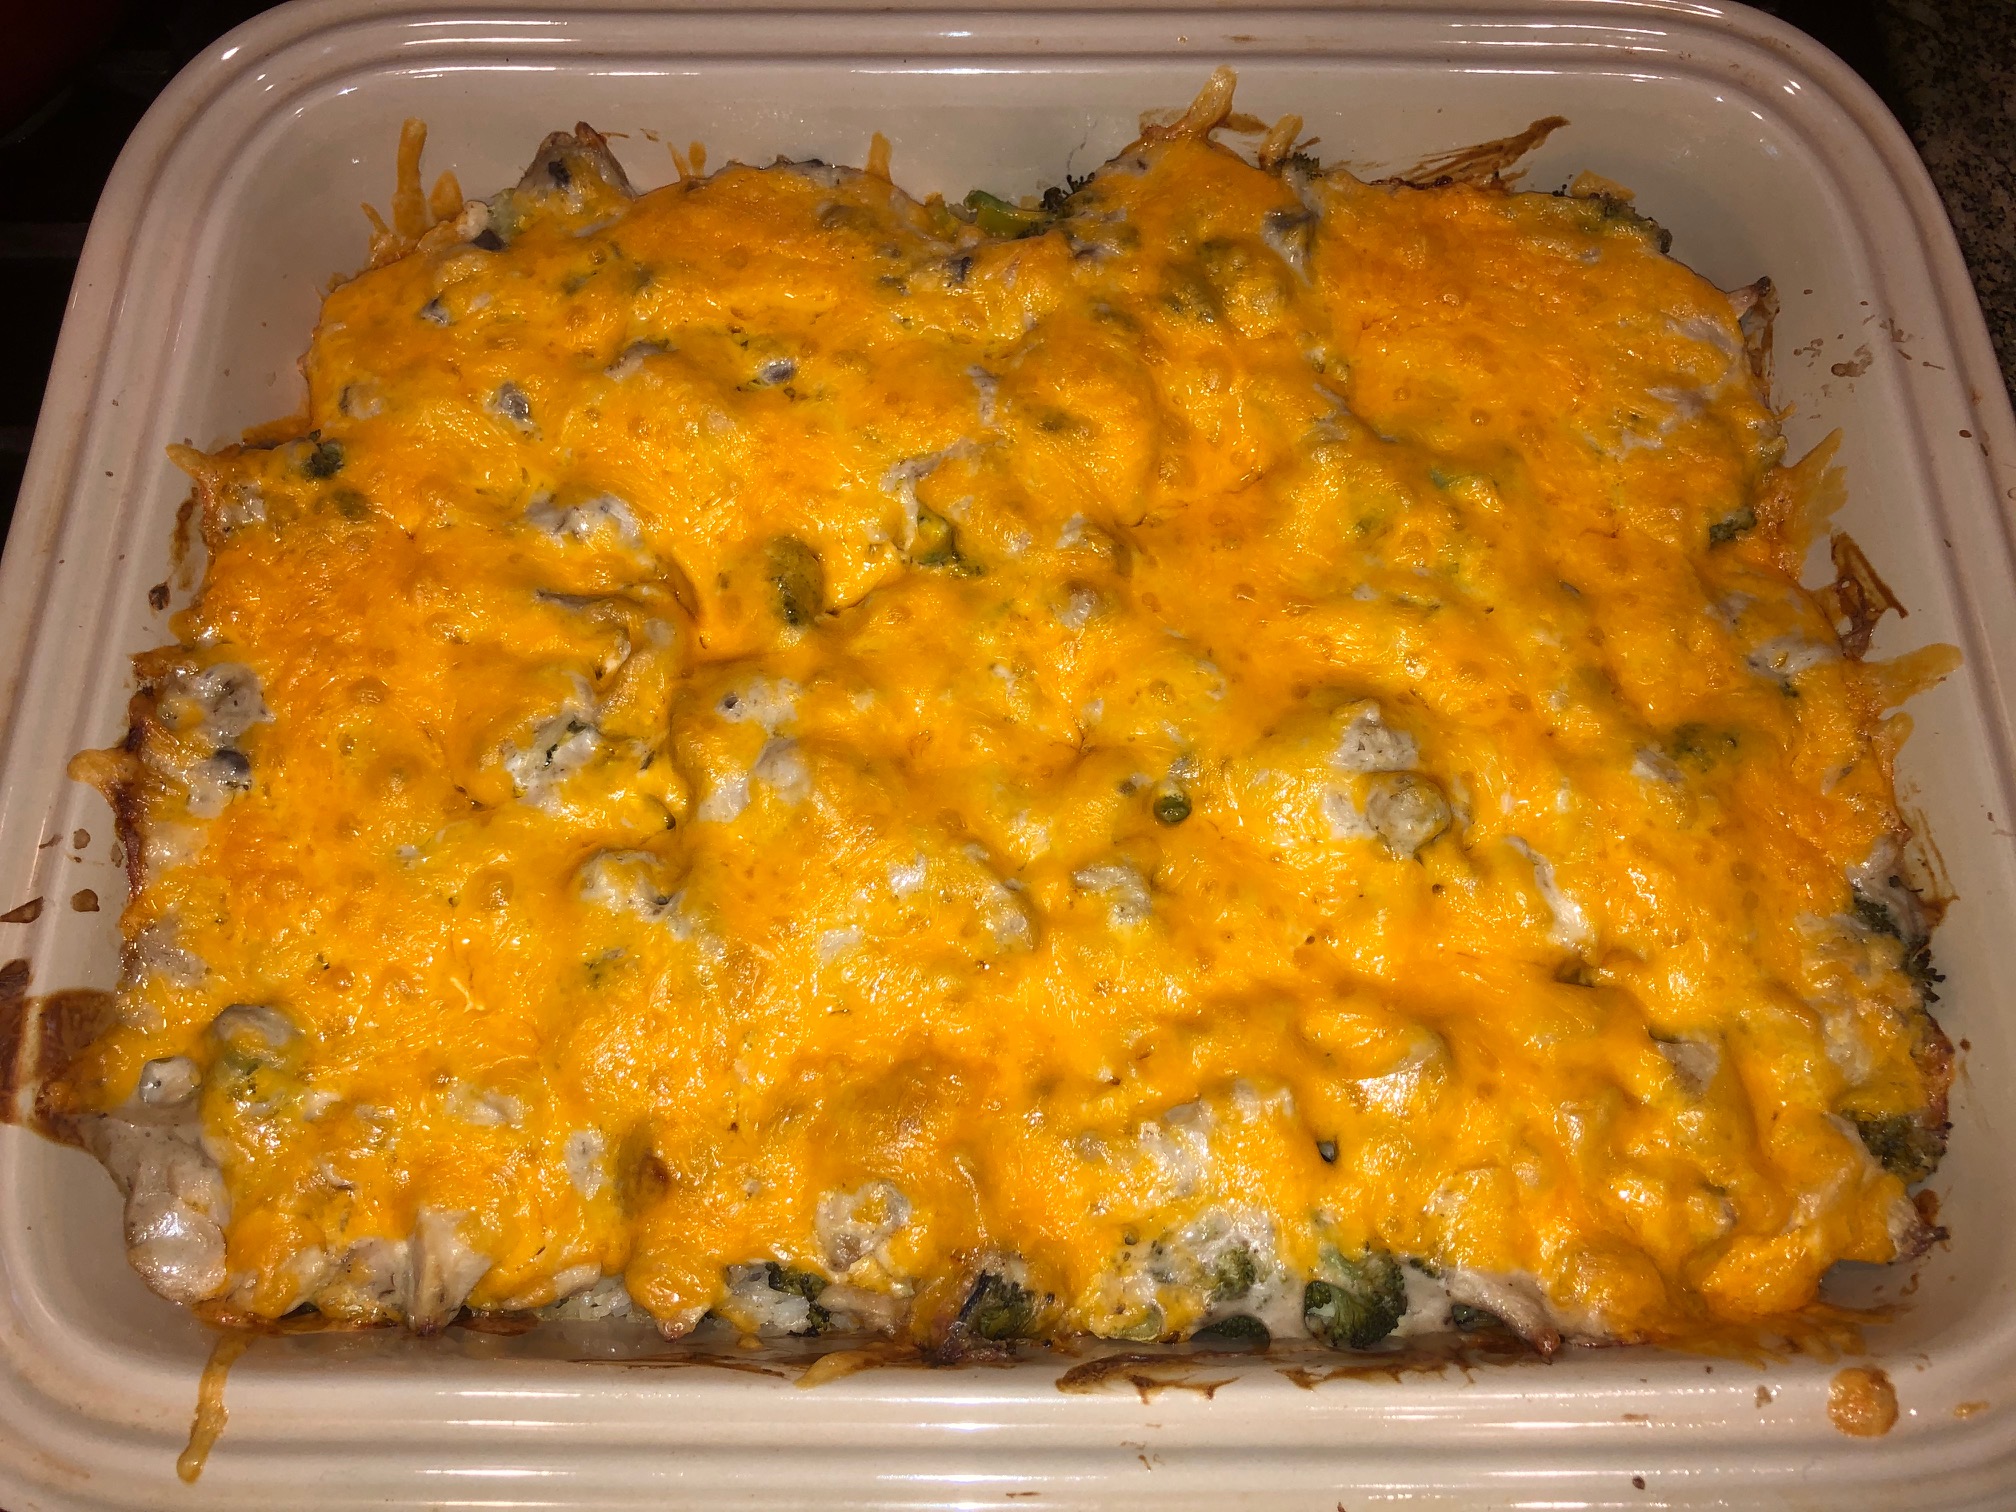
Chicken & Broccoli Casserole

I’ve eaten this dish a lot over the years but I don’t think I’ve ever made it. I don’t know why either because I love it and Chicken & Broccoli Casserole isn’t hard to make. While it isn’t a quick meal to make, it will feed a crowd! And if you don’t have a crowd to feed, it makes for great leftovers.

Since I hadn’t made this casserole before, I searched the internet for recipes. This one sounded most like the ones I’ve eaten and liked. Trisha Yearwood made this on her cooking show. The thing that takes a little longer to make is that you have to cook the chicken separately from the rice. In planning the dish, I knew it was going to take a while, so I cooked the chicken ahead of time and stored it in the fridge. You could also use a store bought rotisserie chicken if you didn’t feel like making the chicken. And if you wanted to take another shortcut, you could use left over rice from another meal.

I hope you’ll make this casserole and let me know what you think.

Chicken & Broccoli Casserole

1 Star2 Stars3 Stars4 Stars5 Stars (No Ratings Yet)
Loading...
By Trisha Yearwood Serves: 10-12
Prep Time: 40 minutes Cooking Time: 2 hours Total Time: 2 hours 40 minutes

Chicken & Broccoli Casserole

Ingredients

  • Nonstick cooking spray or butter, for the baking dish
  • 4 boneless, skinless chicken breasts
  • Kosher salt and freshly ground black pepper
  • 1 medium head broccoli, cut into small florets
  • 2 cups cooked white rice
  • One 10-ounce can condensed cream of chicken soup
  • 1 cup sour cream
  • 1/2 cup mayonnaise
  • 1 tablespoon lemon juice
  • 10 ounces Cheddar, grated (about 2 1/2 cups)

Instructions

1

Preheat the oven to 350 degrees F.

2

Grease a 9-by-13-by-2-inch baking

3

dish with nonstick cooking spray or butter.

4

Place the chicken in a large pot with water to cover.

5

Add some salt, bring to a boil, then reduce the heat to a low

6

simmer and cook the chicken until tender, about 45 minutes. Drain the chicken, cover, and refrigerate until cool, or up to 24 hours.

7

Shred.

8

Meanwhile, bring a medium pot of generously salted water to a boil.

9

Add the broccoli florets, and boil until crisp-tender, 2 to 3 minutes.

10

Spread the rice in an even layer in the baking dish.

11

Make a second layer with the broccoli.

12

In a large bowl, mix the chicken soup, the sour cream, mayonnaise, lemon juice, shredded chicken, half the Cheddar and some salt and pepper.

13

Pour the mixture over the broccoli and top with the remaining Cheddar.

14

Bake for 40 minutes; let stand for 5 minutes before serving.

Casserole/ Vegan/ Vegetarian

Harissa Hot Dish

I watch a lot of cooking shows.  I get a lot ideas and inspiration from these shows.  One of shows I’ve been watching lately is Girl meets Farm featuring Molly Yeh.  Her heritage is Jewish and Chinese.  She lives in the Mid-West, so between her heritage and where she lives, her flavors and style is really interesting. 

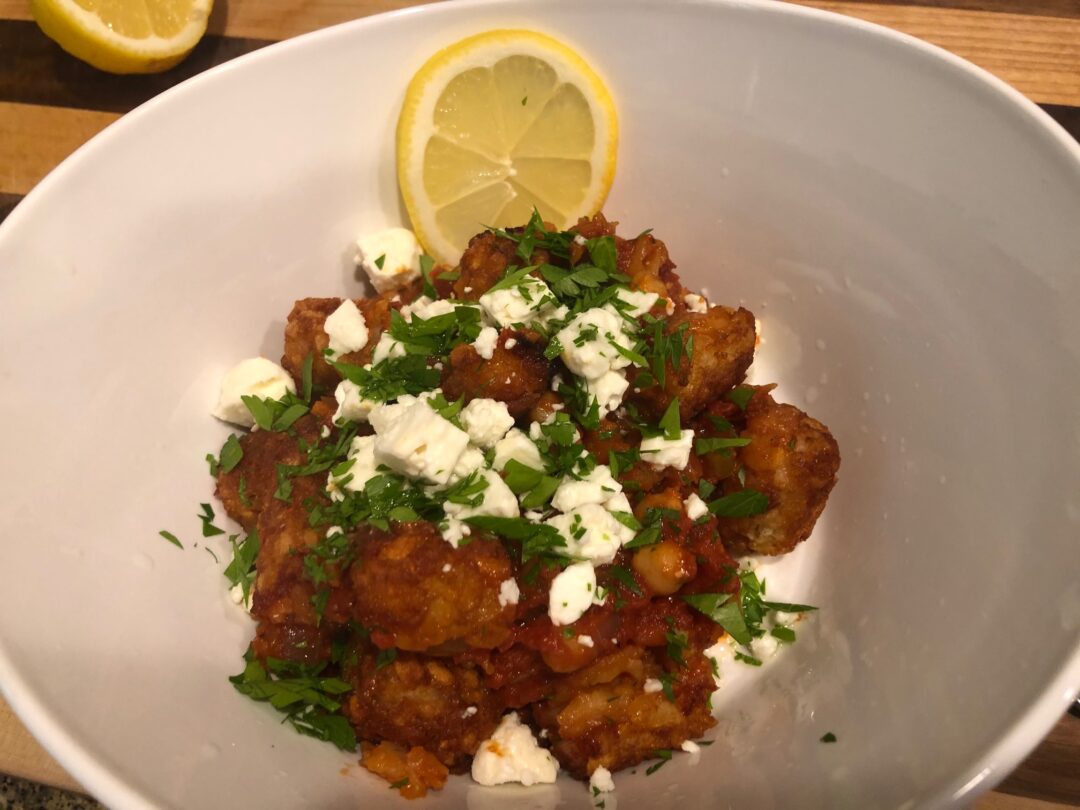
While looking for a vegetarian or vegan dish I could make for Audrey, I saw this recipe that Molly made called Harissa Hot Dish.  I’d never heard of hot dishes before but essentially it is a casserole topped with tater tots.  She had me at tater tots!

If you haven’t cooked with it before, Harissa is a spice used in North African cuisine.  Harissa paste is used in this dish, hence the name, and it is pretty spicy.  Some brands are spicier than other.  Since the dish is vegan, what’s the protein?  Chickpeas.  The chickpeas are cooked with harissa paste, some white wine, thyme and a few other things.  The sauce is made separately as the chickpeas cook down a little.  After the chickpeas are done, combine with the sauce and top with the tater tots.  Bake it and once done, top with grilled lemon and some fresh herbs.  If you want to add some feta cheese – it won’t be vegan but it’ll still be vegetarian.

The next time you’re in the mood for a casserole, try something a little different.  This dish is AWESOME! Check out the recipe and make your version.

Harissa Hot Dish

1 Star2 Stars3 Stars4 Stars5 Stars (No Ratings Yet)
Loading...
By Molly Yeh Serves: 8-12
Prep Time: 30 min Cooking Time: 1hour 30 min. Total Time: 2 hrs

Harissa Hot Dish

Ingredients

  • Chickpeas:
  • 2 tbsp + 1/2 c olive oil, divided
  • 1/2 yellow onion, finely chopped
  • Kosher salt
  • 4 cloves garlic, minced
  • 1 tb harissa
  • 1/2 c dry white wine
  • 2 (15 oz) cans chickpeas, drained and rinsed
  • 4 sprigs thyme or about a tbsp of dried
  • Black pepper
  • Sauce:
  • 2 tb olive oil
  • 1/2 yellow onion, finely chopped
  • 2 large carrots, finely chopped
  • 2 large stalks celery, finely chopped
  • Kosher salt
  • Black pepper
  • 3 cloves garlic
  • 1 tb harissa
  • 1 tb tomato paste
  • 2 tsp aleppo pepper or paprika
  • 1 (28 oz) can or carton chopped tomatoes
  • 1 tsp sugar
  • About 1 1/2 lbs tater tots or potato nuggets
  • 1 lemon, to serve
  • Fresh cilantro and parsley, finely chopped, for serving
  • Optional serving accoutrements: crumbled feta or other cheese/vegan cheese of your choice

Instructions

1

Pre-heat oven to 425 degrees.

2

Bake the tater tots for 25-30 minutes. (This is a departure from Molly's recipe. I like really crispy tater tots, so I do a double bake)

3

In a large pot, heat 2 tbsp olive oil over medium heat. Add the onion and a pinch of salt and cook until soft, 5-7 minutes.

4

Add the garlic and harissa and cook for 1-2 more minutes, until fragrant.

5

Add the wine and cook until reduced by half.

6

Add the chickpeas, 1/2 cup olive oil, thyme, black pepper, a few good pinches of salt, and bring to a simmer.

7

Cover and cook for 35-40 minutes, stirring occasionally, until the chickpeas are soft.

8

Meanwhile, make your sauce. In a separate pot, heat the olive oil over medium heat.

9

Add the onion, carrots, celery, a pinch of salt, and a few turns of pepper and cook, stirring until soft, about 10-12 minutes.

10

Add the garlic, harissa, tomato paste, and Aleppo or paprika and cook for another minute.

11

Add the chopped tomatoes and sugar and cook, covered, stirring occasionally for about 15 minutes.

12

Taste and adjust seasoning as desired.

13

Using a slotted spoon, transfer the chickpeas to the tomato sauce, draining the chickpeas of excess olive oil (and discarding the thyme twigs when you come across them).

14

Transfer the mixture to an 8x12 casserole dish and cover with tater tots.

15

Season with salt, pepper, and more aleppo and bake until the tots are golden, 30-40 minutes.

16

At some point while it’s baking, grill your lemon: heat a skillet over medium high, cut the lemon in half and then place it face down on the skillet until it gets nice brown marks.

17

When the hot-dish is done baking, let it cool slightly, top with fresh herbs, squeeze with lemon, and serve with feta or other cheese/vegan cheese as desired.

Beef

East Coast Donair

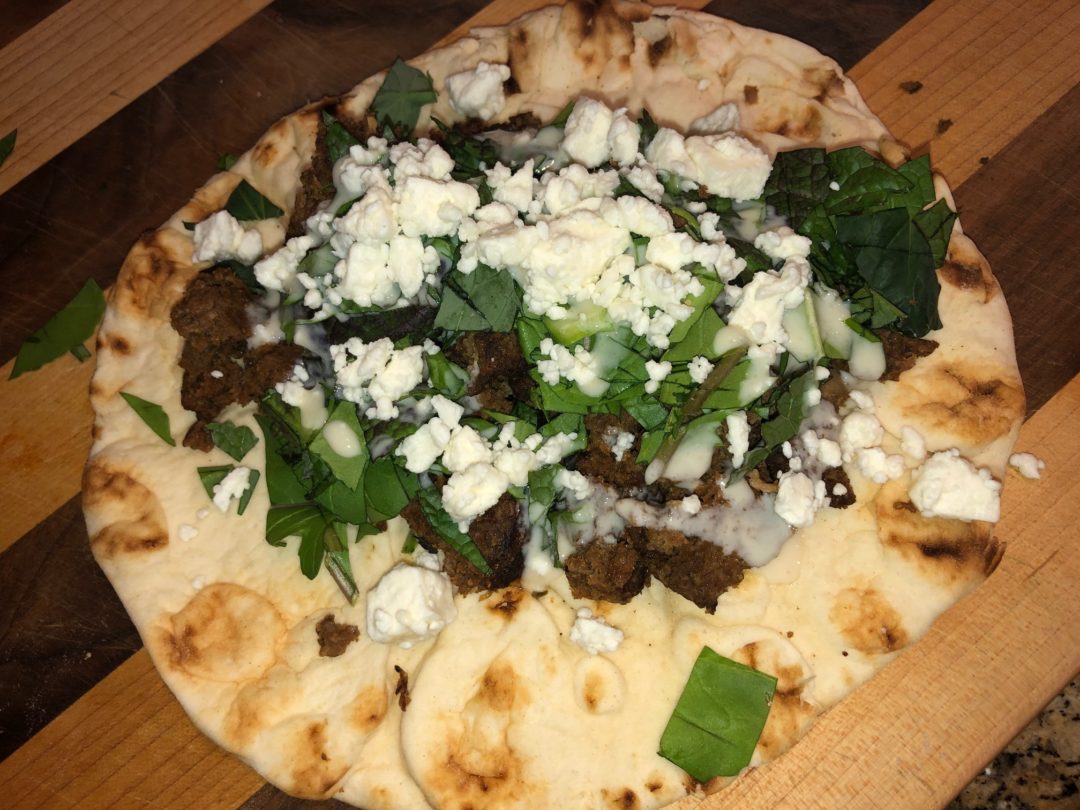
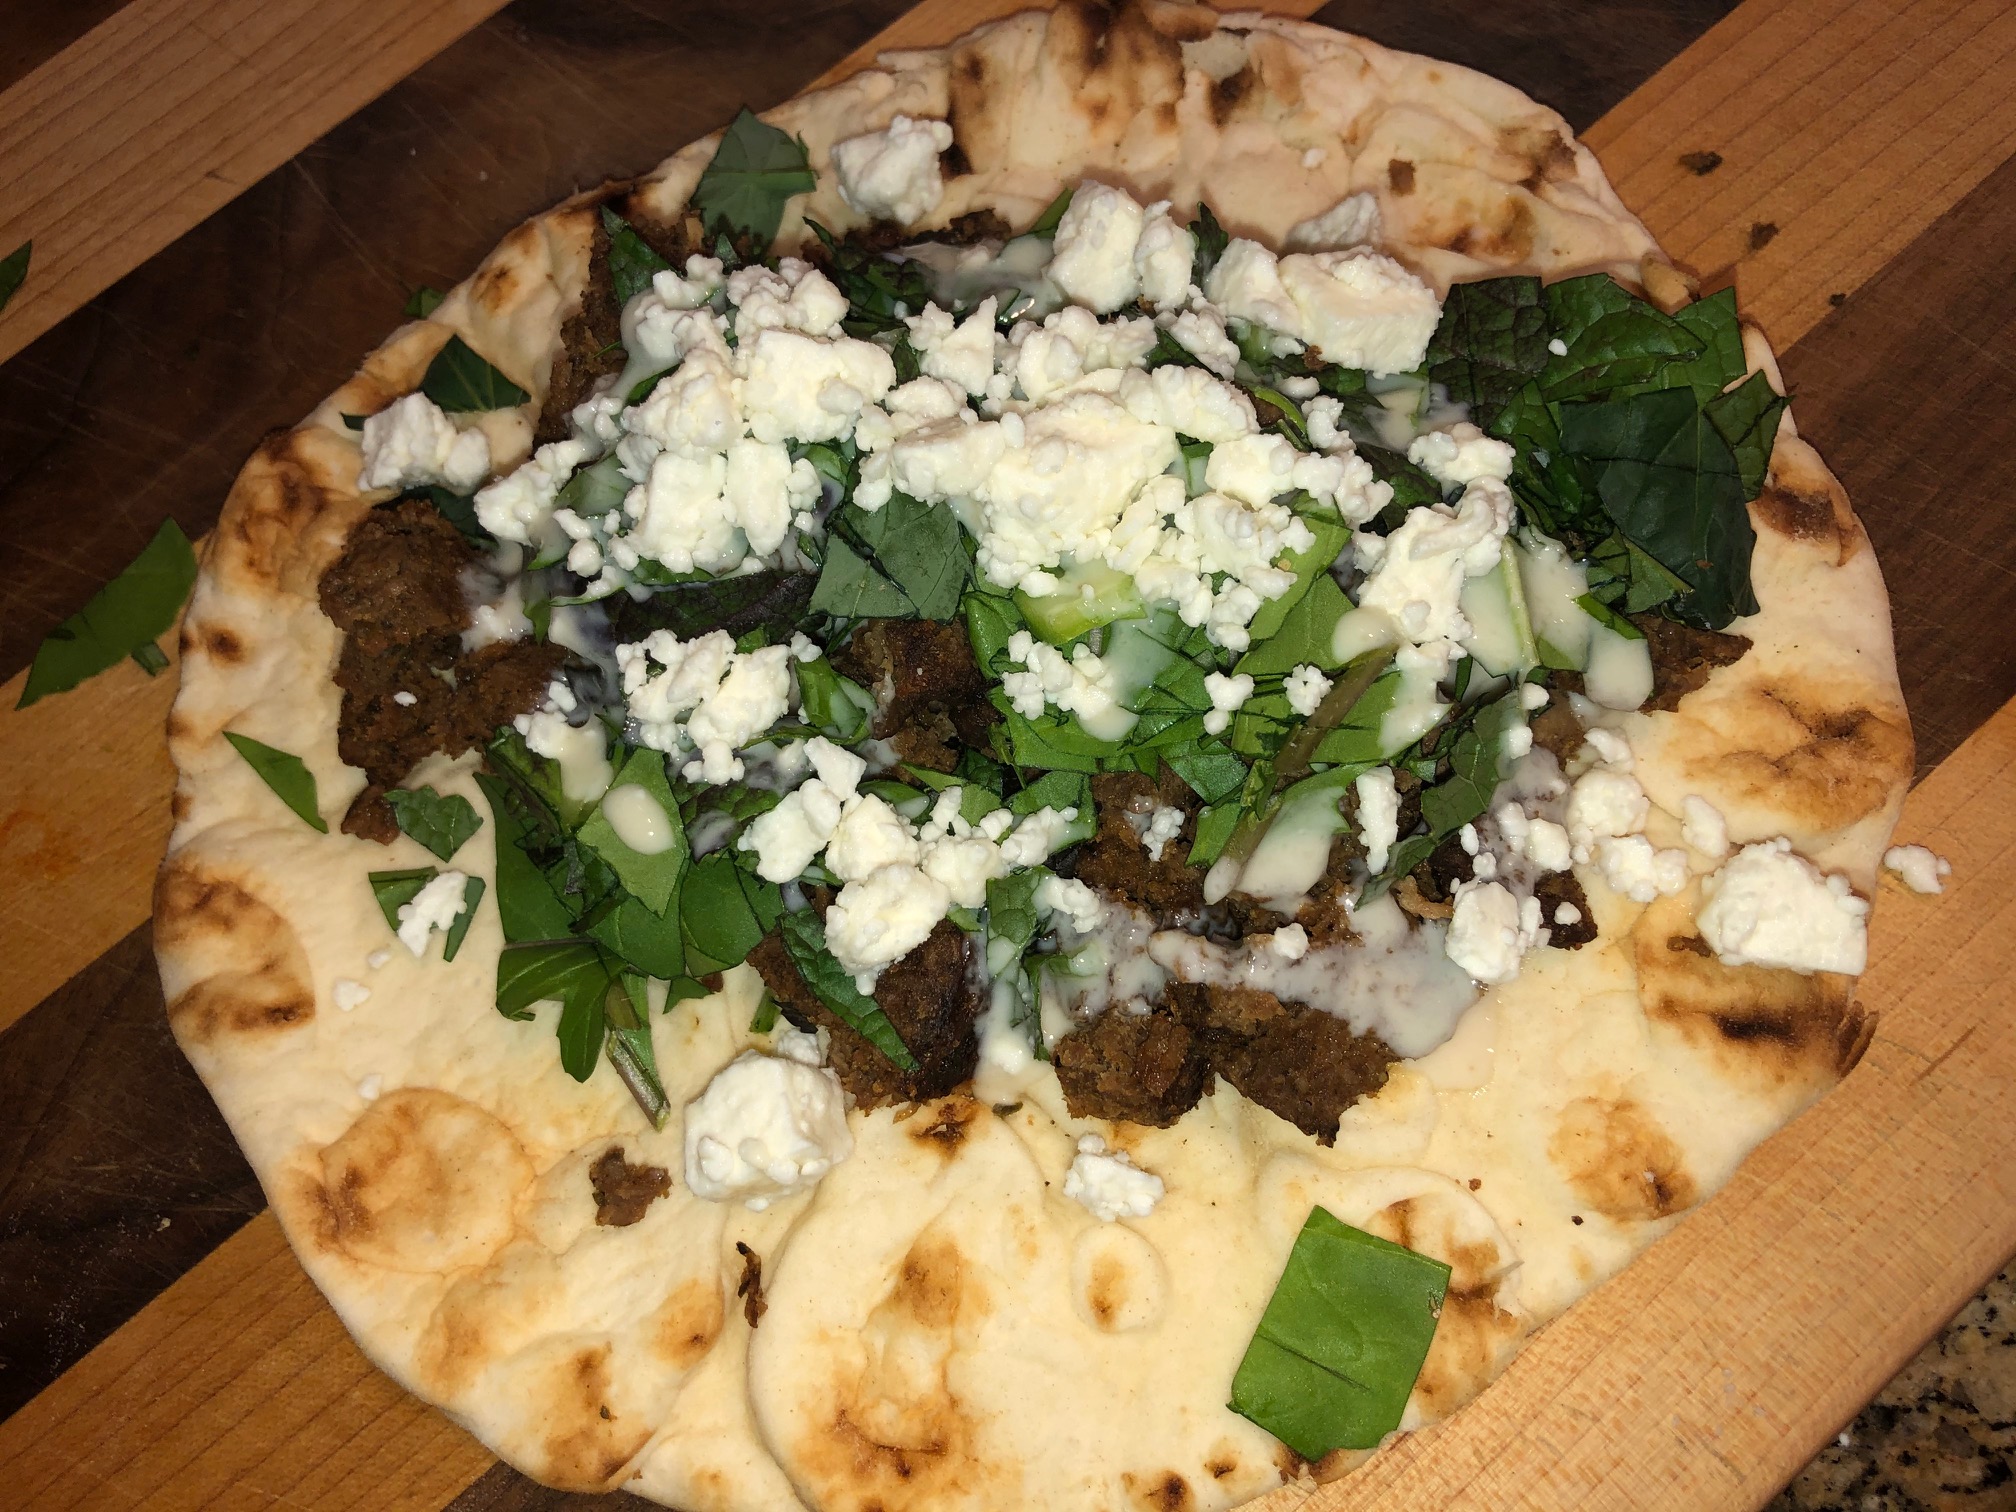
On the menu tonight – East Coast Donair! What is that?! It’s very much like a gyro. The seasonings include a lot of oregano and paprika along with a little cayenne for some heat. The sauce is garlicky and sweet.

I saw this dish made on Diner’s Drive-ins and Dives. Guy was somewhere in Canada, they made this dish and it looked great. It IS great! You should try it out yourself the next time you’re in the mood to try something a little different. If you can make meatloaf, you can make this dish. When you make it, let me know what you think.

East Coast Donair

1 Star2 Stars3 Stars4 Stars5 Stars (No Ratings Yet)
Loading...
Serves: 6-8
Prep Time: 30 minutes Cooking Time: 2 hours Total Time: 2 hours 30 minutes

East Coast Donair - very similar to a gyro.

Ingredients

  • ½ cup all-purpose flour
  • 4 tsp sweet paprika
  • 4 tsp dried oregano
  • 2 tsp salt
  • 2 tsp onion powder
  • 1 tsp pepper
  • ¾ tsp cayenne pepper
  • 2 lbs ground beef
  • 3-4 cloves garlic, pressed or finely grated
  • Sauce:
  • 1 cup evaporated milk
  • 2/3 granulated sugar
  • 1 ½ tsp garlic powder
  • ¼ cup white vinegar
  • The Rest:
  • 8-10 Lebanese-style Pita bread
  • ½ Vidalia or red onion thinly sliced
  • Shredded iceberg lettuce
  • Chopped plum tomatoes

Instructions

1

Preheat oven to 300 degrees.

2

In a large mixing bowl, combine the flour, ground beef, garlic, onion powder, salt, pepper, oregano, paprika, and cayenne pepper.

3

Mix the meat and spices to thoroughly combine.

4

Put the meat on a rimmed baking sheet and form into a 4”x6” loaf. Bake for about 2 hours or internal temperature of 160 degrees.

5

While the meat bakes, make the sauce.

6

In a bowl, stir together evaporated milk, sugar, and garlic powder until sugar dissolves. Add vinegar, gently stir mixture 4-5 times (don’t overmix). Cover and refrigerate for an hour.

7

Assembly:

8

Thinly slice the cooked meat loaf.

9

Heat 1 tbsp in a non-stick skillet, cook the beef slices until browned on each side.

10

Transfer to a bowl and continue cooking the meat slices.

11

Warm the pita bread.

12

Top the pita with beef, some of the Donair sauce, onion, lettuce, and tomatoes.

13

Enjoy!

Seafood

Southern Fried Catfish

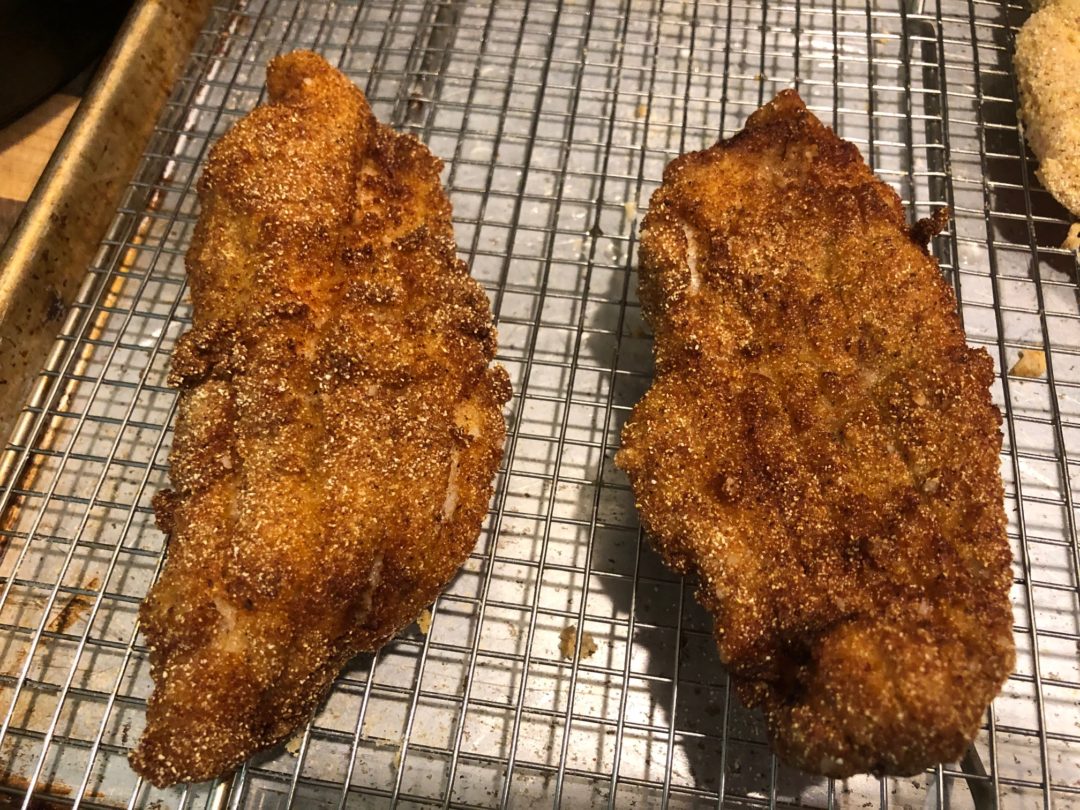
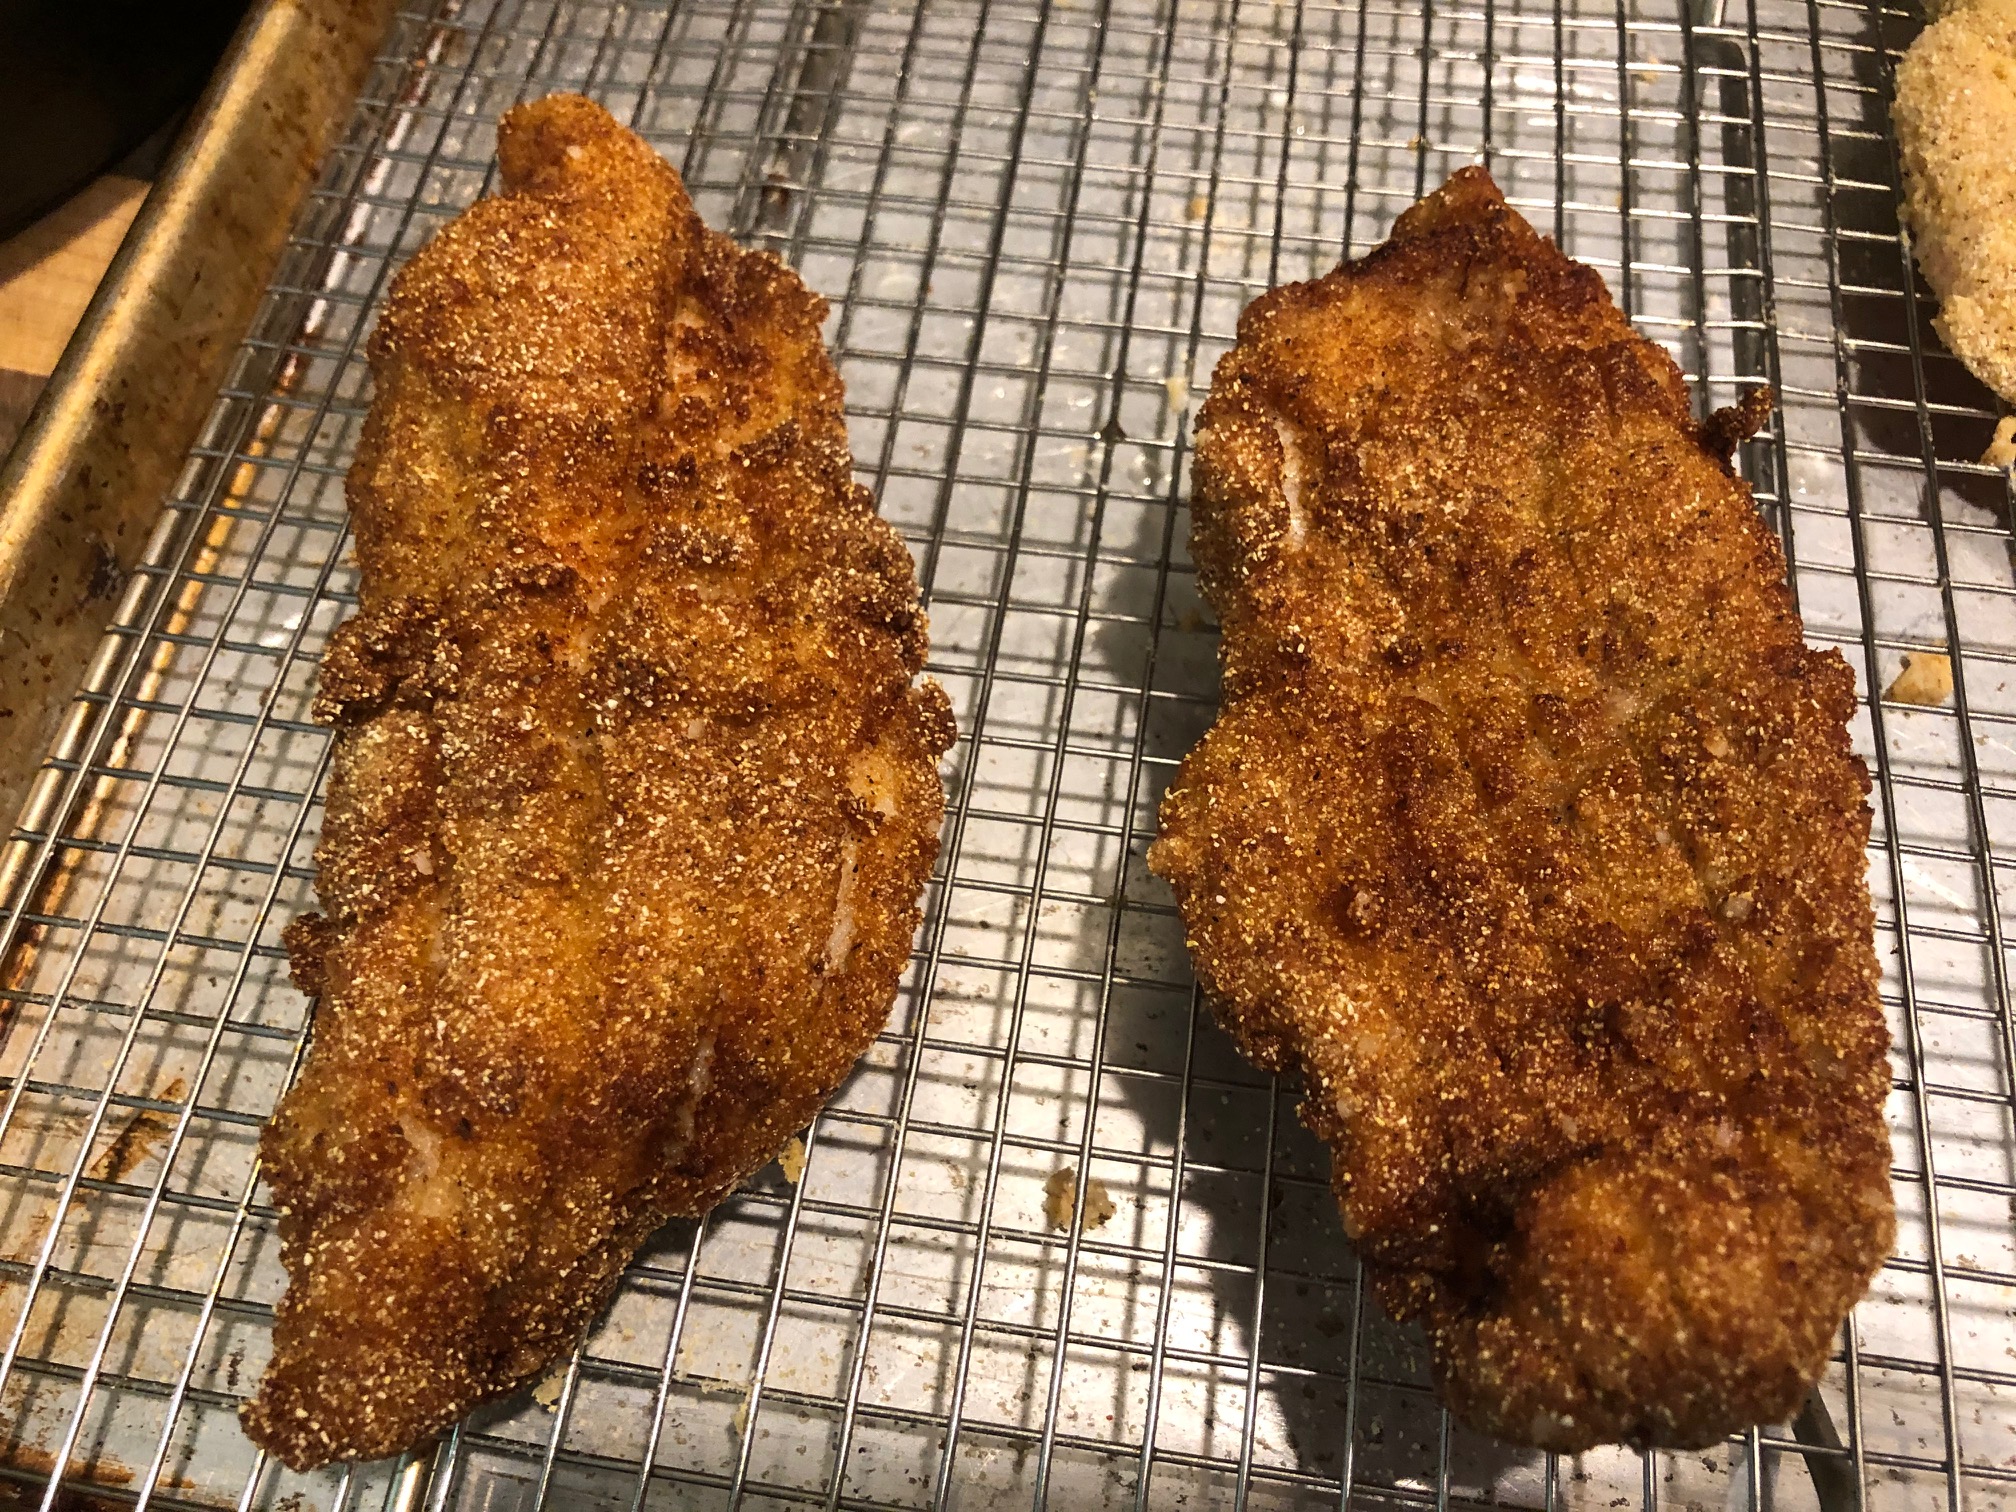
On the menu tonight – Southern Fried Catfish! I was feeling like making another Southern dish today so I made fried catfish and this Vidalia Onion Cornbread. The seasoning on the catfish is fantastic! People often think of fried fish as heavy, but if it’s done right, it won’t be greasy – the fish will be light and flaky. The trick is to maintain the oil temperature and not over crowd the pot.

I paired the fish with some Vidalia Onion Cornbread and it was FANTASTIC! Check out the recipes and make your own fish fry. You can thank me later.

Southern Fried Catfish

1 Star2 Stars3 Stars4 Stars5 Stars (No Ratings Yet)
Loading...
By Alton Brown Serves: 2-4
Prep Time: 10 minutes Cooking Time: 15 minutes Total Time: 25 minutes

Southern Fried Catfish

Ingredients

  • 1 quart peanut oil
  • 1 cup fine cornmeal
  • 1 cup all purpose flour
  • 1 teaspoon Old Bay seasoning
  • ½ teaspoon kosher salt
  • ¼ teaspoon hot smoked paprika
  • ¼ teaspoon ground black pepper
  • 6 farm-raised catfish fillets, rinsed and thoroughly patted dry
  • ¾ cup low-fat buttermilk

Instructions

1

Heat the peanut oil in a 5 quart Dutch oven to 350 degrees.

2

Whisk the cornmeal and flour together in a shallow dish.

3

Combine the seasonings in a small bowl.

4

Season the fish on both sides.

5

Pour the buttermilk in another shallow dish.

6

Dip each piece of fish into the corn meal mixture.

7

Dip each piece of fish into the buttermilk.

8

Then, dip each piece of fish into the corn meal mixture again and set on a cooling rack for at least 5 minutes.

9

Gently add the filets to the hot oil (no more than two at a time) and fry until golden brown, about 5 – 6 minutes.

10

Remove the fish to a cooling rack, then repeat with the rest of the fish.

11

Serve immediately.

Side Dishes

Vidalia Onion Cornbread with Cheddar Cheese

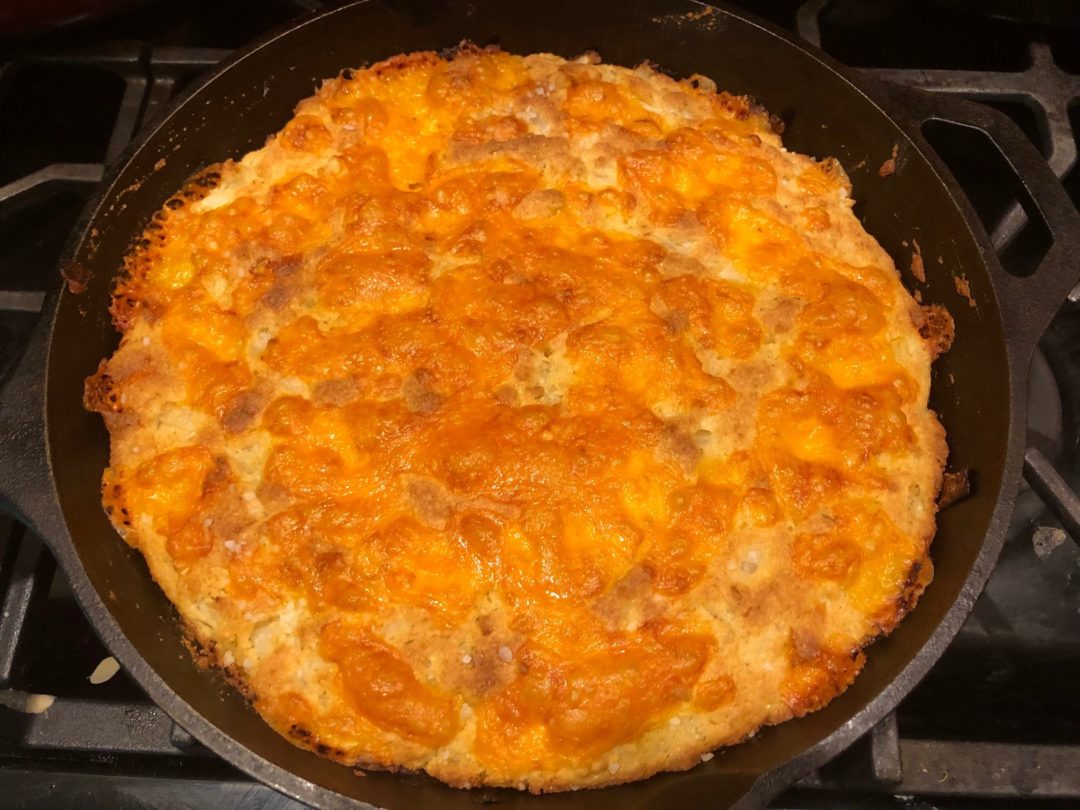
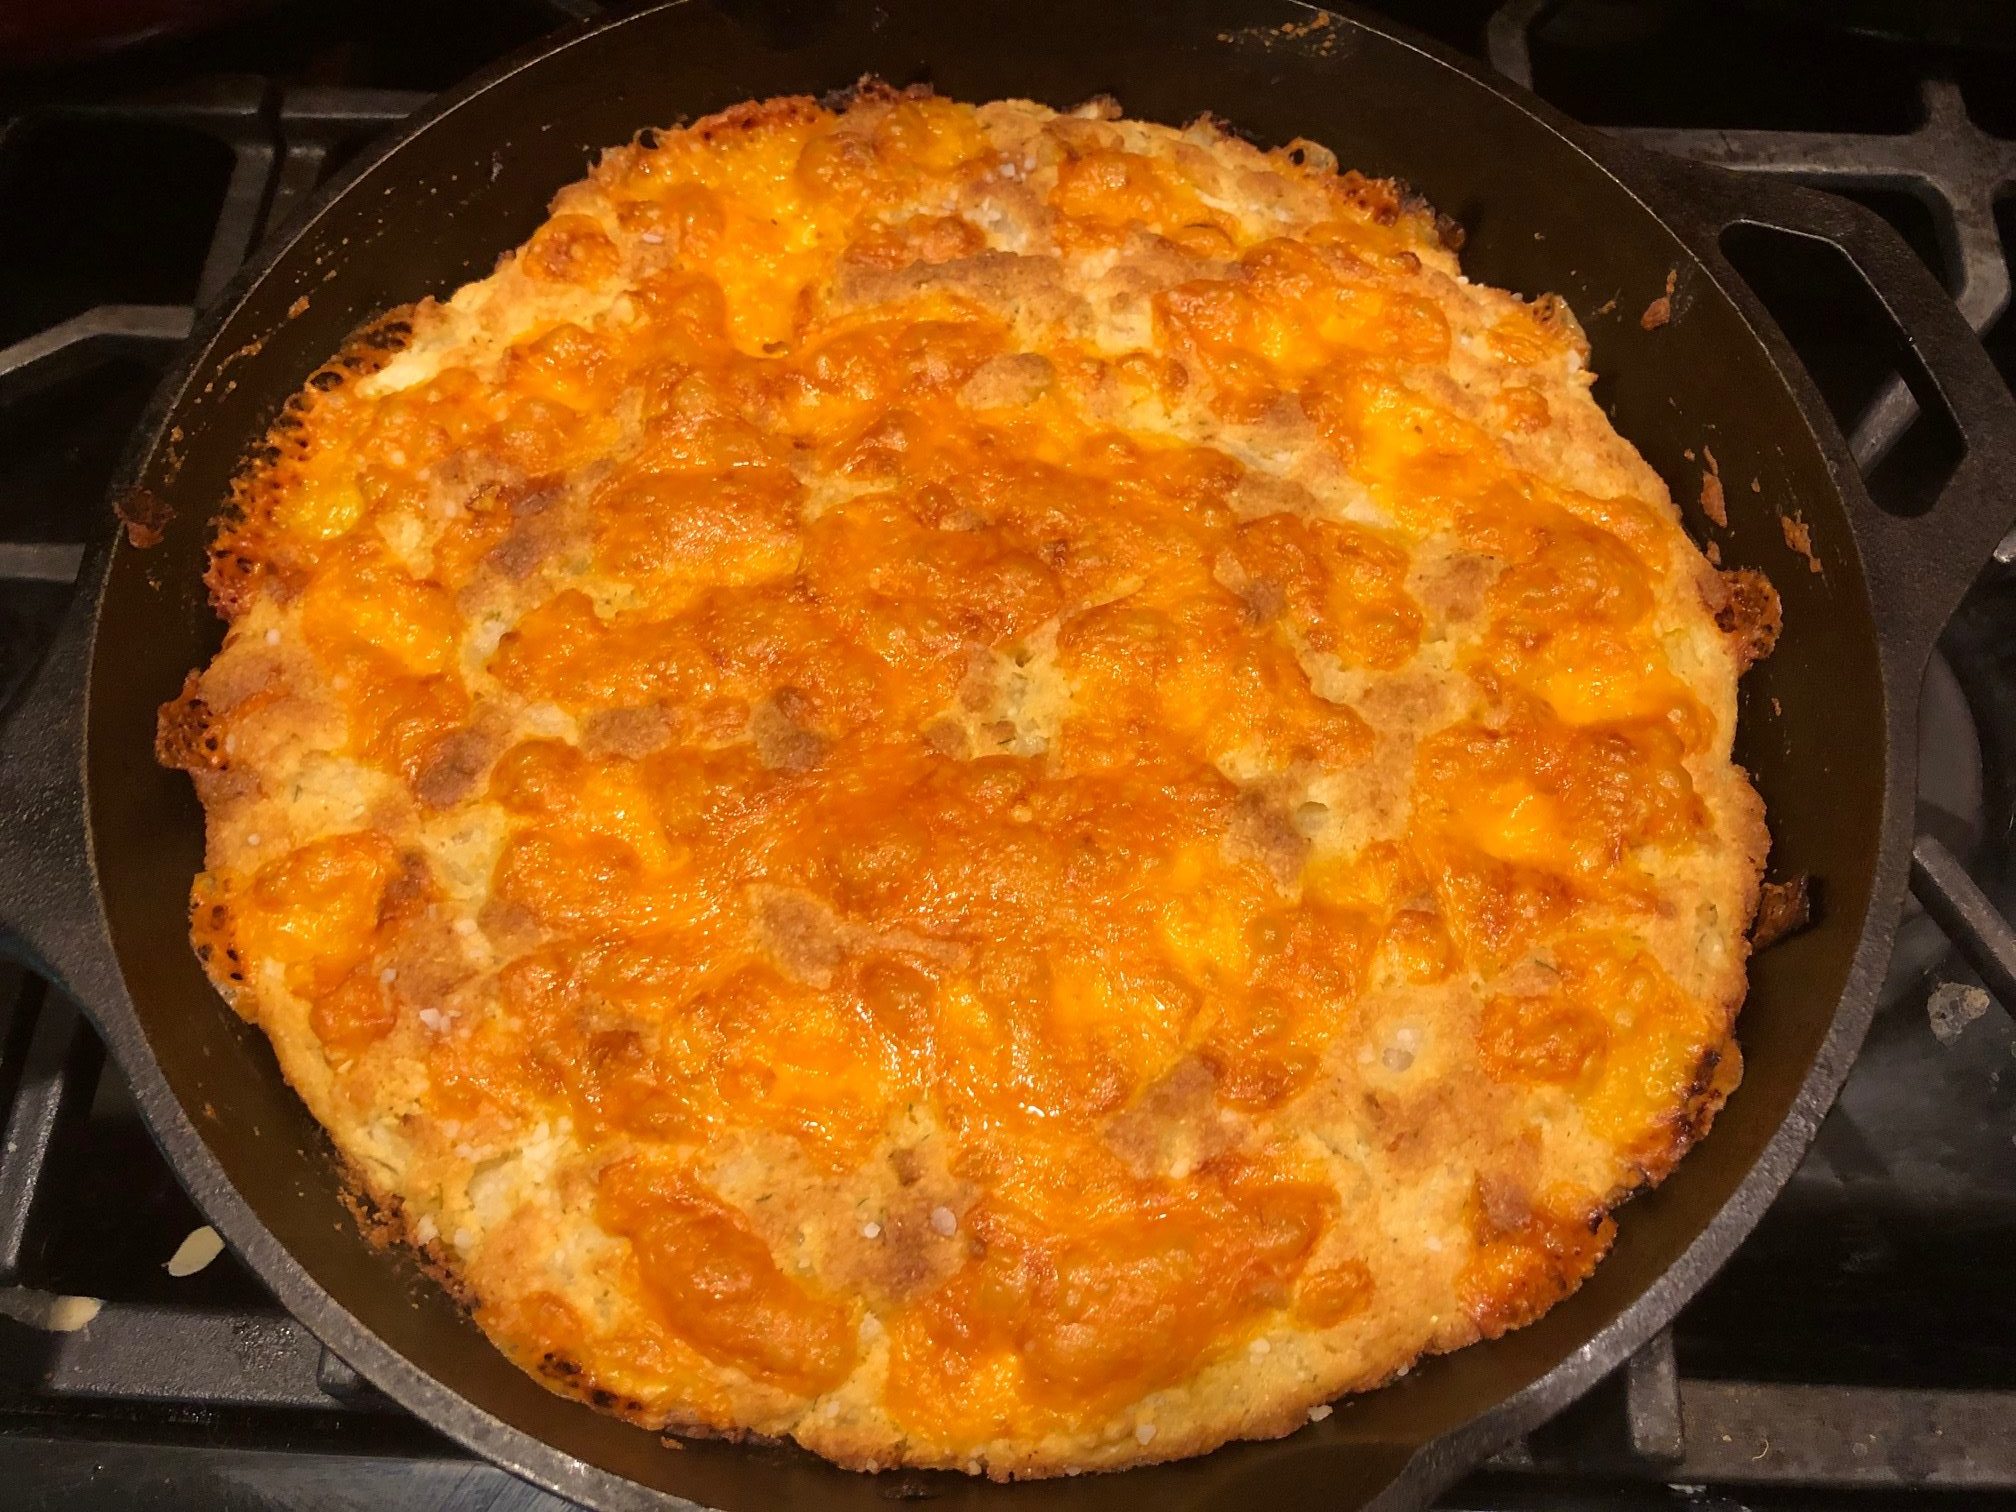
On the menu tonight – Vidalia Onion Cornbread! I was feeling like making another Southern dish today so I made fried catfish and this Vidalia Onion Cornbread.

The cornbread is filled with sweet Vidalia onions, butter, and cheddar cheese. Even with the onions and cheese, this cornbread is pretty light – not dense. I hope you’ll try this cornbread and let me know what you think.

Vidalia Onion Cornbread

1 Star2 Stars3 Stars4 Stars5 Stars (No Ratings Yet)
Loading...
Side Dish
By Paula Deen Serves: 8
Prep Time: 10 minutes Cooking Time: 30 minutes Total Time: 40 minutes

Vidalia Onion Cornbread

Ingredients

  • ½ stick of butter
  • 1 Vidalia onion, large
  • 1 8oz pkg of cornread/muffin mix
  • 1 egg beaten
  • 1/3 cup whole milk or butter milk
  • 1 cup sour cream
  • 1 cup grated sharp cheddar cheese, divided
  • ¼ tsp salt
  • ¼ tsp dill weed

Instructions

1

Pre-heat oven to 450 degrees.

2

In a cast iron skillet, melt the butter and saute the onion over medium heat for about 3-5 minutes.

3

Remove the pan from heat.

4

Combine the muffin mix, egg, milk, sour cream, ½ cup of the cheese, salt, and dill weed.

5

Pour that mixture in the pan with the cooked onions and mix to combine.

6

Top mixture with the remainder of the cheese and put in the oven.

7

Bake for 30 minutes or until a toothpick inserted in the center of the cornbread comes out clean.

8

Allow to rest 5 minutes before cutting.

Casserole

Cheesy Gnocchi Casserole with Ham

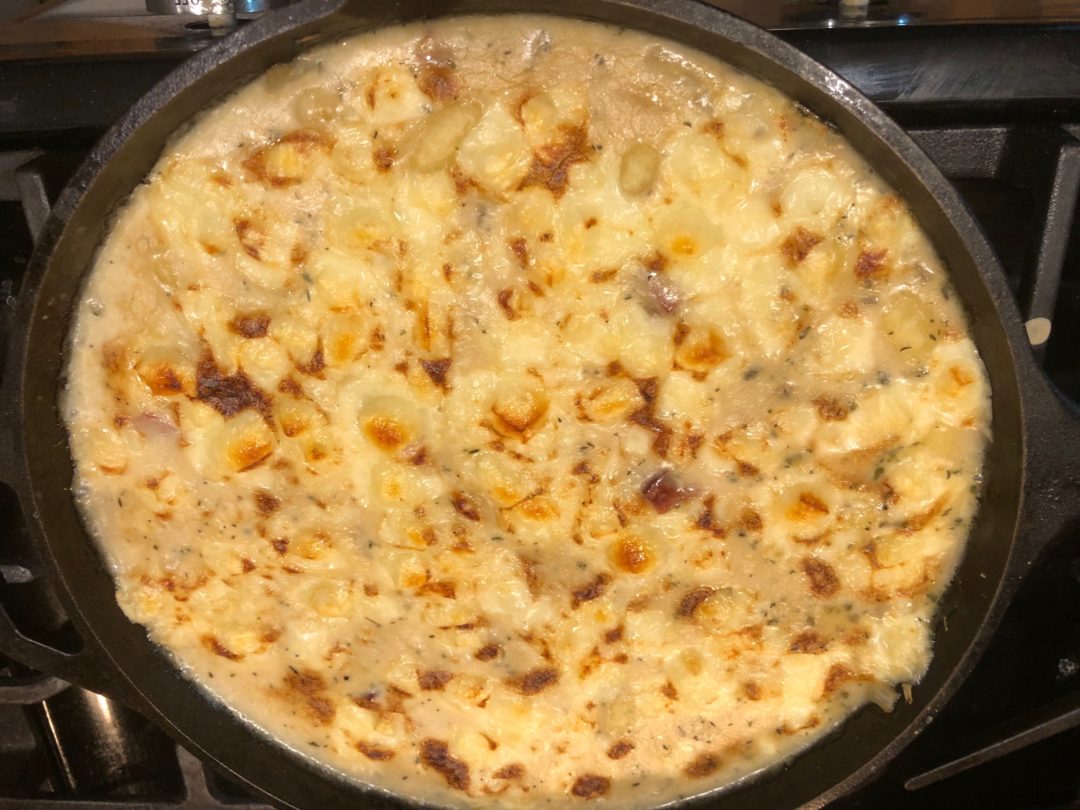
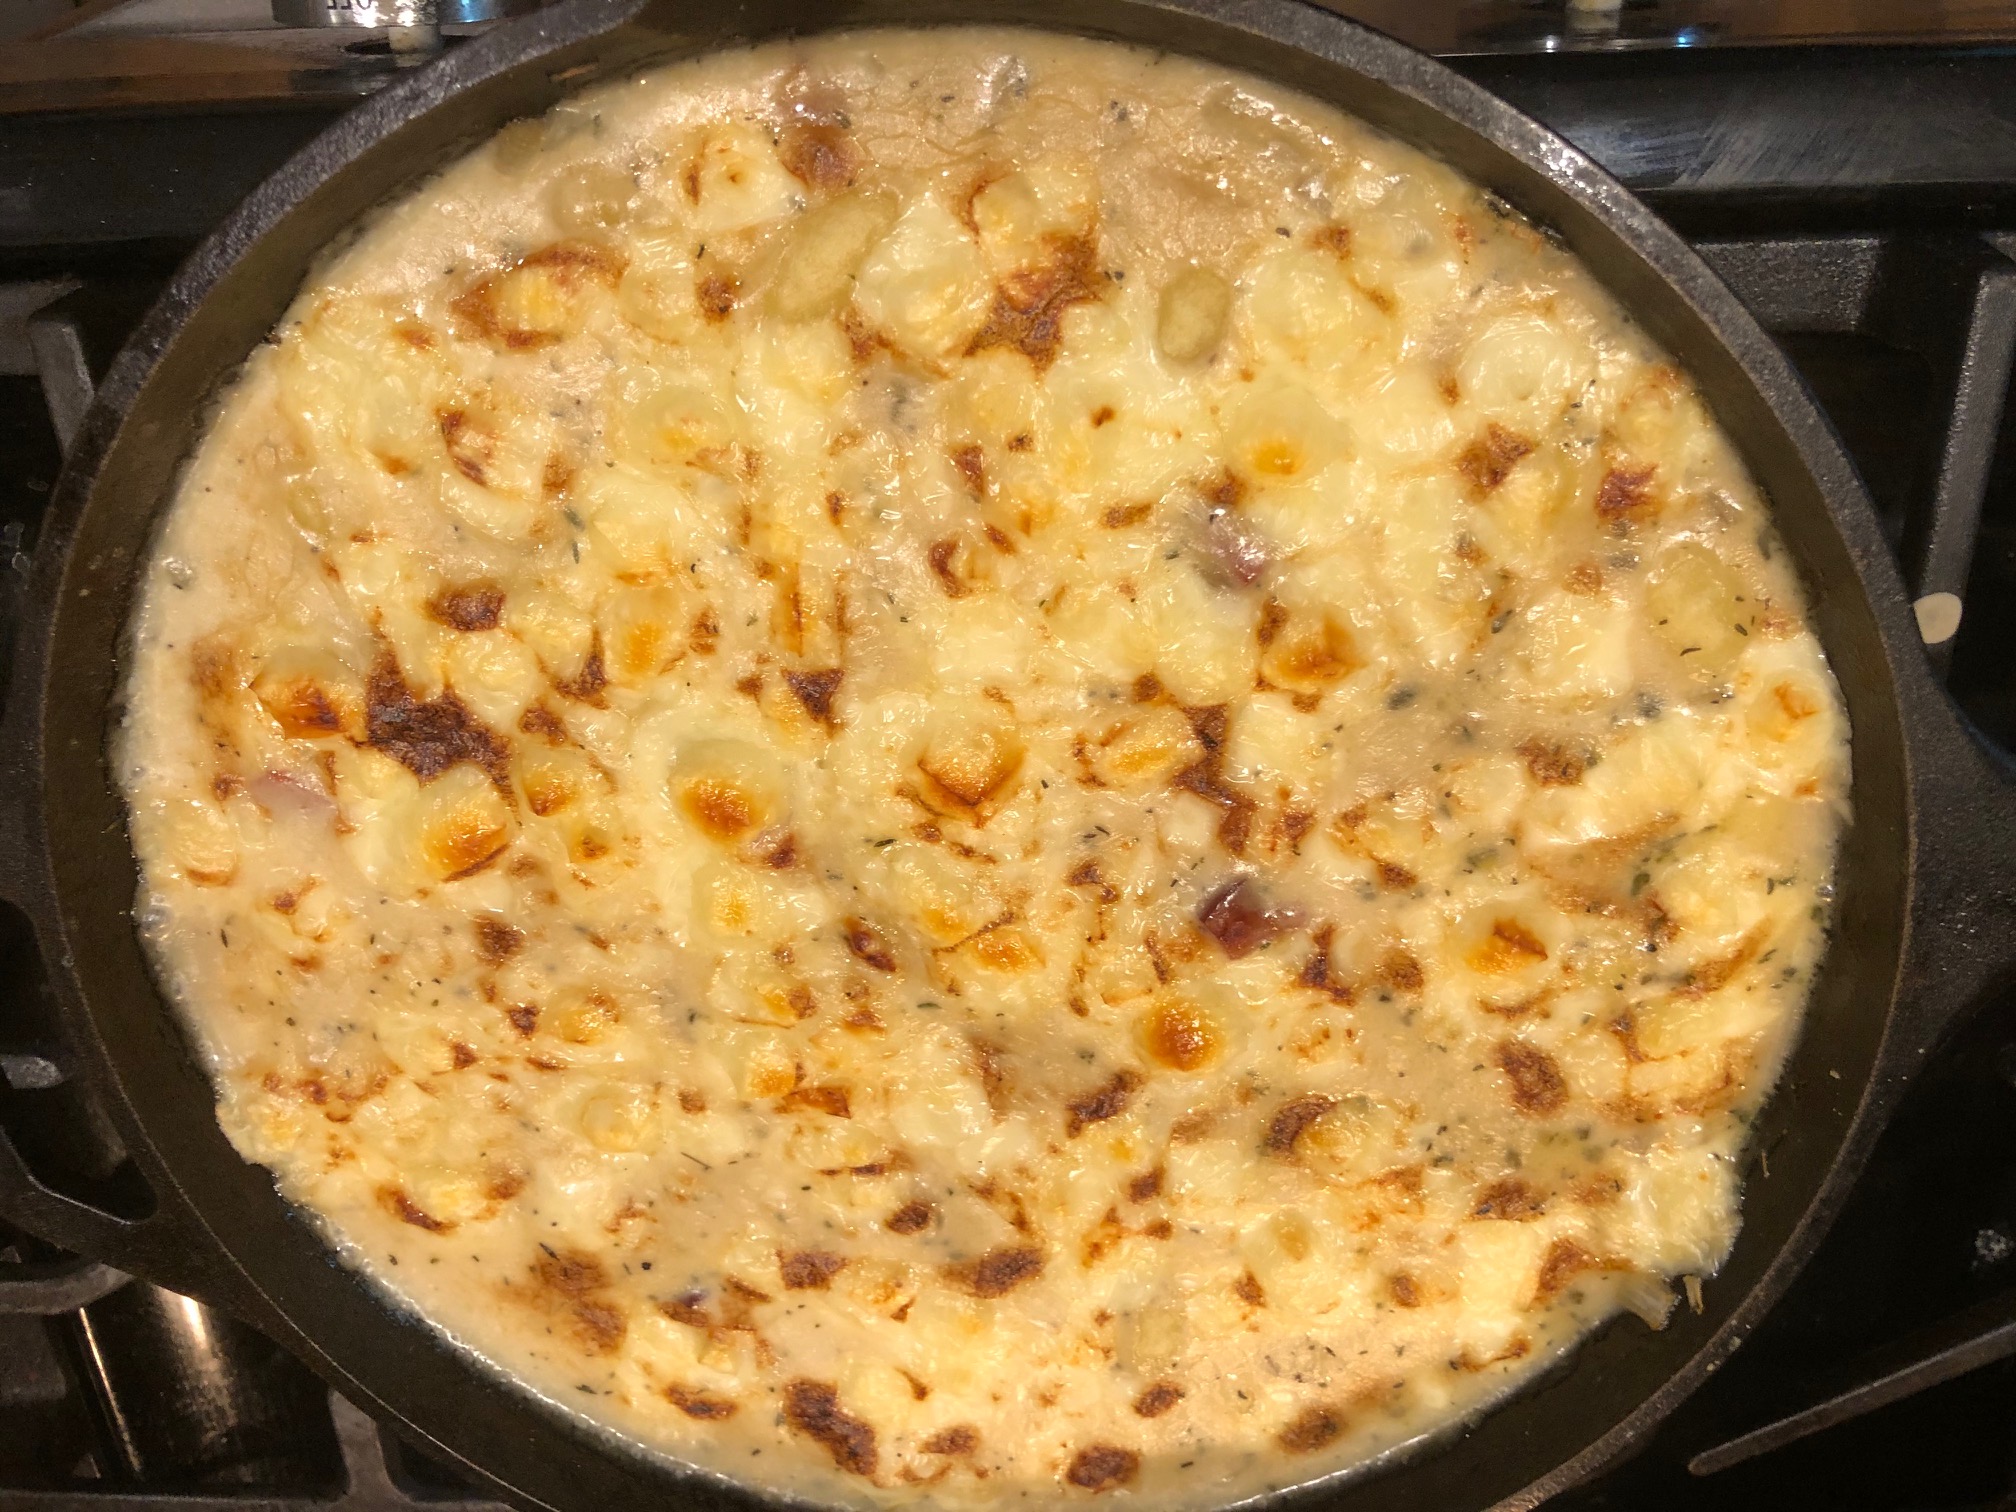
On the menu tonight – Cheesy Gnocchi Casserole with Ham! While trying to figure out something different to do with gnocchi, I found this recipe and it sounded delicious. I tried it and it was delicious! If you’ve never had gnocchi, they are little fluffy potato pillows of goodness. In this dish, combined with the onions, ham and melted cheese you’ve got something special.

You can make your own gnocchi, but I used a frozen variety in this recipe. This would make a great side dish or as a complete meal. The next time you’re looking for something a little different, try making this Cheesy Gnocchi Casserole.

Cheesy Gnocchi Casserole with Ham

1 Star2 Stars3 Stars4 Stars5 Stars (No Ratings Yet)
Loading...
Casserole
By Patrick Dulmage Serves: 6
Prep Time: 5 minutes Cooking Time: 30 minutes Total Time: 35 minutes

Cheesy Gnocchi Casserole with Ham

Ingredients

  • 1 Tbsp butter
  • 1 onion, diced
  • ½ teaspoon thyme
  • 1 cup chicken broth
  • ¼ cup water
  • One 17.5 package potato gnocchi
  • 1 cup frozen peas (optional)
  • ¼ cup heavy cream
  • Kosher salt and freshly ground pepper
  • 1 cup shredded Swiss or Gruyere cheese

Instructions

1

Preheat broiler to high.

2

Melt the butter in a large ovenproof skillet over medium heat.

3

Add the onions and cook until translucent.

4

Add the ham and thyme, cook until the ham is browned.

5

Add the chicken broth and water, bring to a simmer.

6

If you are adding the peas, now is the time.

7

Add the gnocchi, cover, and cook until the gnocchi is slightly tender – about 5 minutes.

8

Remove from the heat.

9

Add the peas, cream, salt and pepper to taste.

10

Sprinkle the cheese on top of the mixture and broil until golden and bubbly.