All Posts By:

patrickdulmage

Chili/ Vegetarian

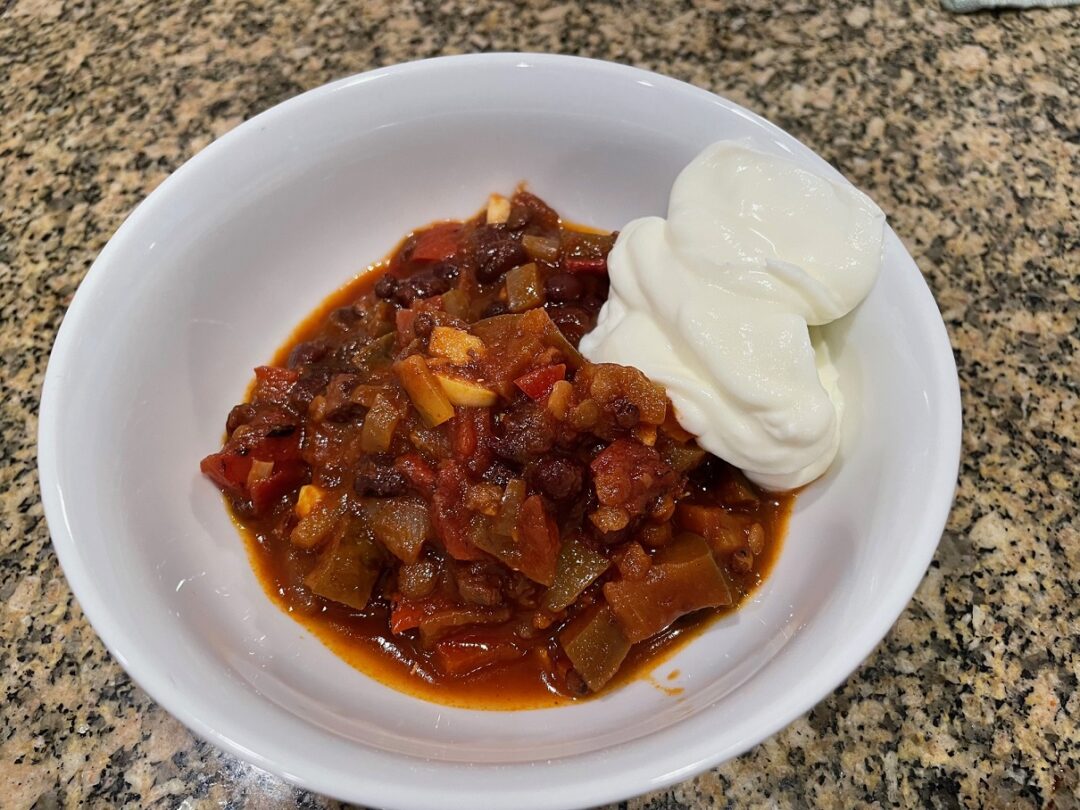
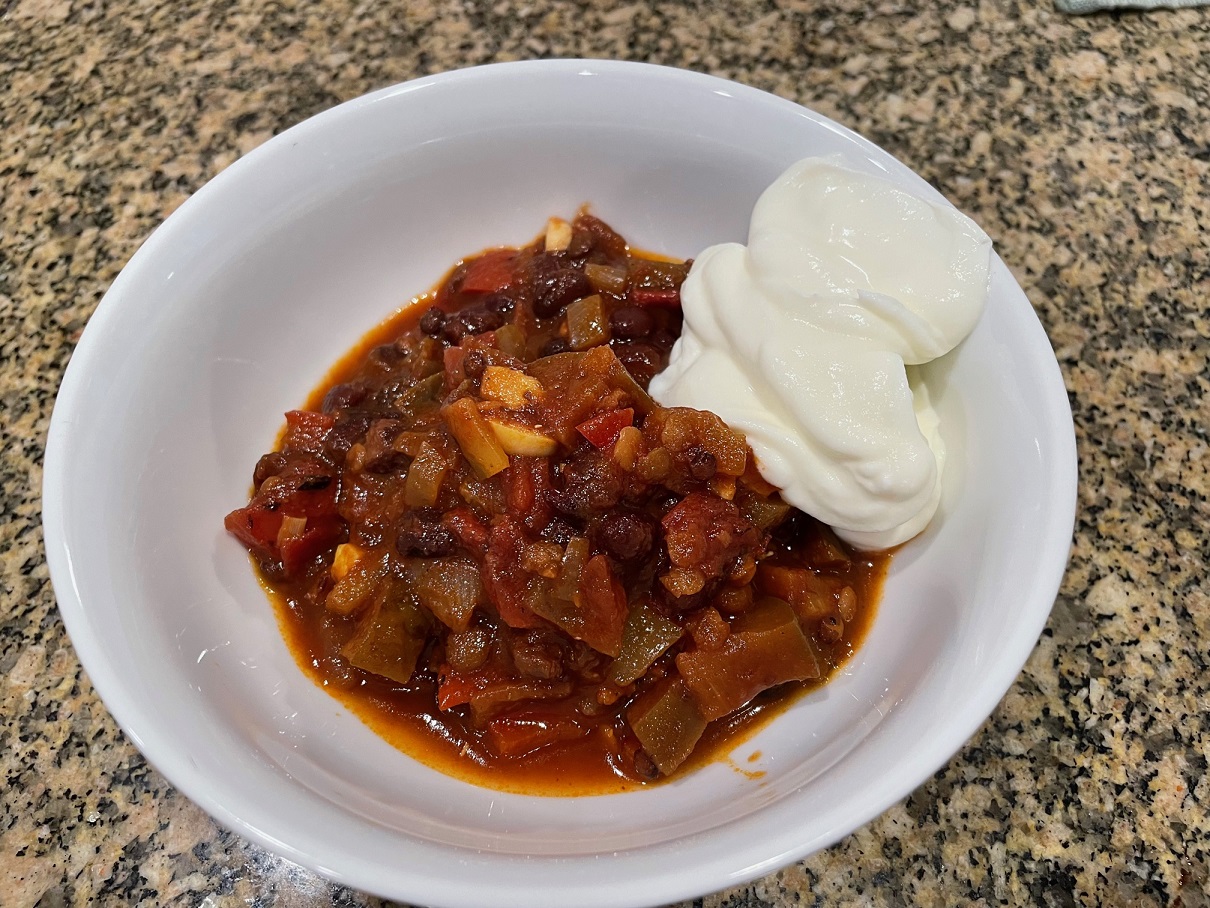
Black Bean Eggplant and Lentil Chili

On the menu tonight – Black Bean Eggplant and Lentil Chili!

I had a Japanese eggplant that I needed to figure out what to do with. I decided to make a big pot of chili! Since Audrey doesn’t eat meat, I went with a completely vegetarian chili.

For the tomatoes, I went with fire roasted diced tomatoes to add a little smokiness.

I hope you will try this dish and let me know what you think.

Black bean Eggplant and Lentil Chili

1 Star2 Stars3 Stars4 Stars5 Stars (No Ratings Yet)
Loading...
By Patrick Dulmage Serves: 8-12
Prep Time: 15 minutes Cooking Time: 1 hour Total Time: 1 hr 15 min

Black bean Eggplant and Lentil Chili

Ingredients

  • 1 Japanese Eggplant, diced
  • 2 cans black beans
  • 1 cup lentils
  • 4 dried Pasilla Chilis, seeded, stemmed, steeped in hot water
  • 3 dried Guajilo Chilis, seeded, stemmed, steeped in hot water
  • 2 28oz cans fire roasted tomatoes
  • 4 cloves garlic, minced
  • 1 Vidalia onion, finely diced
  • 1 tsp ground cumin
  • 1 tsp Better Than Bouillan chicken broth
  • 1/4 cup key lime juice
  • 2-3 Tbsp olive oil
  • salt and pepper to taste
  • Sour cream for garnish

Instructions

1

Pre-heat a large heavy bottom pot over medium heat

2

Pulse the steeped chilis in a food processor

3

Add the olive oil to the pot along with the onions

4

Cook the onions and eggplant until translucent, about 4-5 minutes

5

Add the garlic and black beans, cook an additional 4-5 minutes

6

Add the tomatoes, Better Than Bouillon, and cumin

7

Taste and adjust seasoning, including salt and pepper

8

Let simmer on low for 45 minutes

9

Add the lime juice at the end of the 45 minutes

10

Serve with garnish of your choice

Fish/ Vegetarian

Tuna Steaks with Tomato Basil and Garlic Sauce

On the menu tonight – Tuna Steaks with Tomato Basil and Garlic Sauce.

This dish was literally born from trying to figure out what to have for dinner AND use up stuff in our fridge/pantry. We had some tuna steaks we wanted to use, and we didn’t want to do what we usually do – olive oil, salt, pepper, then grill. Nothing wrong with that, it’s delicious. BUT, it isn’t as delicious as what I made tonight.

From start to finish, there was about 30 minutes invested, including prep time. You can’t order anything healthier and tastier that will get to your door in 30 minutes or less. We LOVED it!

Check out the recipe for all the ingredients, but there isn’t much to do other than zest the lemon and chop the ingredients for the sauce.

I hope you will try this recipe the next time you are in the mood for fish or trying to figure what to make quickly.

Tuna Steaks with Tomato Basil and Garlic Sauce

1 Star2 Stars3 Stars4 Stars5 Stars (No Ratings Yet)
Loading...
By Patrick Dulmage Serves: 4

Tuna Steaks with Tomato Basil and Garlic Sauce

Ingredients

  • 4 (1 inch) Tuna Steaks
  • 4-6 Tbsp olive oil
  • 1 lemon, zested and juiced
  • 1 tbsp Thyme
  • 1 handful fresh parsley, finely chopped
  • 2-3 plum tomatoes, diced
  • 1/2 cup fresh basil, finely chopped
  • 1/2 medium red onion, finely chopped
  • 2-3 cloves garlic, minced
  • Kosher salt
  • Freshly ground pepper

Instructions

1

Pre-heat a grill pan on high OR pre-heat grill to high

2

In a medium bowl, add the olive oil, lemon zest, juice, parsley, tomato, basil, thyme, onion, and garlic. Mix to combine and let sit at least 10 minutes

3

Brush the tuna steaks with olive oil, then season with salt and pepper

4

Put the tuna steaks on the grill, about 2 minutes on each side. You should see a line where the tuna is cooked. If you want rare (preferred), you want to see a cooked line about a quarter way up the steak, then flip to achieve the same cook on the other side

5

Once cooked to your preference, plate and top with the sauce you made

6

Serve immediately

Italian/ Vegetarian

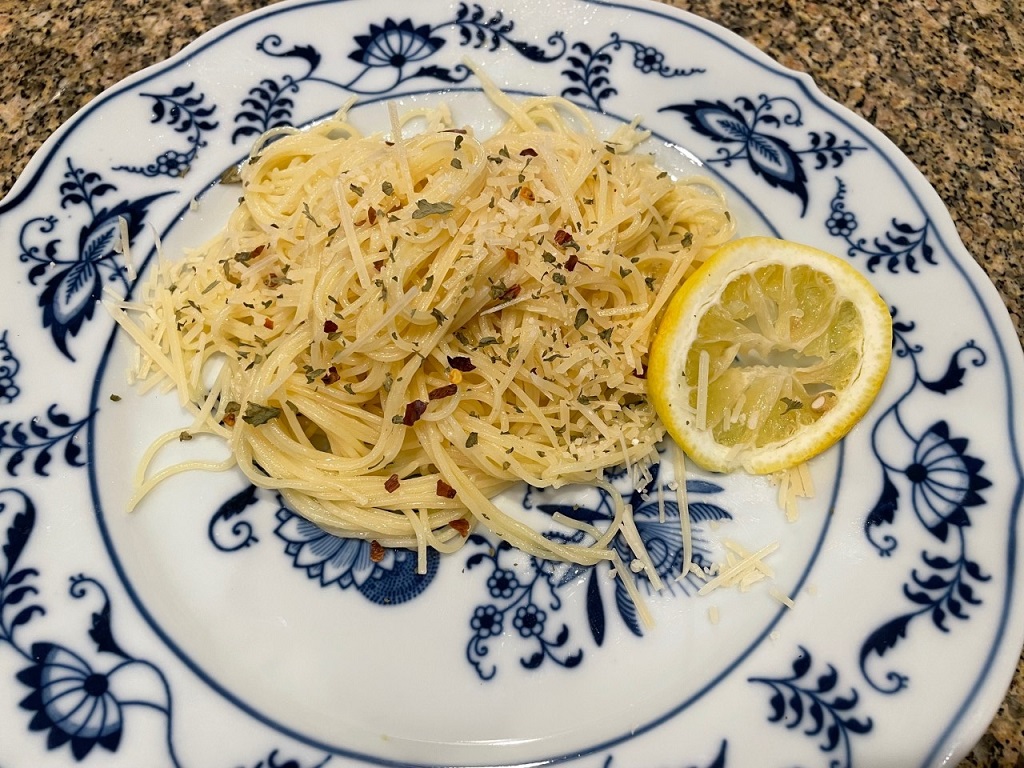
Spaghetti al Limone / Lemon Spaghetti

On the Menu tonight – Spaghetti al Limone or Lemon Spaghetti.

Not too long ago, I made Spaghetti alla Carbonara, and it was fantastic. This is a similar dish, but a little brighter with the lemon.

You can easily make this meal in under 30 minutes and you don’t need a lot of ingredients. All you need is the pasta, lemons, garlic, heavy cream, Parmesan cheese, some olive oil, and red pepper flakes. If you can boil water, you can make this dish.

It sounds like it would be heavy using the heavy cream and the Parmesan cheese, but surprisingly, it isn’t. The lemon and the parsley give it a wonderfully fresh taste, perfect for a summer dinner.

If want to go to Capri, without getting on a plane, put on some Italian music, pour a little limoncello and make Spaghetti al Limone. Let me know how your version turns out.

Spaghetti al Limone / Lemon Spaghetti

1 Star2 Stars3 Stars4 Stars5 Stars (No Ratings Yet)
Loading...
By Patrick Dulmage Serves: 6-8

Spaghetti al Limone / Lemon Spaghetti

Ingredients

  • 1 lb Spaghetti (angel hair pasta would also be great)
  • 3-4 tbsp olive oil
  • 4 garlic cloves, minced or finely chopped
  • 1/2 - 1 tsp red pepper flakes
  • 2-3 lemons, zested and juiced
  • 1/2 cup heavy cream
  • 1 cup Parmesan cheese
  • 1 cup flat leaf parsley, finely chopped
  • 1/2 cup of fresh basil, finely sliced (chiffonade if you want to sound chefy)

Instructions

1

Bring a large pot of heavily salted water to a boil (you want to season the pasta)

2

Add the pasta and let it boil, uncovered, to al dente (read pkg instructions and check it around the time suggested on the pkg)

3

While the pasta is cooking, heat a large skillet over medium heat

4

Add the olive oil, garlic, and red pepper flakes

5

After about 5 minutes, add about a cup of the pasta water, lemon juice, and cream to the skillet

6

Pasta should be about ready. When al dente, drain and add the pasta to the skillet with the lemon zest and half the cheese

7

Turn off the heat and toss the pasta in the sauce

8

Once fully coated, transfer to a serving dish, top with the parsley, basil, and remaining Parmesan cheese

Chicken

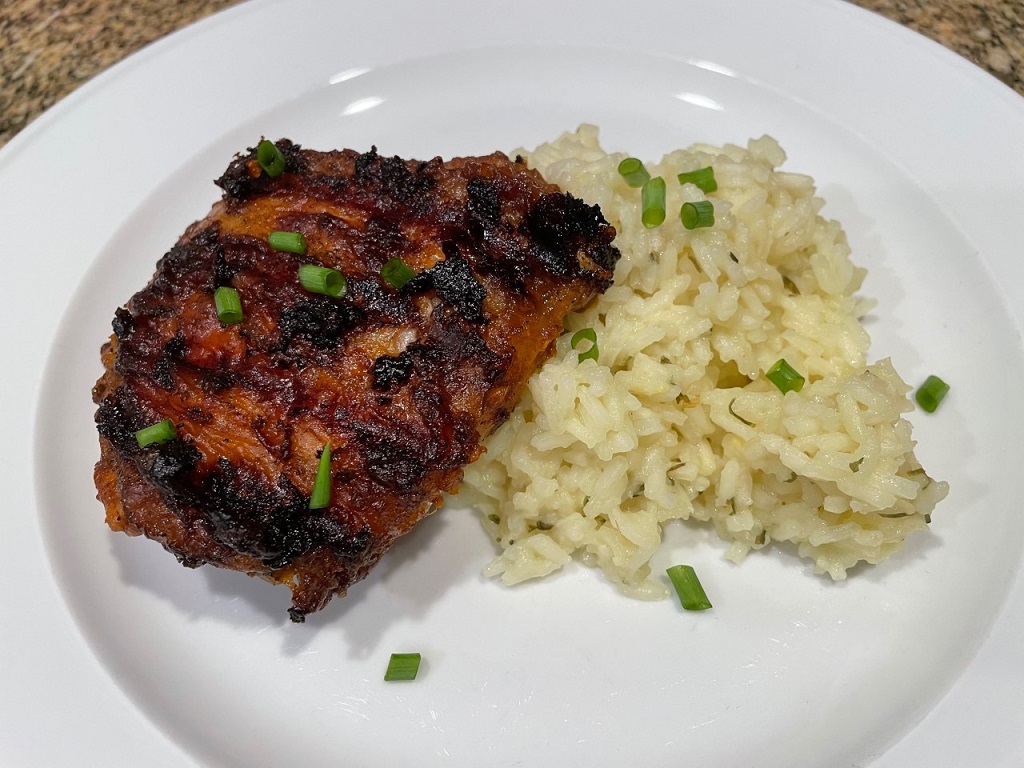
Peri-Peri Chicken with Cilantro Lime Rice

On the menu tonight – Peri Peri Chicken!

What is Peri-Peri? It’s a spicy little pepper, also known as African Bird’s Eye Chili. I heard about it on a cooking show and they mentioned how difficult it was to find this pepper. Challenge accepted! It took very little time to find a source on the internet, and within a few days I had a package from Thailand with my new found peppers!

I said it was a spicy pepper. Peppers’ heat is measured in Scoville units. A JalapeƱo pepper measures 2500-8000 Scoville units. The Peri-Peri measures 50,000 – 175,000 Scoville units, so they definitely put out some heat. The peppers are also pretty small, it looks like you would need a lot of them. Be careful.

The really funny/curious thing I found when researching recipes for Peri-Peri Chicken is I didn’t find one that actually used the Peri-Peri pepper. I know they aren’t a pepper that you’ll likely find in your local market, but at least have them in the recipe and put out an alternative. Rant over.

When you make this dish, it is best if you make the marinade, coat the chicken, and let it sit in the fridge for a day.

Take the chicken out of the fridge about an hour before cooking to allow it to come to room temperature. You can use that time to start your rice. My Cilantro Lime Rice is perfect with the Peri-Peri chicken.

The next time you plan to grill, try something different. Try making this dish and let me know what you think.

Peri-Peri Chicken

1 Star2 Stars3 Stars4 Stars5 Stars (No Ratings Yet)
Loading...
By Patrick Dulmage Serves: 4-6

Peri-Peri Chicken

Ingredients

  • 4-10 Peri-Peri Peppers (Arbol chilis if you can't find Peri-Peri)
  • 3 tbsp olive oil
  • 2 tbsp Kosher salt
  • 8 garlic cloves
  • 2 tbsp tomato paste
  • 1 shallot, finely chopped
  • 1 tbsp sugar
  • 1 tbsp paprika
  • 1 tbsp five-spice powder
  • 2 tsp lemon zest
  • 1/4 cup lemon juice
  • 1 tsp pepper
  • 1/8-1/4 tsp cayenne pepper
  • 3 bay leaves, crushed
  • 6 lbs bone-in chicken thighs
  • 1/2 cup roasted peanuts, finely chopped

Instructions

1

In a food processor, add the chilis, oil, salt, garlic, tomato paste, shallot, sugar, paprika, five spice powder, lemon zest, lemon juice, pepper, cayenne, and bay leaves. Process until smooth

2

Taste it to check the heat level. You want it hotter, add more peppers and/or cayenne pepper

3

Pierce the chicken pieces all over with a knife or skewer to let the mixture get deep into each piece.

4

Put the chicken, peanuts, and sauce in a freezer bag. Mix it up until the chicken is fully coated

5

Put in the fridge at least 6 hours, better over night

6

When it is time to cook, pull the chicken from the fridge early enough to let it come to room temperature (about 20 - 30 minutes)

7

Pre-heat the grill to high

8

Put a pie tin with about 2-3 cups of water on one side of the grill and the chicken on the other.

9

Maintain a grill temp of about 325-350 degrees

10

Grill until you get a nice char on each side, about 5 minutes on each side

11

Once it looks good, move to a cooler part of the grill or lower the heat to finish cooking

12

We are looking for an internal temp of about 160 degrees (temperature will rise about 5 more degrees as you let it rest)

13

If the juice runs clear, it's fully cooked. If you see some pink in the juice, it needs more time

14

Serve with some lemon wedges to squeeze over each piece

Beef/ Pork/ Sauces

Bacon Jam with Classic Hamburger

On the menu tonight – Bacon Jam! I’ve seen bacon jam included in a lot of hamburger recipes I have seen on Food Network. It always looks so good, I decided to make some. It was SO GOOD!

Start with about 2 pounds of your favorite bacon by cooking it until crispy. Once it has cooled enough to touch, chop it into relatively small pieces.

Then, add the chopped bacon and the rest of the other ingredients back to the same pan you cooked the bacon. Bring to a boil, then reduce to a simmer for about 45 minutes.

Since I saw it served over a hamburger, that’s what made – a Classic Hamburger. All I had on that burger was the bacon jam, a little lettuce, a few pickles, and it was fantastic.

If you want to serve something a little different and a LOT delicious, make a batch of bacon jam. Let me know how it turns out.

Bacon Jam with Classic Hamburger

1 Star2 Stars3 Stars4 Stars5 Stars (No Ratings Yet)
Loading...
By Patrick Dulmage Serves: 8-12

Bacon Jam with Classic Hamburger

Ingredients

  • 2 lbs cooked and chopped bacon
  • 1 Red onion - chopped
  • 3 cloves Garlic - minced
  • 1/2 cup Molasses
  • 1/2 cup Brown sugar
  • 1/2 cup Honey
  • 1/4 cup Apple Cider Vinegar
  • 1/4 cup Sherry Wine
  • 1 tsp Dry Mustard
  • 2 tsp Garlic Powder

Instructions

1

Cook the bacon until crispy and set aside, reserve about 2 tbsp of the grease for cooking the onion and garlic

2

Add the chopped bacon, onions, garlic, brown sugar, molasses, honey, apple cider vinegar, sherry, and dry mustard to the pan

3

Bring to a boil and then reduce to a simmer

4

Simmer until it gets syrupy, about 45 minutes

5

Stir frequently, don't let it burn

6

Once it is the consistency you want, transfer to a container, let cool, and store in the fridge

7

Serve over hamburgers, hotdogs, anything you want to add bacony goodness to

Seafood/ Vegetarian

Shrimp and Crab “Boil” with Potatoes and Corn

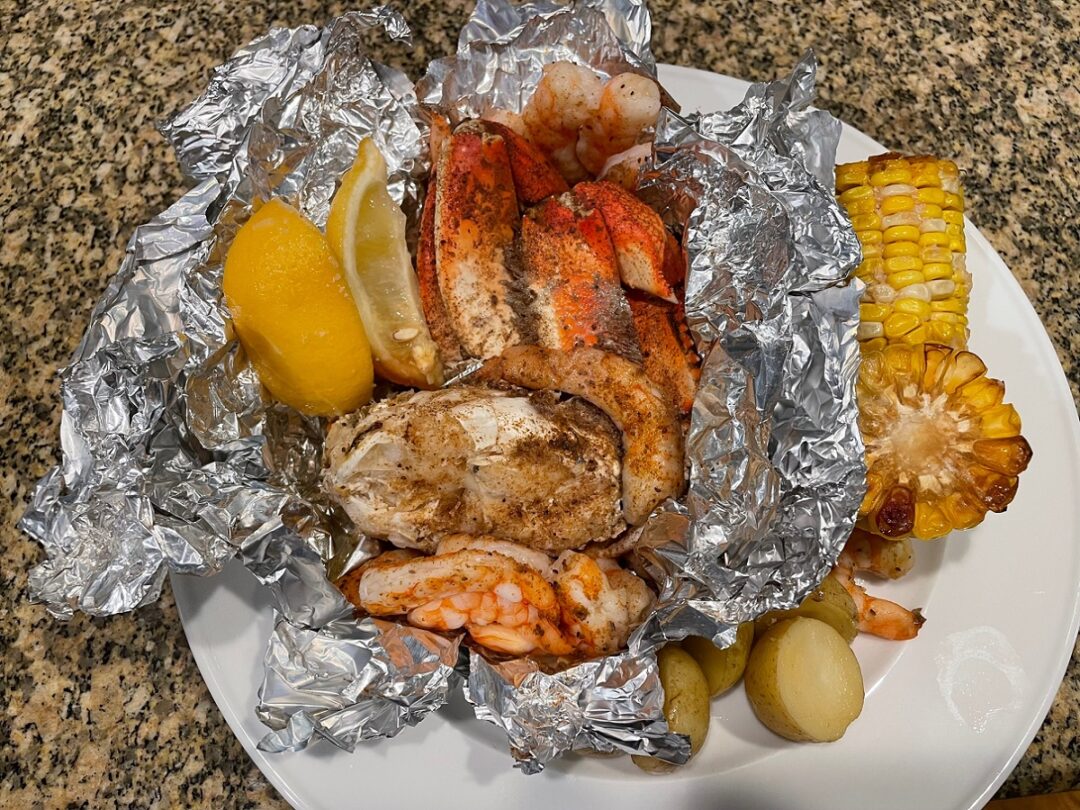
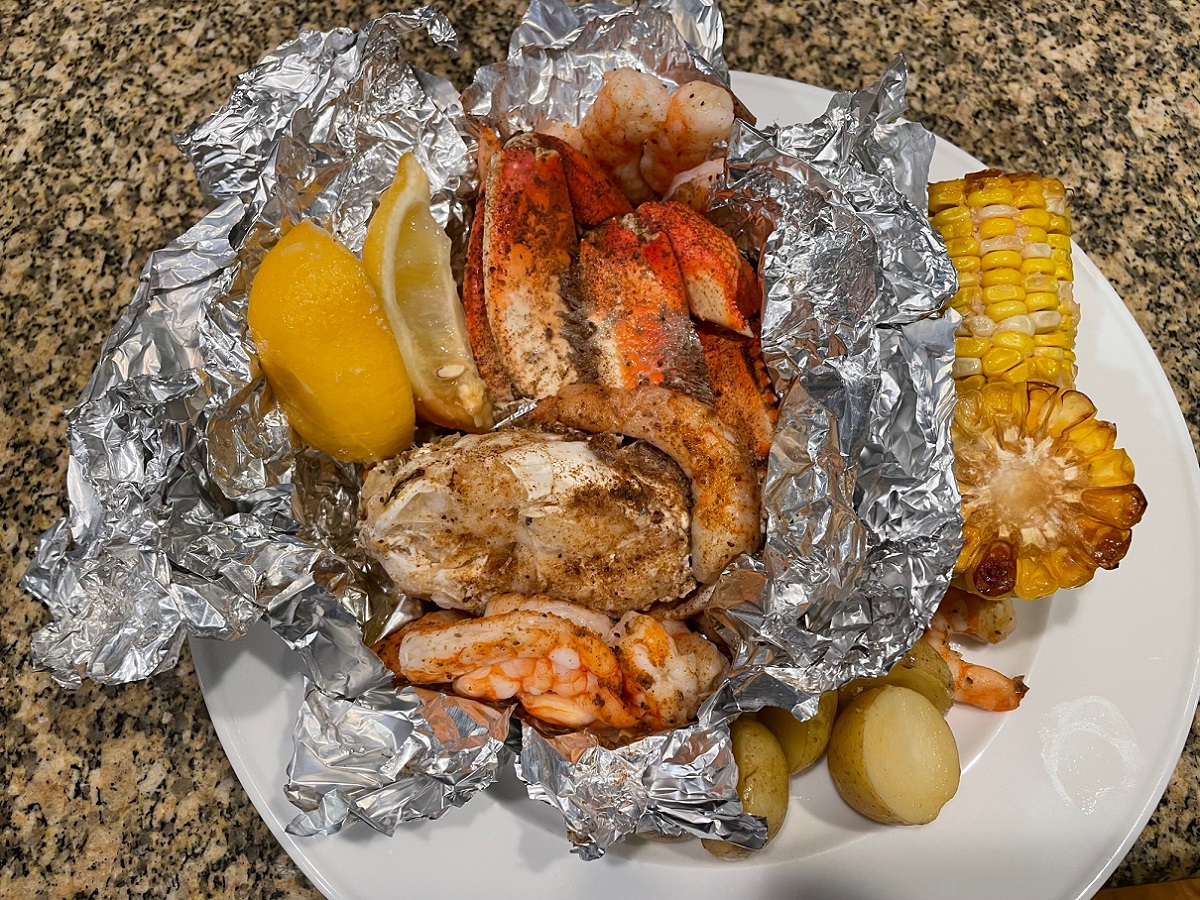
We wanted to do a shrimp boil, but decided to try doing it in the oven rather than boiling everything. It was definitely a success!

The best part of making this meal is there really isn’t much to do. Pre-heat the oven, get a sheet pan or two and put all your stuff on the sheet pans. You do need to put the shrimp and crabs in foil packets, that was the hardest part of making this meal.

For the foil packets, I evenly divided the shrimp and crabs into portion sizes, liberally sprinkled with Old Bay seasoning along with some butter and some liquid. I used beer. Once you have everything in the packets, seal them tightly and add to the sheet pan. Add the corn and potatoes to the sheet pan and put it all in the oven.

We didn’t do any sausage in this boil, but it would be a great addition.

As the seafood cooks, cover your table with newspaper and get a discard bowl for the crab legs. When ready, serve with some cold beer and good music. I hope you will try this way of doing a shrimp and crab boil.

Shrimp and Crab

1 Star2 Stars3 Stars4 Stars5 Stars (No Ratings Yet)
Loading...
By Patrick Dulmage Serves: 4-6

Shrimp and Crab "Boil" with Potatoes and Corn

Ingredients

  • 1 1/2 lbs small potatoes - cut into 1/2 - 1 inch pieces if necessary. You want to make sure they'll cook through in time without overcooking the seafood.
  • 2 ears of corn cut into thirds
  • 1-2 lemons - quartered
  • 2 lbs shrimp - deviened
  • 2-3 lbs crab legs - Snow Crab or Dungeness
  • 6-8 sprigs of thyme
  • 3-4 tbsp Old Bay Seasoning
  • 4-6 tbsp butter
  • 1 can/bottle of beer

Instructions

1

Pre-heat the oven to 400 degrees

2

Put the potatoes in a bowl and cook them in the microwave oven for about 6-8 minutes (if the potato hasn't been halved, prick with a fork to prevent it from exploding)

3

While the potatoes cook in the microwave, put the corn on the sheet pan

4

Make the foil packets for the shrimp and crab, cut the foil large enough you can easily seal the packet

5

Evenly distribute the shrimp and crab into serving sized portions to the packet, then season generously season with Old Bay

6

Add a few ounces of beer to each packet as well as a pat of butter or two, then tightly seal the packet

7

Add the potatoes to the sheet pan

8

Season the corn and potatoes with salt and thyme

9

Add a few more pats of butter and one of quartered lemons to the sheet pan

10

Bake for 40-45 minutes (check them at about 30-35 minutes, you don't want overcooked seafood)

11

Cover a table with newspaper and serve your feast

Notes

You could also add sausage links to the sheet pan

Beef/ Italian

Stuffed Shells with Ground Beef and Mushrooms

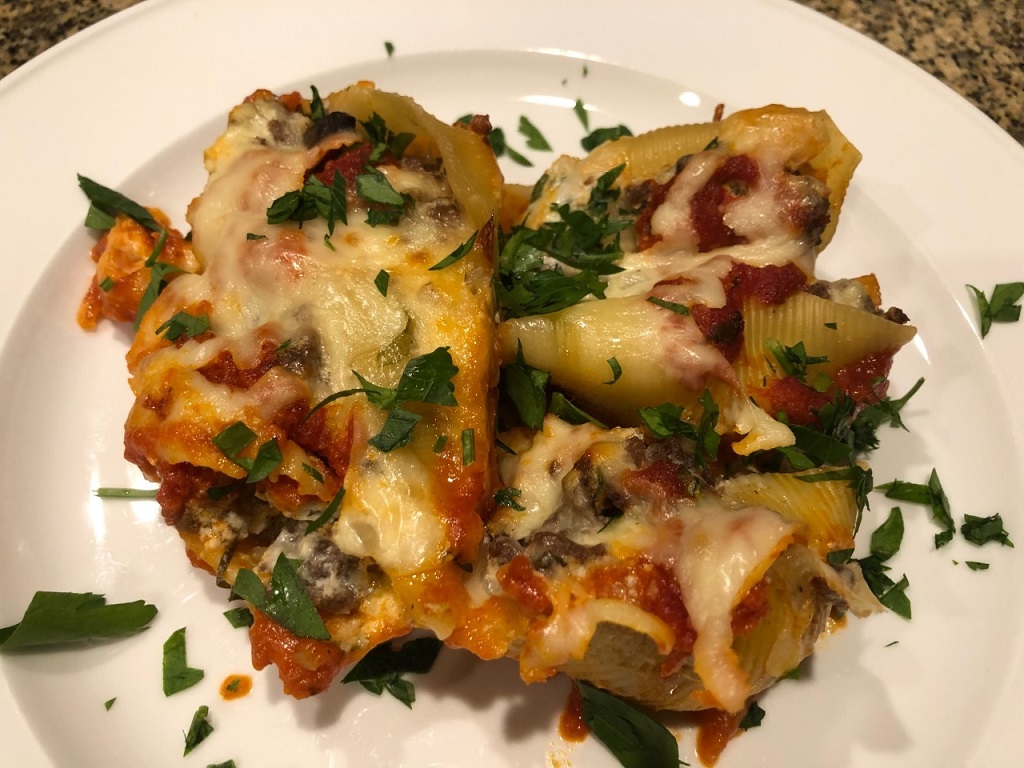
It’s kind of rainy today and I decided to make a comforting pasta dish – Stuffed Shells with Ground Beef and Mushrooms!

There isn’t anything difficult about making this dish, but there are a few steps. You have to brown the ground beef, cooked with onions and mushrooms, then set it aside to cool off. Then, make the cheese mixture with ricotta, Parmesan, and mozzarella along with garlic, basil, and Italian parsley. Mix the meat and cheese mixtures together. Then, cook the pasta shells and let those cool off.

With all the components prepared, it’s time to assemble. Get a 13×9 baking dish and add about a cup of the marinara sauce. Then, start assembling the shells. Take a spoonful of the meat and cheese mixture and carefully fill the shells to fill up the baking dish. Finally, top the shells with some more marinara sauce and some mozzarella cheese. Bake it until the cheese is bubbly and golden brown. Serve it with some garlic bread – enjoy!

Hopefully, you’ll have some leftovers for your lunch during the week. Let me know how your version turns out.

Stuffed Shells with Ground Beef and Mushrooms

1 Star2 Stars3 Stars4 Stars5 Stars (No Ratings Yet)
Loading...
By Patrick Dulmage Serves: 6-8
Prep Time: 20 minutes Cooking Time: 45 minutes Total Time: 1 hour

Stuffed Shells with Ground Beef and Mushrooms

Ingredients

  • 1 lb ground beef
  • 1 box large pasta shells
  • 15 oz ricotta cheese
  • 4-6 oz sliced cremini mushrooms
  • 3 cups grated mozzarella cheese
  • 1 cup Parmesan cheese, grated
  • 1 medium onion, chopped
  • 3 Tbsp freshly chopped Italian parsley
  • 1 Tbsp freshly ripped basil (dry will do if you don't have fresh)
  • 2-3 cloves garlic, minced
  • 3 cups marinara sauce
  • Kosher salt and pepper to taste

Instructions

1

Pre-heat a large skillet over medium-high heat

2

Brown the ground beef and season with salt and pepper

3

Add the onions and mushrooms, cook until the onions are translucent

4

Set the beef mixture aside to cool

5

Pre-heat the oven to 350 degrees and bring a large pot of water to a boil

6

In a large mixing bowl, add the ricotta, parsley, basil, garlic, the Parmesan cheese, about half the mozzarella cheese, stir to combine

7

Once the water comes to a boil, add the shells and cook to aldente. The shells need to be firm enough for you to stuff without them falling apart

8

Add the meat mixture to cheese mixture, stir to combine

9

In a 13x9 baking dish, put in about a cup of marina

10

Once the shells have finished cooking, remove from the water and let cool

11

Start filling the shells with the meat and cheese mixture and add the shells to the baking dish

12

Once all the shells are stuffed, top with marinara and the rest of the mozzarella cheese

13

Bake until the cheese is golden brown

Vegetarian

Falafel with Tzatziki Sauce

If you like falafel, you MUST try this recipe. Most of the times I have ordered this out somewhere, it has been disappointing. Either the flavors are just bland or it has been overcooked.

In this recipe, I used a BUNCH of spices that give it fantastic flavor. Get some good pita or flat bread, make some tzatziki sauce and try my falafel.

Falafel with Tzatziki Sauce

1 Star2 Stars3 Stars4 Stars5 Stars (No Ratings Yet)
Loading...
By Patrick Dulmage Serves: 4
Prep Time: 15 minutes Cooking Time: 30 minutes Total Time: 45 minutes

Falafel with Tzatziki Sauce

Ingredients

  • Falafel:
  • 1 can Garbanzo beans
  • 1/2 cup cilantro, rough chop
  • 1/2 cup parsley, rough chop
  • 1 Tbsp coriander
  • 1 tsp cumin
  • 1/2 tsp turmeric
  • 1 small onion, rough chop
  • 3 scallions, rough chop
  • 4 cloves garlic, smashed
  • 1 tsp baking powder
  • 1/2 tsp cinnamon
  • 1/4 tsp cardamom
  • 1/2 tsp dry ground ginger (or fresh)
  • 1/4 tsp red pepper flakes
  • 1/8 tsp cayenne pepper
  • zest and juice of 1 lemon
  • 1/3 cup flour
  • 1 large egg, beaten
  • sea salt and freshly ground pepper to taste
  • Oil for frying
  • Pita or Flatbread
  • Lettuce, chopped
  • Tzatziki Sauce:
  • 1 pint Plain Greek Yogurt
  • 1 English cucumber, seeded and finely chopped
  • 1 tbsp Kosher salt
  • 1/2 cup sour cream
  • 1 tbsp vinegar, Champagne or white
  • 2 tbsp lemon juice
  • 1 tbsp olive oil
  • 2-3 cloves minced garlic
  • 1 1/2 tsp dill
  • pinch of fresh black pepper

Instructions

1

In a food processor, pour in the garbanzo beans, spices, garlic, cilantro, parsley, egg, lemon zest and juice.

2

Pulse until combined. You will need to scrape down the sides periodically.

3

Add the flour and baking powder, pulse until combined.

4

Put the mixture in the refrigerator for about 30 minutes.

5

Preheat the oil in a cast iron pan.

6

Form the falafel balls and gently drop into the oil. (I used a small ice cream scoop and it was SO much easier than using spoons)

7

Turn the falafel as they cook to make sure they cook evenly on all sides.

8

Once finished cooking, remove to a plate lined with paper towels.

9

Tzatziki Sauce:

10

Put the yogurt in a small colander lined with a tea towel or paper towel over another bowl and let the yogurt give off some moisture. Put in the fridge for 3-4 hours

Beef

Ground Beef Enchiladas with Olives and Cheddar Cheese

On the menu tonight, Ground Beef Enchiladas. I’ve made enchiladas before but these are different in that I didn’t use a lot of sauce on top. I also added olives, which I don’t normally use, but it turned out delicious. Other enchilada dishes I have made used flour tortillas, but I used corn tortillas in this dish. The taste and texture changes were really nice.

Unlike a lot of enchiladas I’ve had, this one has a lot of veggies with the meat. I mentioned the olives but there are also onions and green bell pepper. This isn’t a spicy dish, but you could easily add a little cayenne pepper and or jalapeno (or hotter) peppers to give it some heat. The most interesting change I made was adding Chinese 5 spice. WHAT?? In enchiladas?? Yes! It was so good.

If you don’t eat meat, you could easily substitute the ground beef with Impossible burger. I hope the next time you are in the mood for enchiladas, you will try my version.

Ground Beef Enchiladas with Olives and Cheddar Cheese

Ground Beef Enchiladas with Olives and Cheddar Cheese

1 Star2 Stars3 Stars4 Stars5 Stars (No Ratings Yet)
Loading...
By Patrick Dulmage Serves: 4-6
Prep Time: 15 minutes Cooking Time: 30 minutes Total Time: 45 minutes

Ground Beef Enchiladas with Olives and Cheddar Cheese

Ingredients

  • 1 lb ground beef
  • 1 green bell pepper, diced
  • 1 small Vidalia onion, diced
  • 1 14 oz can crushed tomatoes
  • 1 tsp Chinese 5-spice powder
  • 1/4 cup green olives, chopped
  • 12 6" corn tortillas
  • 2 cups medium cheddar cheese, grated
  • 1 cup Cotija cheese, crumbled
  • Kosher salt and pepper to taste
  • 2-3 Tbsp olive oil

Instructions

1

Pre-heat the oven to 350 degrees

2

Pre-heat a large skillet with a little olive oil over medium-high heat

3

Add the onion and bell pepper to the pan and season with a little salt and pepper

4

Cook until the onions are translucent, about 5 minutes

5

Add the ground beef and season it with the 5-spice powder along with salt and pepper

6

Break up the ground beef and let it carmelize, another 5-10 minutes

7

Add the tomatoes and olives to the pan, stir to combine

8

Cook another 2-3 minutes and taste for seasoning

9

Remove and set aside

10

Heat some more oil in the pan and heat the tortillas on each side - 10-15 seconds per side

11

Place the cooked tortillas on a lined plate to absorb any excess oil

12

In a 13x9 baking dish, put down some of the meat mixture, about 1/2 cup

13

Start assembling the enchiladas. Put about 1/4 cup of mixture in the middle of tortilla along with a sprinkle of cheese

14

Roll the filled tortilla tightly and put in the baking dish seam-side down

15

Repeat until you've used all the tortillas and top the entire baking dish with some additional cheddar and Cotija cheese

16

Bake for 15-20 minutes until the cheese melts

17

Serve with some sour cream, salsa, and maybe some home-made guacamole

Italian/ Vegetarian

Classic Eggplant Parmesan

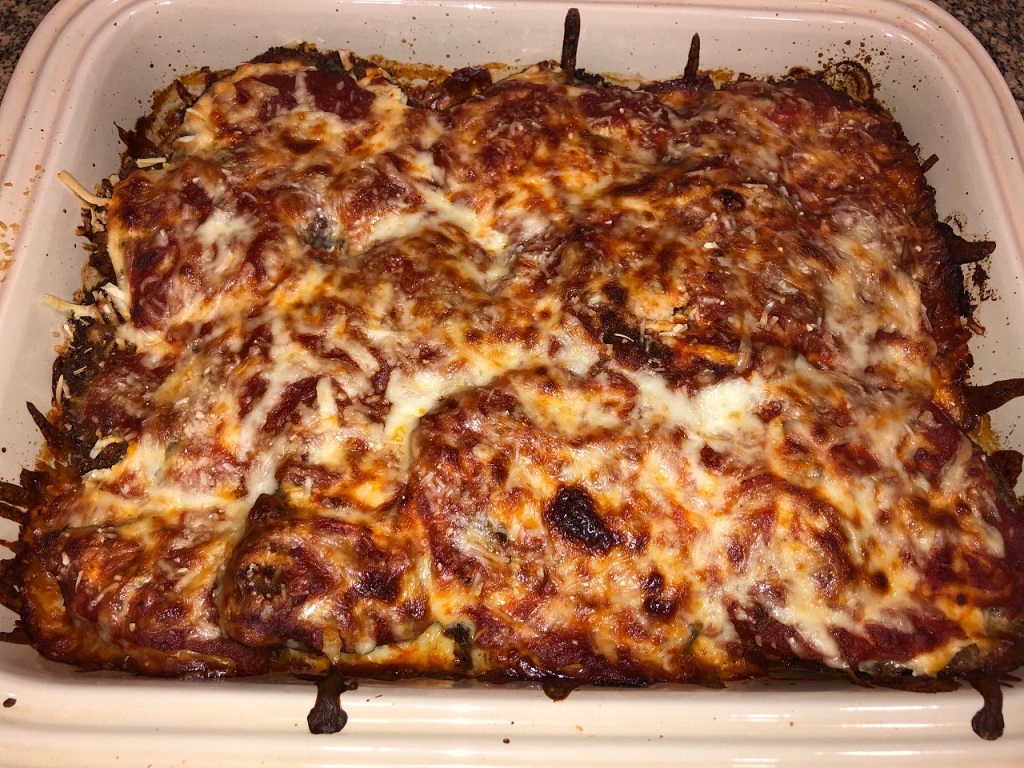
Last night, I made eggplant Parmesan for dinner. I hadn’t had it in a while and I decided to make the classic version. It was fantastic!

If you can, take the time to sprinkle the eggplant slices with salt and let them sit about an hour before you start cooking. That step will make the eggplant less bitter and pull out some of the moisture. You can work on the sauce while the eggplant is resting. After an hour has passed, rinse the eggplant and dry them with a kitchen towel. You will be really happy with the results taking the time to do this step.

I like to make my own sauce, but feel free to use your favorite jarred sauce. If I use a store bought sauce, I still doctor it up with some additional seasoning.

I hope you’ll try my eggplant parmesan and let me know what you think.

Classic Eggplant Parmesan

1 Star2 Stars3 Stars4 Stars5 Stars (No Ratings Yet)
Loading...
By Patrick Dulmage Serves: 8-12
Prep Time: 1 hour Cooking Time: 1 hour Total Time: 2 hours

Classic Eggplant Parmesan

Ingredients

  • Eggplant:
  • 2 medium eggplants, 1/2 inch slices
  • 1/2 cup flour
  • 5 eggs, beaten
  • 4 cups Italian bread crumbs
  • Oregano
  • Thyme
  • salt and pepper
  • oil for frying
  • 1 1/2 pounds mozzarella, grated
  • 1/2 cup Parmesan cheese, grated
  • 1-2 handfuls fresh basil leaves, torn into smalls pieces
  • Sauce:
  • 2 28 oz. cans San Marzano tomatoes
  • 1/2-1 can tomato paste (I like a thicker sauce for this application)
  • 1 cup water
  • 1 Vidalia onion, diced
  • 4-7 cloves garlic, minced
  • 1/2 cup olive oil
  • 1 Tbsp Italian seasoning
  • 1 tsp red pepper flakes
  • 1 Tbsp oregano
  • 1 tsp kosher salt
  • 1 tsp black pepper

Instructions

1

Start with the sauce. Crush the tomatoes in a large mixing bowl with your hands

2

Pour 1 cup water in the cans to get the rest of the tomato juice. Reserve

3

Heat the oil in a large skillet over medium heat

4

When the oil is hot, add the garlic - don't let it burn

5

After about a minute, add the tomatoes, tomato paste, tomato water, red pepper flakes, oregano, and Kosher salt

6

Simmer the sauce until thickened

7

Taste for seasoning and adjust as needed

8

Prep the eggplant. Slice into 1/2 discs, put on a sheet tray and sprinkle salt on both sides. Let it sit about an hour

9

After an hour, rinse off the salt and dry the eggplant thoroughly with a kitchen towel

10

Heat the oil in a large cast iron skillet to 350 degrees (use a candy thermometer to make sure the oil maintains 350 degrees)

11

Put the flour in a pie tin or baking dish and season with freshly ground pepper and kosher salt

12

Put the beaten eggs in a pie tin

13

In a third pie tin or baking dish, mix the Italian bread crumbs, thyme, oregano, salt and pepper

14

Pre-heat the oven to 350 degrees

15

Get a sheet pan lined with paper towels or a wire rack to drain the eggplant

16

Dip the eggplant slices in the flour and shake off any excess flour

17

Dip the eggplant slices in the eggs

18

Dip the eggplant slices in the Italian Breadcrumb mixture and coat thoroughly

19

Carefully put the coated eggplant slices in the frying pan, working in batches

20

When the eggplant is golden brown, remove to the lined tray

21

Once it is all cooked, start assembling in a 13x9 baking dish

22

Put down enough of the sauce in the baking dish to coat the bottom

23

Add a layer of the eggplant, top with some mozzarella, some Parmesan, some of the basil leaves, and some sauce

24

Continue layering until you used up all the eggplant. Make sure the top has a nice layer of cheese

25

Bake for 35-40 minutes until the cheese is golden brown

26

I like to put it under the broiler for a few minutes to make sure the cheese gets browned and delicious

27

Let it rest about 10 minutes and serve