All Posts By:

patrickdulmage

Leftovers/ Thanksgiving/ Turkey

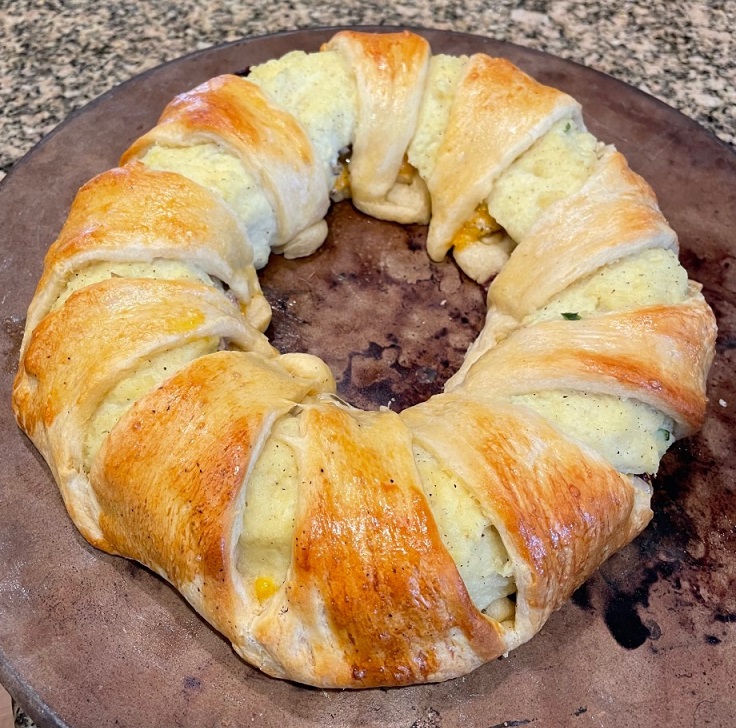
Turkey Crescent Wreath with Gravy

On the menu tonight – Turkey Crescent Wreath!

Thanksgiving has passed and now you have a refrigerator full of leftovers. You can only make so many turkey sandwiches before you are ready for something different. This recipe uses just about all the leftovers for one meal.

I used turkey, mashed potatoes, cheddar cheese, and craisins in my recipe, but feel free to add other things like green bean casserole, or any other leftovers. The only thing you may need to buy are the crescent rolls you find in the refrigerated section at the grocery store.

You already did most of the cooking. All you need to do to make this dish is chop the turkey into small pieces and combine it with a few other ingredients in bowl. Then assemble the crescent wreath and bake. 30 minutes later, you have a fresh new meal for the family.

I hope the next time you are looking for an idea to use up Thanksgiving leftovers, you will try my Thanksgiving Crescent Wreath!

Thanksgiving Crescent Wreath with Gravy

1 Star2 Stars3 Stars4 Stars5 Stars (No Ratings Yet)
Loading...
By Patrick Dulmage Serves: 6-8
Prep Time: 15 minutes Cooking Time: 25-30 minutes Total Time: 45 minutes

Thanksgiving Crescent Wreath with Gravy

Ingredients

  • 2 8 oz containers crescent rolls (8 count)
  • 2 cups cooked and chopped turkey
  • 2 cups mashed potatoes
  • 1 cup cranberry sauce or craisins
  • 8 oz block cheddar or Swiss cheese, grated
  • 1-2 cups mayonnaise
  • 1 egg, scrambled
  • 1 tsp ground sage
  • 1 tsp thyme
  • 1 tsp Kosher salt
  • 1 tsp freshly ground pepper
  • 1-2 cups turkey gravy

Instructions

1

Pre-heat the oven to 350 degrees

2

Carefully unroll the crescent rolls and arrange them on a baking sheet in a circle with the "fat" side of the triangle in the center and the points facing outward. You can use a bowl in the center as a guide

3

In a large bowl, add the turkey, cheese, craisins, mayonnaise, sage, thyme, salt and pepper, then mix to combine.

4

Taste the mixture and adjust seasoning

5

Spoon about 1-2 tablespoons of the mixture at a time on the "wreath" and continue around the circle

6

Spoon about the same amount of mashed potatoes on top of the mixture

7

Be careful not to overfill the wreath, you need to leave enough room to be able to fold the "points" over the mixture

8

Begin folding the points over the top and use a butter knife or offset spatula to fold the dough under to make the center pretty

9

Continue around the wreath until it is fully formed

10

Brush the egg on the dough and then put in the oven

11

Bake for 25-30 minutes (look for the top to be browned and the dough fully cooked)

12

When finished, let it rest at least 10 minutes before serving

13

Heat up the gravy while the wreath is resting

14

Serve and enjoy!

Notes

The method I used to form the wreath was using individual dough triangles formed into a circle and folding the points over. The dough comes out of the can in rectangles that you pull apart. You could also simply arrange the rectangles into a circle, fold the ends over the filling, and then carefully separate the pieces once the wreath is filled. Using that method, you could put a little more filling in. So, depending how many leftovers you have, you can choose which method you want to arrange the dough.

Thanksgiving/ Turkey

Roasted Turkey for Two with Gravy

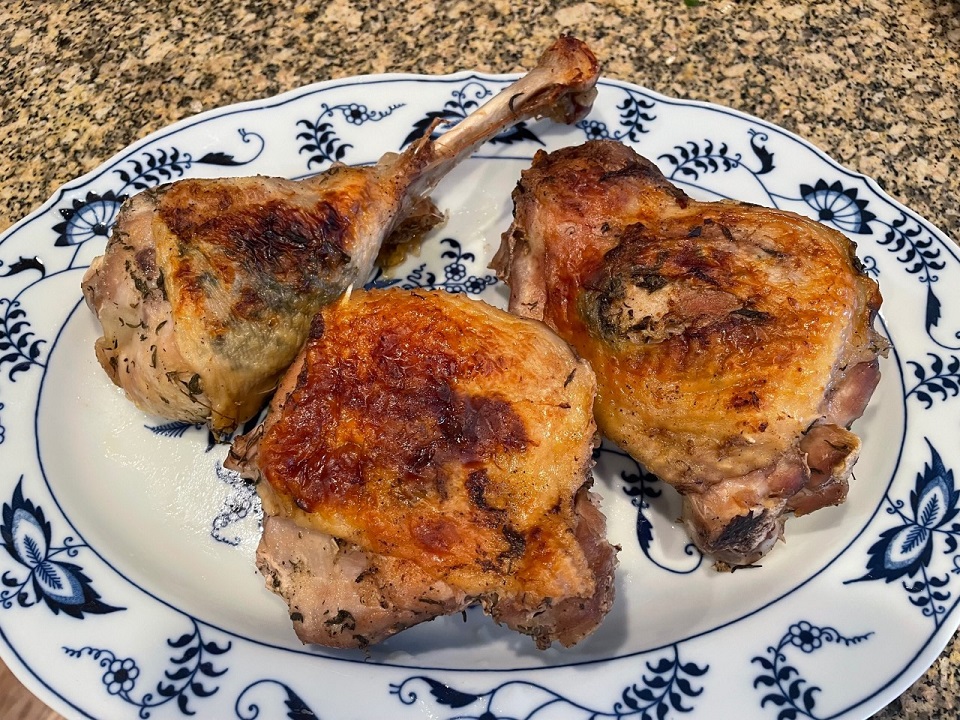
On the menu tonight – Roasted Turkey for Two!

Every now and then you don’t have the entire family over or can’t make it to a big Thanksgiving gathering, but you still want the turkey without cooking an entire bird. This recipe is for you!

Your grocery store likely has turkey parts in addition to the entire bird. The great thing about this is if you like dark meat, just get the dark meat. Want white and dark meat… you get the idea.

One of the tricks to a great turkey dinner is the brine. Brine your turkey at least a day prior to cooking. What’s a brine you ask? A brine is liquid and spices you soak the meat in. There are as many brine recipes as there are opinions, but I keep mine simple. I’m not 100% I can taste all the ingredients I’ve put in brines before, so I just use water, salt, peppercorns, and sugar. Amounts? It depends on how much meat you are brining. As long as you can cover the meat with liquid that is enough.

Since you aren’t cooking at giant bird, it isn’t going to take as long to fully cook. Also, you’ll have more room in the oven for the side dishes. Score!

If you want to cook a smaller Thanksgiving feast, I hope you will try my version of roast turkey!

Roasted Turkey for Two

1 Star2 Stars3 Stars4 Stars5 Stars (No Ratings Yet)
Loading...
By Patrick Dulmage Serves: 2-4

Roasted Turkey for Two

Ingredients

  • two turkey thighs
  • two turkey legs
  • 2 tsp fresh or dry thyme, divided
  • 1 tsp sage
  • 1 tsp paprika
  • 1 tsp garlic powder
  • 1 tsp onion powder
  • 1/2 - 1 lemon, sliced (It will depend how much turkey you end up using and how lemony you like it. Start with a half lemon)
  • 4-5 Tbsp butter
  • salt
  • pepper
  • 1 onion thickly sliced
  • 2 stalks celery cut into thirds, include the greens
  • Gravy:
  • 1 cup Turkey drippings
  • 4 Tbsp butter
  • 1/4 cup flour

Instructions

1

A day before cooking, put the meat in a container that will allow you to cover with liquid

2

Add the meat, water, about a quarter cup of salt, a quarter cup of sugar, and about 20 peppercorns to the container

3

The day you are going to cook take the turkey out and pat it dry

4

Pre-heat oven to 350 degrees

5

In a bowl, add the spices and mix thoroughly

6

In another bowl mix the softened butter with 1tsp thyme

7

Put a pat of butter under the skin of each piece of turkey and mash it around so it isn't one big clump. Continue putting the butter mixture under the skin of each piece until it's gone

8

Season the turkey on all sides with the dry spice mix

9

Put the onion, celery, and lemon in the bottom of the baking dish

10

Put the turkey, skin side down on top of the onion, celery, and lemon

11

Put in the oven and bake for about 30 minutes, covered

12

After 30 minutes, flip the turkey so the skin side is up and bake another 30 minutes or until temp has reached 160-165 degrees. We want nice brown skin

13

Once the turkey is finished, it's time to make the gravy.

14

In a sauce pan, heat the butter over medium heat

15

Add the flour slowly to make the roux

16

Slowly add the juices from the dish you cooked the turkey and whisk to avoid any lumps

17

Continue adding the liquid until you have the consistency you want while whisking

18

Once you have the consistency you like, put in a gravy boat and serve

Side Dishes/ Thanksgiving

Classic Mashed Potatoes

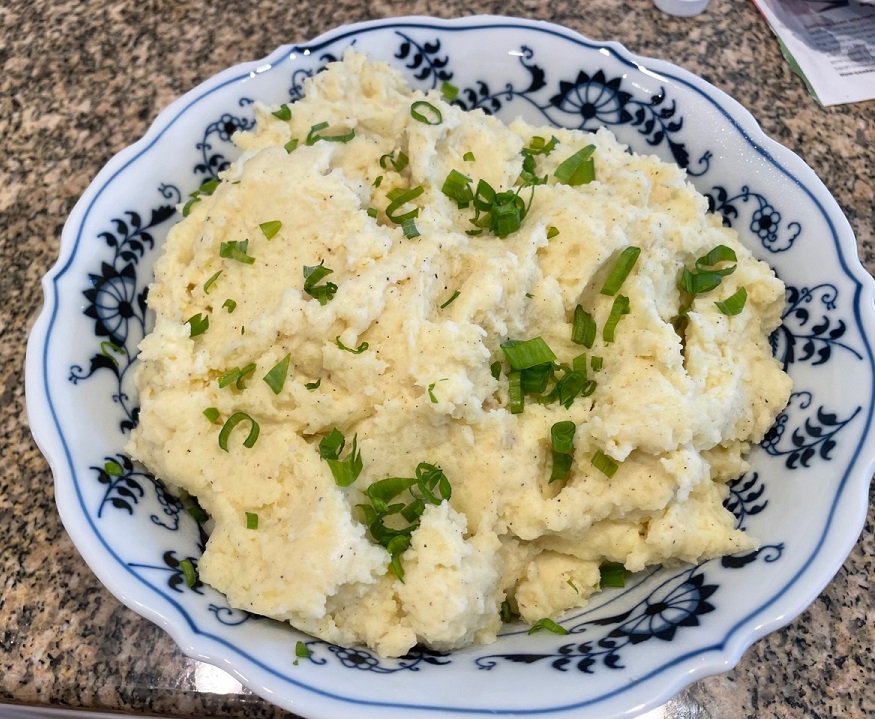
On the menu tonight – Classic Mashed Potatoes!

I’m assembling a collection of some classic Thanksgiving dishes and what is more classic than mashed potatoes. To get the best mashed potatoes, you need to start with the right potato. In my humble opinion, Yukon Golds make the best mashed potatoes – it has something to do with the level of starch. I’m not getting into all that…trust me on that one though. 🙂

Now that we know what type of potato we’re using, do you like them with a little chunk or do you want fluffy, smooth mashed potatoes? If you don’t mind a little chunk, all you need is a potato masher. If you want them fluffy and smooth, you will want a potato ricer – think giant garlic mincer. Another option is something called a food mill.

Potatoes will soak up liquid and flavor, so don’t be bashful with the butter or salt. Taste as you season, you can always add but you can’t take away when it comes to cooking.

Mashed potatoes are on every menu that I’ve ever seen. If you haven’t made mashed potatoes before, I hope you will try my version of classic mashed potatoes!

Classic Mashed Potatoes

1 Star2 Stars3 Stars4 Stars5 Stars (No Ratings Yet)
Loading...

Classic Mashed Potatoes

Ingredients

  • 2-2.5 lbs Yukon Gold Potatoes
  • 4-6 Tbsp of butter
  • 1 cup sour cream
  • 1/4-1/2 cup of milk, warmed
  • 3-6 Tbsp of cream cheese
  • Kosher Salt
  • Freshly ground black pepper
  • 1 or 2 chives, finely chopped (greens only please, save the white part for another dish)

Instructions

1

Prepare a large pot of water on the stove, but don't turn it on yet

2

Peel the potatoes and cut them to relatively equal size - I go for quarters. Don't cut them too small, but you want them to cook evenly

3

As you cut the potatoes, add them to the pot so they don't oxidize

4

Once you have them all in the pot, THEN turn it on high and bring to a boil

5

As the water is boiling, add a couple of tablespoons of salt, like you would when cooking pasta

6

After about 8-10 minutes, test if you can easily pierce the potato with a knife or fork (depending on your application, you may WANT them to be al dente. If you are putting the mashed potatoes on a shepherds pie as an example

7

Once cooked to your liking, drain in a colander

8

Add the butter to the pot along with the milk, then add the potatoes back to the pot and begin mashing. If you are going to use a ricer, have a large bowl ready and start ricing.

9

Add the cream cheese and mix that in along with your first bit of salt and pepper

10

Taste and adjust seasoning

11

Once they are seasoned how you want sprinkle the chopped chives on top and they will look like you got them from a fancy steak house

Notes

While I used black pepper, you could also use white pepper and then you wouldn't see the little black flecks

Casserole/ Side Dishes/ Thanksgiving/ Vegetarian

Corn Casserole with Cheddar Cheese

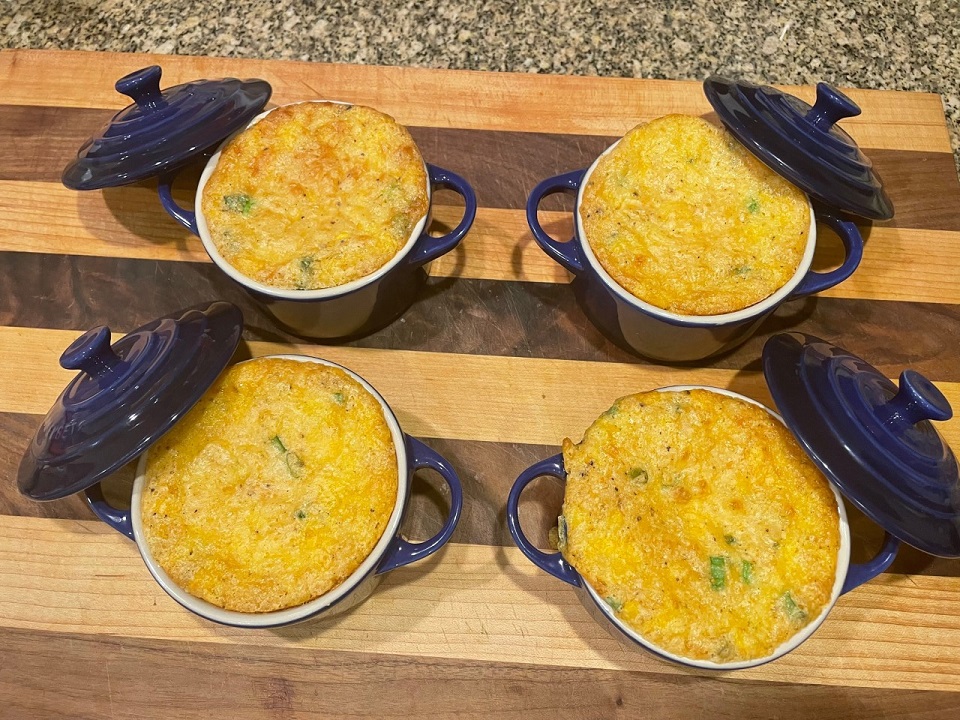
On the menu tonight, Corn Casserole!

I remember having this a LONG time ago and loving it. SO, I decided to add it to my Thanksgiving menu this year.

Rather than doing a cooking marathon on Thanksgiving day, I’m trying to get a few dishes made the night before that will heat up nicely. This corn casserole will definitely keep tonight and heat up well the next day.

One of the things I love about this dish, besides being delicious, is how quick it comes together. Dump the ingredients in the bowl, mix it together, and bake it. 30 minutes later, you have a DELICIOUS Corn Casserole!

If you are looking for a new side dish for Thanksgiving, or any night, try this Corn Casserole!

Corn Casserole

Corn Casserole

1 Star2 Stars3 Stars4 Stars5 Stars (No Ratings Yet)
Loading...

Corn Casserole

Ingredients

  • 1 cup corn meal (I used white corn meal but yellow is fine too)
  • 1 can whole corn, drained
  • 1 can creamed corn
  • 1 cup sour cream
  • 1 egg, beaten
  • 2 tsp baking soda
  • 1/4 cup chives, chopped
  • 1/4 cup sugar
  • 1 1/2 cups cheddar cheese, grated
  • 6 Tbsp melted butter
  • 1 1/2 tsp Kosher salt
  • 2 tsp fresh ground black pepper

Instructions

1

Pre-heat oven to 350 degrees

2

In a large mixing bowl, add all the ingredients and gently mix thoroughly

3

Add to a 2 quart baking dish, or divide into smaller, individual baking dishes (If you do this, check them sooner as they will cook faster)

4

Bake for about 30 minutes, the top should be golden brown

5

Once finished, remove and let rest at least 15 minutes

Notes

Whatever vessel you use to bake this casserole, leave room at the top as it WILL rise. To avoid spillover messes, you can put the baking dish(es) on a baking sheet.

Fish

Salmon Wellington

On the menu tonight – Salmon Wellington!

I was looking for something different to do with Salmon and decided to wrap it in puff pastry, making a version of Salmon Wellington. This dish came out really well and wasn’t difficult to make.

I used puff pastry, dijon mustard, dill, shallots, and mushrooms.

Once you cook the mushrooms and shallot, all you have to do is top the salmon with that mixture and bake. About 30 minutes later, you have a beautiful dish to serve your family or at a party. I’d recommend serving it with a little sour cream with dill on the side.

The next time you make salmon, I hope you will try this dish! Oh, while I made two big wrapped pieces of salmon, you could also do individually portioned Salmon Wellingtons. I may try that next time myself.

Salmon Wellington

1 Star2 Stars3 Stars4 Stars5 Stars (No Ratings Yet)
Loading...
By Patrick Dulmage Serves: 6-8
Prep Time: 10 minutes Cooking Time: 35 - 40 minutes Total Time: 45 minutes

Salmon Wellington

Ingredients

  • 3lb salmon, de-boned
  • 2 sheets puff pastry sheets, thawed and rolled out
  • 1 lb cremini or button mushrooms, sliced
  • 3-4 Tbsp butter, divided
  • 4 Tbsp Dijon mustard, grainy mustard works well too
  • 4 Tbsp dill
  • 1 shallot, finely chopped
  • 1-2 eggs, beaten
  • Kosher salt
  • Freshly ground black pepper
  • 1/2 cup sour cream with 1 tsp of dill mixed in for garnish - optional

Instructions

1

Thaw and roll out two sheets of puff pastry to accommodate salmon (size will be determined by the size of the salmon, but you don't want the puff pastry to be too thick when you bake it)

2

Pre-heat a large skillet over medium-high heat and add a tablespoon of butter

3

Add the sliced mushrooms to the pan and cook 3-4 minutes

4

Add the shallot to the mushrooms and cook an additional 2-3 minutes

5

When the mushrooms and shallots are cooked, remove from heat and set aside to cool

6

Cut the salmon so you have two uniform pieces to be wrapped in the pastry (you may need to cut one end of the salmon so you can stack the thin ends to make one thicker piece)

7

Place each piece of salmon on top of the puff pastry sheets

8

Slather the de-boned salmon with Dijon mustard, then season with Kosher salt and pepper to taste

9

Sprinkle the dill over the salmon, then add the mushroom and shallot mixture

10

Carefully wrap the salmon with the puff pastry and put on a rimmed baking sheet, seam-side down

11

Brush the puff pastry with the beaten egg and sprinkle with a little Kosher salt

12

Bake for about 30 minutes, the puff pastry should be golden brown

13

Serve immediately with sour cream on the side

Pork/ Wild Game

Pork and Alligator Sausage Onions and Peppers

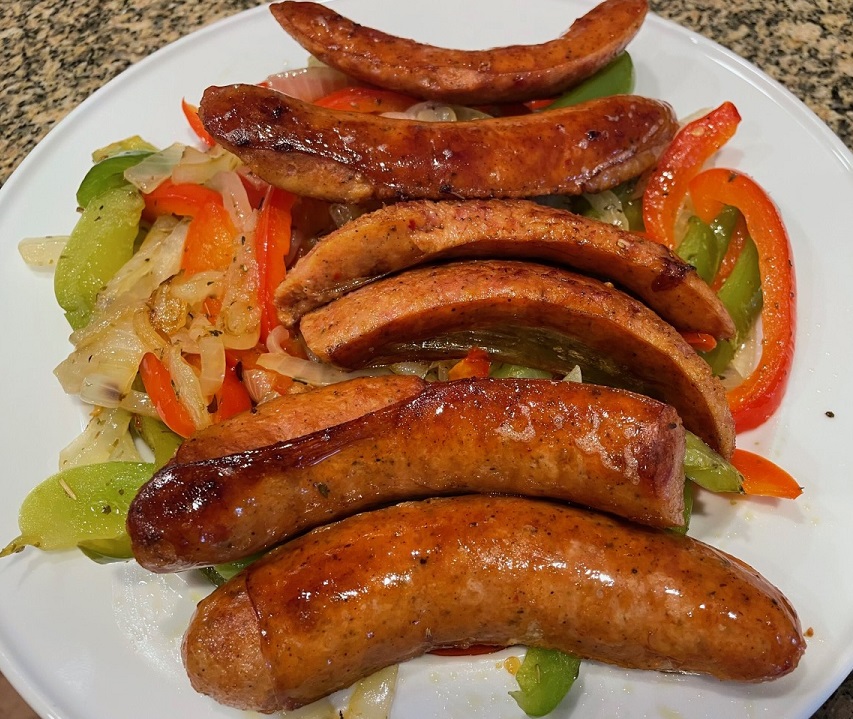
On the menu tonight – Sausage Onions and Peppers!

As I was doing my weekly grocery shopping, I saw these pork and alligator sausages and had to get them. I like to try different things and I certainly don’t see a lot of alligator on the menu in my area.

It took a minute to figure out what I would make without completely hiding the sausage. I wanted the sausage to be front and center. AH! Sausage, Onions, and Peppers!

My inspiration were the sausage onions and peppers I saw so much of on a recent trip to Boston. This version has a decidedly Southern style sausage smoked pork and alligator rather than an Italian hot sausage. Otherwise, this classic sausage, onions, and peppers.

The next time you want to try something easy to make, yet delicious – make Sausage, Onions, and Peppers. You can serve it on a bun with mustard, or on a platter with the sausage on a bed of the onions and peppers. Either way, DELICIOUS!

Pork and Alligator Sausage Onions and Peppers

1 Star2 Stars3 Stars4 Stars5 Stars (No Ratings Yet)
Loading...
By Patrick Dulmage Serves: 3
Prep Time: 10 minutes Cooking Time: 25 minutes Total Time: 35 minutes

Pork and Alligator Sausage Onions and Peppers

Ingredients

  • 1 pkg sausage (I used Country Pleasin' brand)
  • 12 oz beer
  • 1 onions, sliced
  • 1 bell peppers, sliced
  • 1 Tbsp olive oil

Instructions

1

In a medium sauce pan heat the beer and the sausages over low to medium heat - 15 - 20 minutes. You just want to heat them throughout before browning

2

While the beer and sausages heat up, put a large pan with straight sides over medium heat

3

Add olive oil, the onions, and peppers

4

Cook the onions and peppers until translucent - about 5 minutes

5

Remove the onions and peppers once cooked and set aside

6

When the sausages have warmed through, add to the pan and brown on all side. I cut mine in half to maximize the browning

7

Serve immediately

Beef

Classic Beef Stroganoff

On the menu tonight – Beef Stroganoff!

I love beef stroganoff. I love the fall apart goodness of the beef and the buttery noodles along with the creaminess from the sour cream and cream cheese. DELICIOUS!

This is one of those dishes that has been around forever and made a thousand ways. When I made this, I wanted to make the version I remember as a kid. I think I came pretty close. The next time you want Beef Stroganoff, I hope you will try my version.

Beef Stroganoff

1 Star2 Stars3 Stars4 Stars5 Stars (No Ratings Yet)
Loading...
By Patrick Dulmage Serves: 6-8
Prep Time: 15 minutes Cooking Time: 3 hours 15 minutes Total Time: 3 hours 30 minutes

Beef Stroganoff

Ingredients

  • 2 lbs beef, 2" cubes (chuck roast or whatever cut you would use for stew)
  • 1 stick of butter, divided
  • 1 Tbsp canola oil
  • 1-2 bay leaves
  • 1 medium Vidalia onion, sliced
  • 2 cups cremini mushrooms, sliced
  • 2 cups beef broth
  • 2-3 cloves garlic, minced
  • 2 Tbsp soy sauce
  • 1 Tbsp dry thyme
  • 2 Tbsp grainy or honey mustard
  • 16 oz extra-wide egg noodles
  • 1 cup sour cream
  • 4 oz cream cheese, cubed
  • Kosher salt, to taste
  • Pepper, to taste
  • 1/2 cup parsley, chopped

Instructions

1

Pre-heat a large Dutch oven over medium-high heat

2

Add the canola oil and 2 tablespoons of butter

3

Cook the meat in batches to get each side browned (you want a nice little crust on each piece)

4

Set aside the cooked meat

5

Once all the meat is cooked, add the sliced onions and mushrooms

6

Cook for about 8 minutes until the onions are translucent

7

Add the meat, beef stock, soy sauce, mustard, thyme, garlic (I intentionally put the garlic in later to ensure it doesn't burn), and the bay leaf

8

Bring to a simmer and let it cook for 3 hours

9

Bring a large pot of water to a boil

10

Heavily salt the water and add the noodles

11

Once the noodles are cooked, drain and add back to the pot with the rest of the butter

12

Mix the butter into the noodles

13

Add the sour cream, cream cheese, and half the chopped parsley to the meat and stir to incorporate

14

Season with salt and pepper to taste

15

For serving, put a bed of noodles on a plate, then ladle on the stroganoff mixture on top of the noodles

16

Sprinkle with a little more chopped parsley and serve

Vegetarian

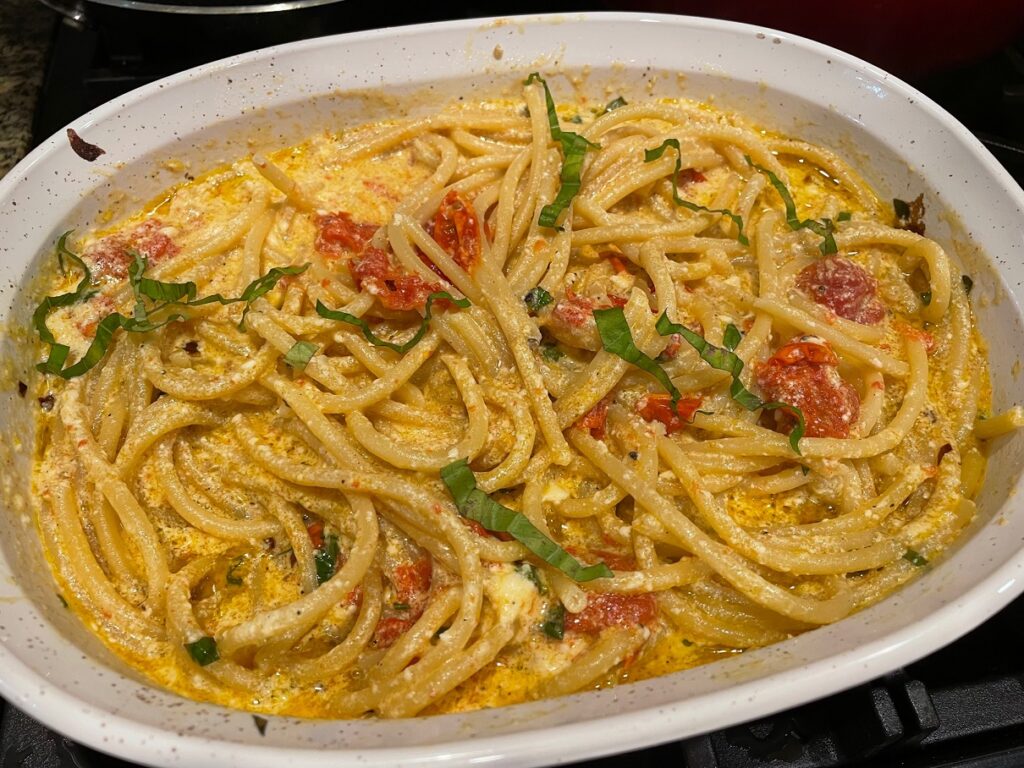
Baked Feta Cheese Pasta made with Bucatini

On the menu tonight – Baked Feta Pasta!

Going through the fridge, I was trying to figure out what to do a block of feta cheese. I stumbled upon this recipe and knew I had to make it – I’m glad that I did, it is SO good!

There aren’t that many ingredients, olive oil, feta cheese (of course), cherry tomatoes, pasta, basil and a few spices. That said, use good ingredients because there is nowhere to hide regarding flavor.

In addition to being delicious, it doesn’t take very long to make, 45 minutes. After seasoning the tomatoes with olive oil, salt, and pepper, put them in the oven for 30 minutes. After the time is up, I flipped the feta, added some red pepper flakes and put it back in the oven for another 15 minutes. Once the time is up, serve and garnish with basil.

I hope the next time you aren’t sure what to make, try this quick, inexpensive, delicious, and vegetarian meal. Let me know how your version turns out.

Baked Feta Bucatini

Baked Feta Cheese Pasta made with Bucatini

1 Star2 Stars3 Stars4 Stars5 Stars (No Ratings Yet)
Loading...
By Patrick Dulmage Serves: 6-8
Cooking Time: 45 minutes

Baked Feta Cheese Pasta made with Bucatini

Ingredients

  • 10 oz. Pasta - I used Bucatini, but you could use rigatoni, elbow macaroni... your choice
  • 1 block Feta cheese, about 1 lb. (my package literally said random weight LOL)
  • 2 pints cherry tomatoes
  • 1/2 cup olive oil
  • 2 cloves garlic, minced
  • 1/4 cup fresh basil, chiffonade or hand ripped
  • 1-2 tsp crushed red pepper flakes
  • Kosher Salt
  • Freshly ground pepper

Instructions

1

Pre-heat the oven to 400 degrees

2

In a 3 quart baking dish, add the olive oil, tomatoes, salt and pepper, then toss to fully coat the tomatoes

3

Add the block of Feta

4

Put the baking dish with tomatoes in the oven and bake for 30 minutes

5

While the tomatoes are baking chiffonade the basil and start the water boiling

6

After 30 minutes, raise the temperature of the oven to 450 degrees, turn the block of feta over, and add the crushed red pepper

7

Bake for an additional 15 minutes and drop the pasta (cooked according to pkg instructions)

8

When you pull the dish from the oven, add the minced garlic, gently mash the tomatoes and feta cheese while mixing together

9

Add the cooked pasta and thoroughly coat the pasta

10

Garnish with the basil and serve

Notes

Take note of the cooking time for the pasta you choose as it will determine when you put it in the boiling water.

Beef/ Pork

Stuffed Cabbage – A Second Look

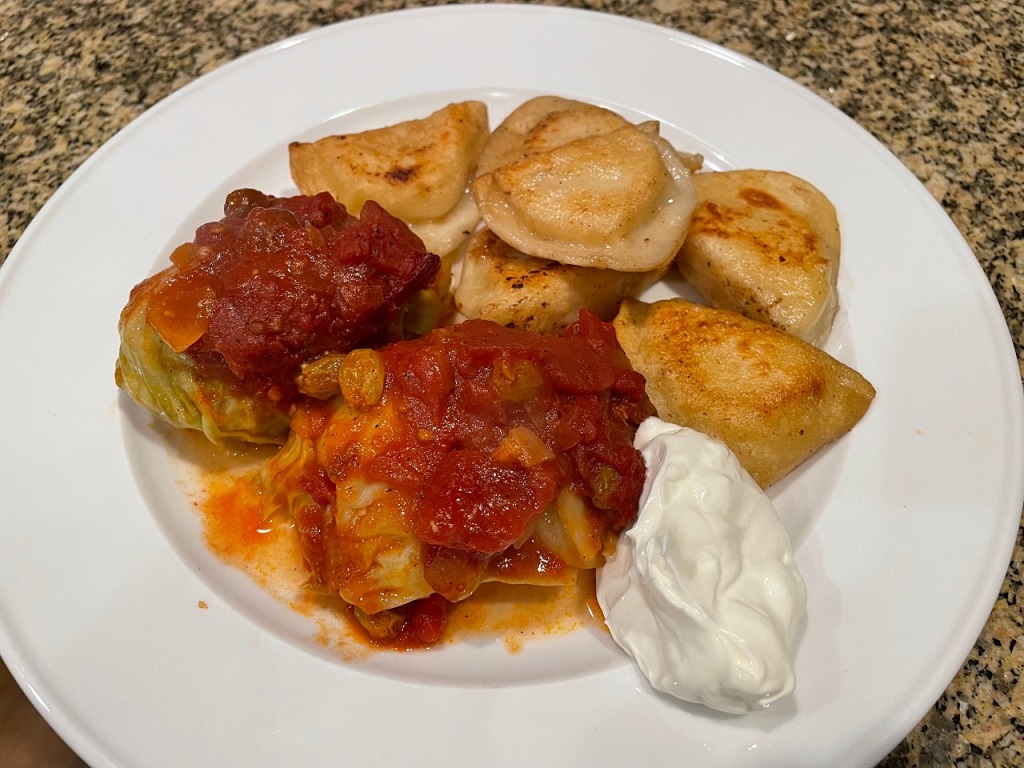
On the menu tonight – Stuffed Cabbage!

It’s that time of year again to make stuffed cabbage. I decided to try a little bit different version this time. While very similar to what I made last time, I used a few new ingredients, one of them was Cognac.

I usually bake this in a baking dish, but this time I did it in a Dutch oven in layers. Either way works fine, so use whichever method you prefer. There isn’t anything difficult about this dish, but getting that perfect cabbage leaf and meat mixture to roll pretty can be a little challenging. The good news is, it is going to get covered with sauce, so if it isn’t perfectly rolled it’s OK.

Stuffed Cabbage

Stuffed cabbage always brings me back to my grandmother’s place. I love sweet and sour tomato sauce, the sour from the red wine vinegar and the sweet from the brown sugar and raisins. As far as comfort food goes, this ranks right up there with meatloaf and mashed potatoes with gravy.

I hope you’ll make a batch of stuffed cabbage and let me know how your version turns out!

Stuffed Cabbage - A Second Look

1 Star2 Stars3 Stars4 Stars5 Stars (1 votes, average: 5.00 out of 5)
Loading...
By Patrick Dulmage Serves: 8-10
Prep Time: 30 minutes Cooking Time: 1 hour 30 minutes Total Time: 2 hours

Stuffed Cabbage - A Second Look

Ingredients

  • 1-2 Heads of cabbage, boiled and leaves separated
  • Filling:
  • 1 lb ground beef
  • 1 lb ground pork
  • 1 onions, grated
  • 2 cloves garlic, minced
  • 1 Tbsp Cognac or Brandy
  • 1/2 cup cooked white rice (leftover Chinese food rice works great)
  • 1 cup bread crumbs
  • 1/2 cup whole milk
  • 1 tsp finely chopped thyme
  • 1/4 tsp ground nutmeg
  • 1 tsp parsley
  • 1 1/2 tsp Kosher salt
  • 1 tsp white pepper
  • 1 tsp freshly ground black pepper
  • Sauce:
  • 1 onion finely chopped
  • 2 28 oz cans crushed tomatoes
  • 1 14 oz can tomato sauce
  • 1/4 cup red wine vinegar
  • 1/2 cup raisins (white or red)
  • 3 Tbsp Cognac or Brandy
  • 2 cloves garlic, finely chopped
  • 1 tsp red pepper flakes
  • 1 tsp oregano
  • 2 Tbsp freshly chopped parsley
  • 1 1/2 tsp Kosher salt
  • 1 tsp freshly ground black pepper

Instructions

1

Core the head(s) of cabbage

2

Boil the cabbage about 5-7 minutes

3

As it cooks, carefully remove the outer leaves and set aside to cool (You want leaves that are pliable but not falling apart)

4

Once the leaves are cool enough to work with, cut the tough rib from each each leaf

5

For the filling:

6

In a large mixing bowl, add the ground beef, ground pork, scrambled eggs, seasonings, Cognac, bread crumbs, rice, and gently combine and set aside

7

For the sauce:

8

Heat a large pot over medium-high heat

9

Add the olive oil and onion, then cook for about 8 minutes

10

Add the Cognac and let the alcohol cook off

11

Add the crushed tomatoes, tomato sauce, garlic, red pepper flakes, parsley, oregano, salt and pepper

12

Bring to a boil, and then reduce to a simmer

13

Simmer for about 30 minutes

14

Assembly:

15

Pre-heat the oven to 350 degrees

16

After the sauce is finished, take 1 cup of it and add it to the meat mixture and give it one last gentle mix

17

In a 13x9 baking dish or large Dutch oven, put a few cabbage leaves on the bottom, then add a layer of sauce

18

On your work surface, lay out 1-2 cabbage leaves and add about a 1/2 cup of meat mixture and roll like you would a burrito

19

Repeat until you've used up all the meat

20

If you have more than one layer of cabbage rolls, cover the first layer with sauce before starting the next layer

21

Cover the cabbage rolls with sauce, then cover the baking dish/Dutch oven and bake for 1 hour

22

Once cooked, serve hot. I've seen some people garnish with a dollop of sour cream. Try it - it's DELICIOUS!

Chicken

Citrus Marinated and Glazed Roasted Chicken with Rice

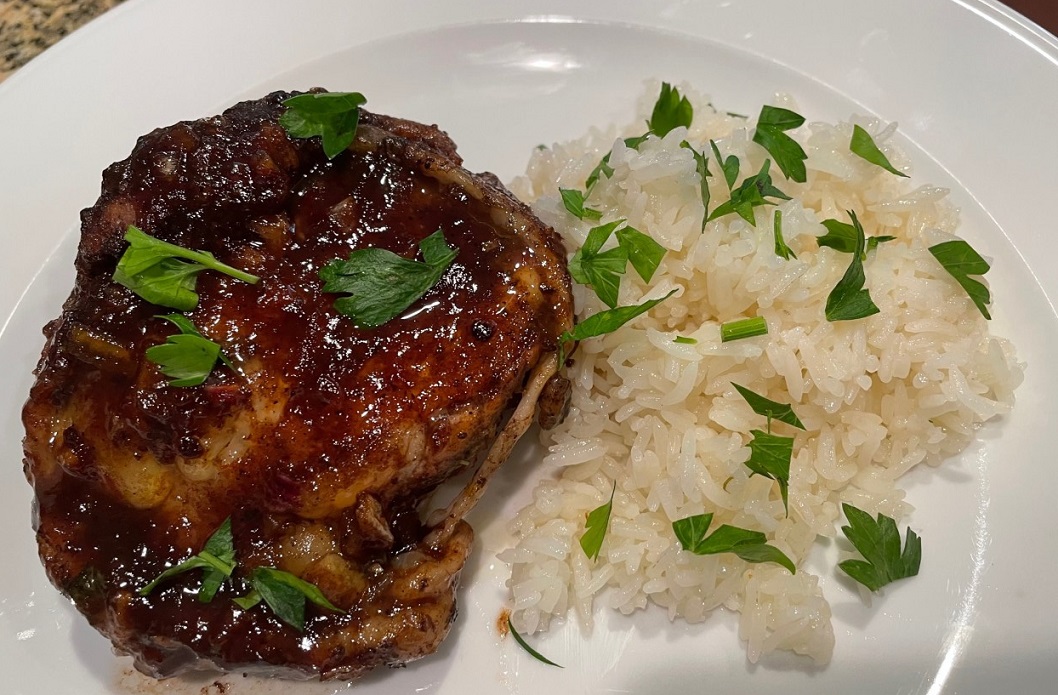
On the menu tonight – Citrus Glazed Roasted Chicken!

It’s getting colder outside, but I wanted to a summery bright dish to give one more shout out to summer. I also wanted to do something different than a lemon chicken, though there is lemon in this recipe.

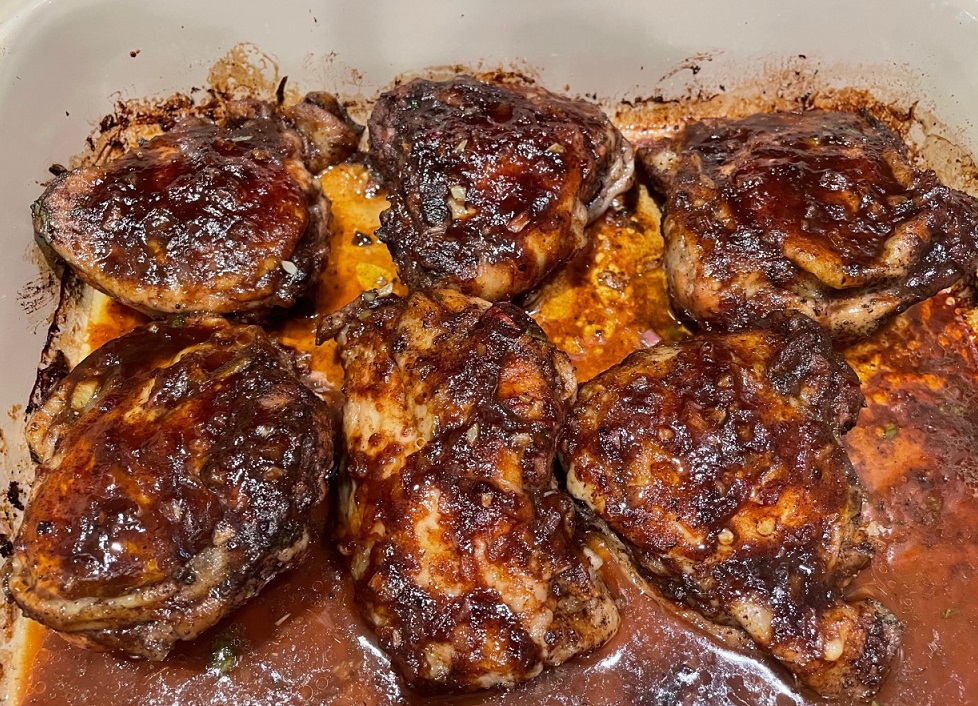
As the title says, the chicken is glazed. I don’t usually take the time to make a separate glaze but this time I tried it and I’m glad I did. That glaze adds another great level of flavor. For the citrus, I used freshly squeezed orange and lemon juice along with the zest.

I let the chicken marinade over night which resulted in really juicy and flavorful chicken.

Citrus Glazed Chicken

One thing that didn’t turn out as well as I would have liked is the chicken skin. I would have liked the skin to be crispier. Even though I took the time to remove the excess liquid, the skin still didn’t crisp up. Next time, I will put the chicken under the broiler the last 5-10 minutes. Or, I may just grill the chicken next time instead of baking it. In any event, the chicken was still delicious.

I hope you will make your version and let me know it turns out.

Citrus Marinated and Glazed Roasted Chicken

1 Star2 Stars3 Stars4 Stars5 Stars (No Ratings Yet)
Loading...
By Patrick Dulmage Serves: 6-8
Prep Time: 15 minutes Cooking Time: 1 hour Total Time: 1 hour 15 minutes

Citrus Marinated and Glazed Roasted Chicken

Ingredients

  • 3-4 lbs chicken thighs (skin-on and bone-in)
  • 2 oranges, zested and juiced
  • 1/2-1 lemon, zested and juiced
  • 3 Tbsp basalmic vinegar
  • 1 Tbsp celery seed
  • 2 tsp black pepper
  • 1 tsp kosher salt
  • 1/4 red onion, finely chopped
  • 1 tsp freshly chopped mint
  • 1 1/2 Tbsp freshly chiffonade basil
  • 3/4-1 cup Mojo marinade
  • Glaze:
  • 1 Tbsp olive oil
  • 1 Tbsp shallot, minced
  • 1 tsp ginger, minced
  • 1/2 cup orange marmelade
  • 1/4 cup sweet chili sauce
  • 1/4 cup reserved marinade, strained

Instructions

1

Combine all the ingredients in a zip lock type bag

2

Massage and mix the chicken with the marinade before letting rest in the refrigerator at least 4 hrs

3

Let chicken come to room temperature prior to cooking, about 30-60 minutes

4

Preheat the oven to 350 degrees

5

Put the chicken in a 13x9 baking dish, skin side down. Reserve some of the marinade for basting

6

Bake the chicken for 45 minutes, then baste with the glaze, turn each piece over and glaze that side

7

Bake an addition 30 minutes, basting every 10 minutes

8

Make the glaze after you put the chicken in the oven:

9

Heat a small sauce pan over medium-high heat with olive oil

10

Add the shallots and ginger, saute for 3-4 minutes

11

Add the remaining ingredients, reduce heat to a simmer

12

Cook for 15 minutes or longer, it should have thickened

13

Before you baste for the first time, there will likely be a lot of liquid in the bottom of the baking dish. To get a nice glaze, you will want to get that liquid out of there so the glaze can really thicken.