All Posts By:

patrickdulmage

Chicken

Pollo al Horno / Roasted Chicken with Roasted Potatoes

Pollo al Horno

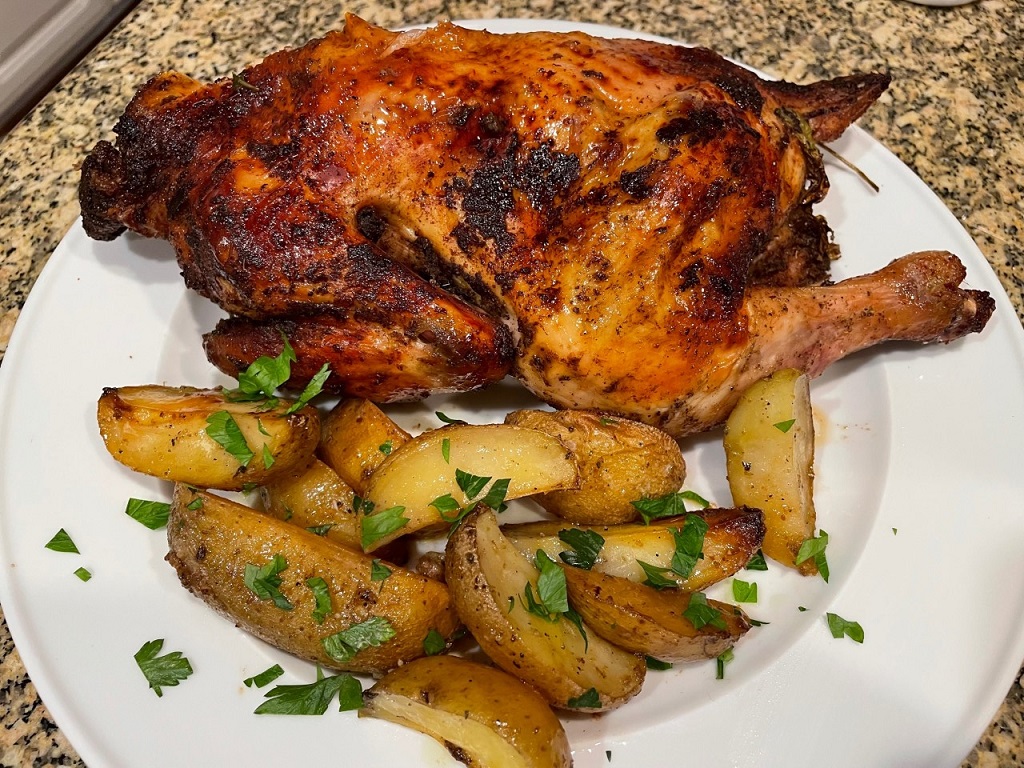
On the menu tonight – Pollo al Horno… Roasted Chicken!

I came across this dish while I was in El Salvador. On my last day there, the house keeper made this for me and it was one of the best chicken dishes I’ve had. I asked her how she made it, which was a challenge because she didn’t speak English and my Spanish is marginal at best. Luckily for me, she wrote out the recipe – but it was all in Spanish. I brought what she wrote to work with me and asked my colleagues to help translate. It must have been pretty comical watching about 5 IT guys reading over what she wrote and trying to figure out what this or that word in English was.

My version was fantastic! It was juicy and flavorful. The potatoes get some of that chicken flavor from the juices as it bakes. While I think we came pretty close, my version still isn’t as good as what Anna made.

If you want to try a different take on a roasted chicken, I hope you will try my interpretation of an El Salvadorian Pollo al Horno.

Pollo al Horno / Roasted Chicken

1 Star2 Stars3 Stars4 Stars5 Stars (No Ratings Yet)
Loading...
By Patrick Dulmage Serves: 4-6
Prep Time: 15min Cooking Time: 3 hrs Total Time: 3hrs 15min

Pollo al Horno / Roasted Chicken

Ingredients

  • 1 whole chicken (3-4 lbs)
  • 2 Tbsp Complete Seasoning (Badia brand)
  • 1 Tbsp Granulated garlic
  • 1 tsp black pepper
  • 2 tsp mustard (I used honey mustard)
  • 1/4 cup soy sauce
  • 1/4 cup Worcestershire sauce
  • 1 Tbsp cumin
  • 1 Tbsp hot sauce
  • Kosher salt to taste
  • 1 Tbsp chicken powder (tried substituting Chicken flavored Better Than Bullion )
  • Potatoes:
  • 1.5 lbs small potatoes (fingerling, Yukon, red potatoes, your choice), halved/quartered depending on size

Instructions

1

Pre-heat oven to 325 degrees

2

In a large mixing bowl, combine the Complete seasoning, garlic, black pepper, mustard, soy sauce, Worcestershire sauce, cumin, and hot sauce

3

Marinade the chicken in the mixture for at least an hour

4

In a large mixing bowl, add the small potatoes, olive oil, and Kosher salt

5

Fill the cavity of the bird with the cilantro, celery, basil, mint, garlic, and onion

6

Scatter the potatoes around the chicken on the baking sheet

7

Bake on a rimmed baking sheet covered with foil for 2 hours

8

Uncover the bird and bake an additional hour

9

Let rest 10-15 minutes before serving
Seafood

Skillet Shrimp Alfredo with Roasted Red Peppers

Shrimp Alfredo

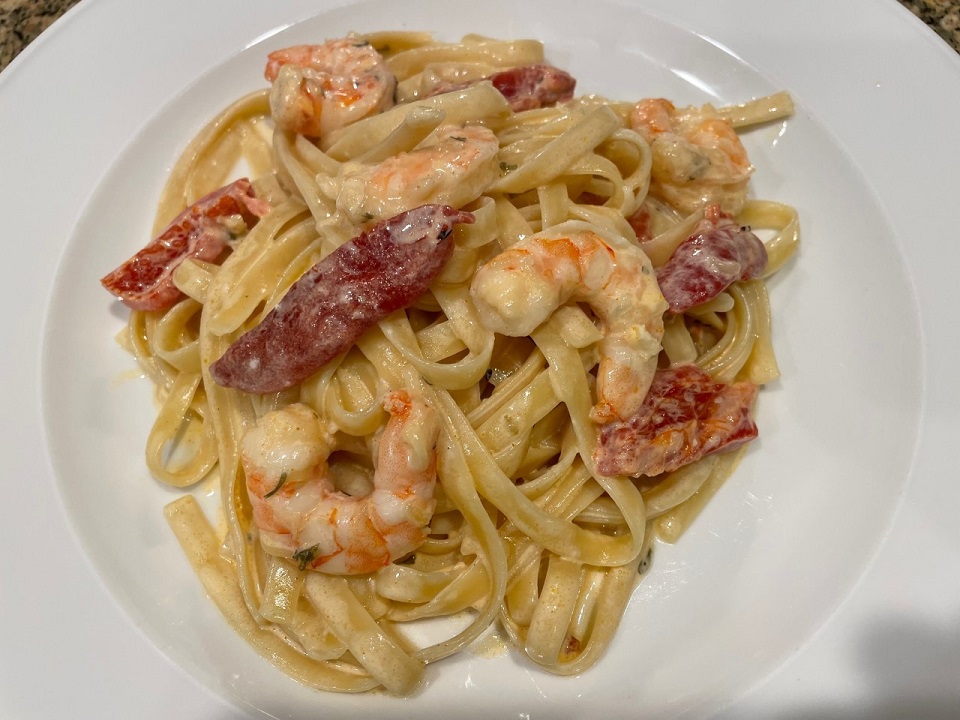
On the menu tonight – Skillet Shrimp Alfredo with Roasted Red Peppers!

This sounds like a fancy dish, and it kind of is, but it is really easy to make AND it doesn’t take very long.

You could make this dish in about the same amount of time as it takes to order a pizza, but this tastes SO much better and it is way more impressive.

The list of ingredients to make this dish is pretty short. All you need are the noodles, shrimp, a jar of roasted red peppers ( that you probably have in your pantry), cream, garlic, butter, and the Parmesan cheese.

If you haven’t made this before, I hope you will make my version. Once you do, not only will you have a delicious dinner, you can take the method learned here and turn it into a bunch of other meals. For example, leave out the shrimp and red pepper and just make Fettuccini Alfredo. Add a little chicken (take a shortcut and add rotisserie chicken) and you have Chicken Alfredo. The options are limitless. Let me know how your version turns out.

Skillet Shrimp Alfredo with Roasted Red Peppers

1 Star2 Stars3 Stars4 Stars5 Stars (No Ratings Yet)
Loading...
By Patrick Dulmage Serves: 4
Prep Time: 10 minutes Cooking Time: 25 minutes Total Time: 25 minutes

Skillet Shrimp Alfredo with Roasted Red Peppers

Ingredients

  • 12 oz Fettuccini
  • 3-4 Tbsp butter
  • 1 lb Shrimp, deveined and tails removed
  • 12 oz jar Roasted red peppers, cut into bite sized pieces
  • 3-4 Garlic cloves, minced or finely chopped
  • 2 cups heavy cream
  • 1 1/2 cups Parmesan cheese, grated
  • Kosher salt

Instructions

1

Bring a large pot of water to a boil

2

Pre-heat a large skillet with straight sides over medium heat

3

Add pasta and salt to the boiling water - this is your only chance to season the pasta

4

Cook pasta to al dente, drain and set aside

5

Add butter to the skillet and cover the bottom of the pan

6

Add the red peppers and garlic and cook about two minutes

7

Add the cream and bring to a boil

8

Reduce the heat to a simmer

9

Add the shrimp and cook until they are cooked through, about 5 minutes

10

Your pasta should be done by now, add the drained pasta to the skillet

11

Add the Parmesan cheese and about a teaspoon of salt

12

Toss to coat all the pasta

13

Sprinkle with parsley and serve

Casserole/ Chicken/ Soup

Skillet Chicken and Dumplings

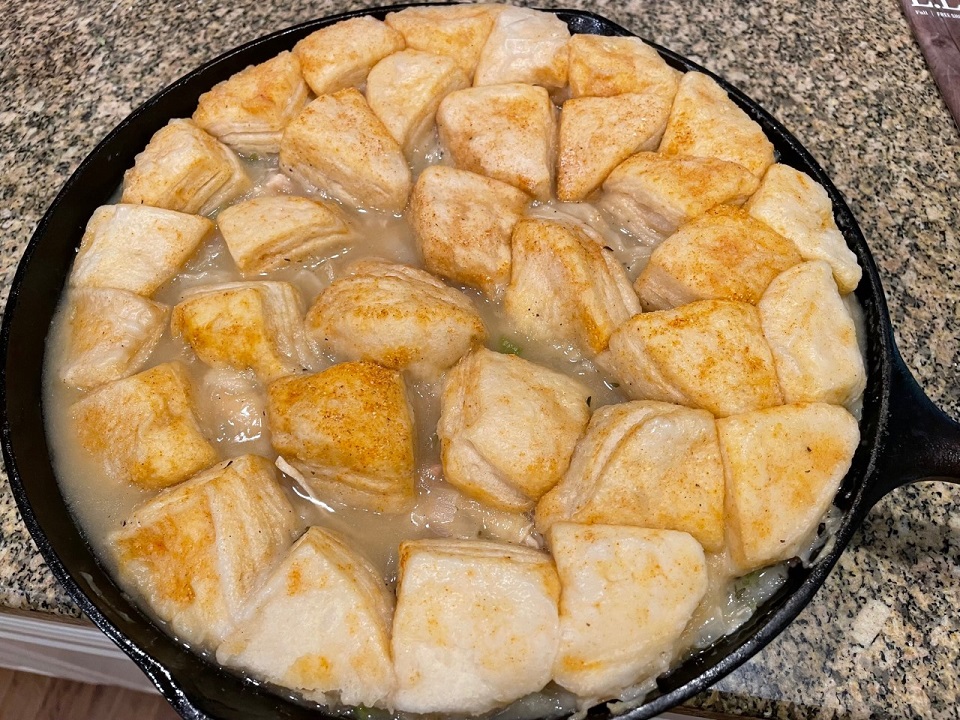
On the menu today – Skillet Chicken and Dumplings!

The last time I made chicken and dumplings, it was a disaster. It was my first attempt and I didn’t let the dumplings cook long enough. As a result, the dumplings were awful. With the weather getting cooler, I decided to try it again. This time I took a shortcut and used biscuits instead of making the dumplings myself.

This dish is a complete success! One bite with the chicken, a bit of dumpling, and of course the thick sauce… it’s like a nice warm hug. YUM!

You get a bonus recipe on this post. I’m also including a recipe for homemade chicken stock. How many times do you buy a rotisserie chicken from the grocery store? I buy them pretty frequently, but I had been throwing away the bones – don’t do that. Use the bones along with the other things I will list in the recipe and make your own chicken stock. It’s really easy and taste so much better than store bought. No judgement if you decide to use store bought stock for your version of chicken and dumplings.

Let me know how your version turns out!

Skillet Chicken and Dumplings

1 Star2 Stars3 Stars4 Stars5 Stars (No Ratings Yet)
Loading...
By Patrick Dulmage Serves: 8-10
Prep Time: 15 minutes Cooking Time: 40 minutes Total Time: 55 minutes

Skillet Chicken and Dumplings

Ingredients

  • 1 rotisserie chicken, pulled from the bone and cubed - discard the skin (about 4 cups)
  • 1 Vidalia Onion, diced
  • 3 stalks celery, diced
  • 1 carrot, diced
  • 1 tsp thyme
  • Kosher salt
  • Freshly ground pepper
  • 4 Tbsp butter
  • 32 oz chicken stock, homemade or store bought
  • 1 16.3 oz container of refrigerated biscuit dough
  • 1/4 cup stone-ground corn meal
  • 1/3 cup flour
  • 2 tsp paprika
  • 1/4 cup fresh parsley, finely chopped

Instructions

1

In a medium mixing bowl, mix the corn meal, paprika, and about a half teaspoon of salt

2

Open the tube of biscuits and cut each one into bite sized pieces

3

Toss the biscuit pieces in the corn meal mixture and set aside

4

In a large cast iron skillet, heat the butter

5

Add the onion and cook until translucent, about 5 minutes

6

Add the flour and mix with the onions and let cook another 3-5 minutes

7

Slowly add the chicken stock and stir constantly to thoroughly combine all the ingredients

8

Season with salt and pepper and bring to a boil

9

Reduce the heat to a simmer, then add the chicken, half of the parsley, carrot, and celery

10

Cover the chicken mixture with the biscuit pieces and then cover

11

Cook for about 25 minutes on low

12

The "dumplings" should be light, fluffy, and fully cooked

13

Garnish with the rest of the parsley

14

Let it cool at least 5 minutes before serving

Chicken/ Soup/ Stock

Quick Homemade Chicken Stock

On the menu today – Quick Homemade Chicken Stock!

How many times do buy a rotisserie chicken and then throw away the bones and carcass? That is exactly what I have been doing for years. Recently, I figured I would make use of that carcass and make a batch of chicken stock.

This is so easy to make and then you have it to use right away or freeze and have it on hand.

To make this chicken stock, all you need are the bones/carcass from a rotisserie chicken, an onion, one clove of garlic, a carrot or two (depending on size), three stalks celery, 8-10 peppercorns, 8 sprigs of parsley (use dry if you don’t have fresh), and two bay leaves.

Throw all that into a large stock pot and cover with water. How much water? I don’t know, you have to cover what you put in the pot. Bring that mixture to a boil and then drop the heat to a simmer for an hour and a half. That’s it!

Now that you have this lovely, delicious stock, you could use it right away or freeze it. If you freeze it, you could freeze it ice cube trays for the times you just need a little chicken stock or in pre-portioned containers.

I hope you start making your own chicken stock. It is much tastier and better for you since you know what ingredients are in it. Let me know how your version turns out.

Quick Homemade Chicken Stock

1 Star2 Stars3 Stars4 Stars5 Stars (No Ratings Yet)
Loading...
By Patrick Dulmage Serves: 8-10
Prep Time: 10 minutes Cooking Time: 1 hour 30 minutes Total Time: 1 hour 40 minutes

Quick Homemade Chicken Stock

Ingredients

  • Bones/carcass from one rotisserie chicken
  • 1/2 - 1 onion, halved
  • 1 Clove of garlic, halved
  • 1-2 Carrots (depending on size)
  • 3 Celery stalks
  • 8-10 peppercorns
  • 8 sprigs of parsley (use dry if you don't have fresh)
  • 2 Bay leaves

Instructions

1

Put all the ingredients in a large stock pot, preferably a heavy cast iron one

2

Cover the ingredients with water, amount will vary based on size of pot and what you have in it

3

Bring to a boil, then simmer for 1 and a half hours

4

As it simmers, skim the scum from the top

5

Once finished, remove the bones and other solids

6

Let it cool and store in the fridge or freezer

7

The following day, you can skim more of the chicken fat from the top

Notes

Freeze the stock in pre-measured sizes (1 cup, etc) to make it easy to pull exactly what you need for your next dish. You could also fill an ice cube tray with the stock and freeze it for smaller portions.

Casserole/ Vegetarian

Haluski – Fried Cabbage, Onions, and Pasta

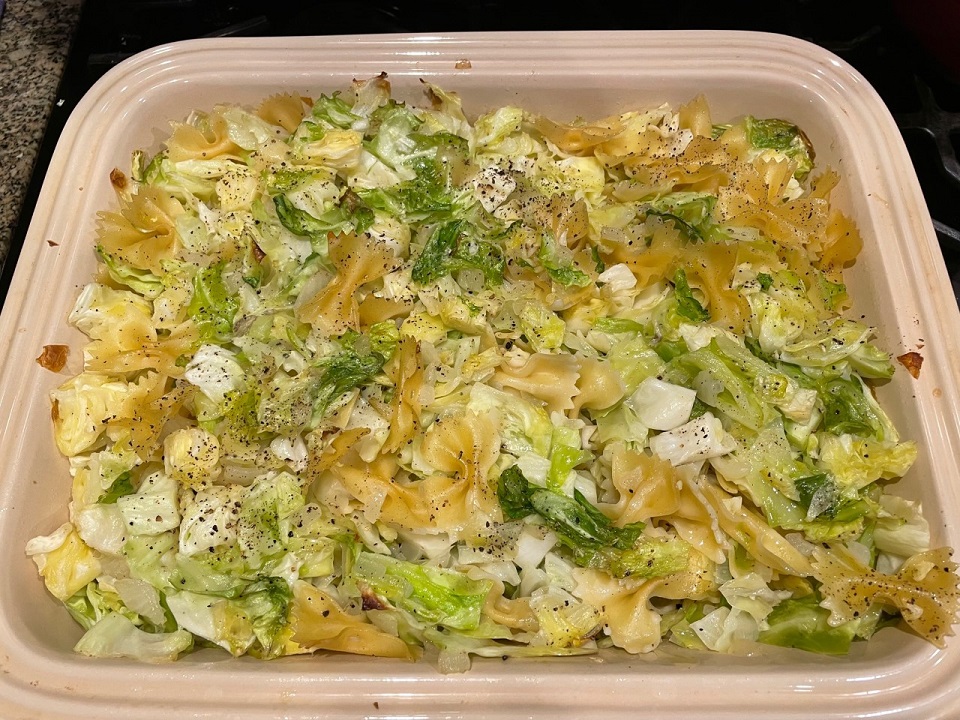
On the Menu tonight – Haluski!

What in the world is Haluski? It is a traditional Polish dish made of cabbage, onions, and egg noodles. In my version, I used farfalle (bow-tie) pasta because it’s prettier.

The last time I made this was during Christmas time a few years ago. My brother suggested we make something different for Christmas dinner. We decided on a Polish theme since our grand parents were of Eastern European decent. The only Polish dish I’d made was Stuffed Cabbage. After some research, I decided to make Haluski. It was FANTASTIC!

Now that it’s getting cold, I decided to make it again. Now, I’m sharing the recipe with you. Two tips – 1) Good butter and lots of it. 2) Lots of freshly ground pepper. Don’t use the pre-ground pepper for this dish.

There are only a few ingredients, so use the best you can find. All the ingredients are pretty inexpensive too, a head of cabbage, an onion, a pound of pasta, salt and pepper. You can feed a crowd for less money than you would spend on one fast meal.

I hope that you will try this dish. Let me know how your version turns out.

Haluski - Fried Cabbage, Onions, and Pasta

1 Star2 Stars3 Stars4 Stars5 Stars (1 votes, average: 5.00 out of 5)
Loading...
By Patrick Dulmage Serves: 10-12
Prep Time: 15 minutes Cooking Time: 45 minutes Total Time: 1 hour

Haluski - Fried Cabbage, Onions, and Pasta

Ingredients

  • 1 Head of cabbage, chopped to bite-sized pieces
  • 1 Large onion
  • 1 clove of garlic, finely chopped or minced
  • 1 stick of butter
  • 1 lb farfalle (bow tie) pasta
  • Kosher salt and freshly ground pepper to taste

Instructions

1

Pre-heat oven to 300 degrees

2

In a large Dutch oven, pre-heat over medium heat

3

Add 1/2 stick of butter, then

4

Add the diced onion and cook 3-5 minutes, until translucent

5

Add the garlic and cook an additional minute

6

Add the chopped cabbage, the other half stick of butter, and continue to cook about 10-15 minutes - long enough to soften the cabbage

7

Season with salt and freshly ground pepper

8

While the cabbage is cooking, bring a pot of water to a boil

9

Heavily season the boiling water with Kosher salt and add the pasta

10

Cook the pasta to package directions and set aside

11

Once the cabbage is cooked, add it and the pasta to a 13x9 casserole dish

12

Mix the pasta, cabbage, and onions together. Taste and add salt and pepper if necessary

13

Bake for 30 minutes until you see golden brown bits on top

Breakfast/ Vegetarian

Loaded Breakfast Burritos

On the menu this morning Loaded Breakfast Burritos!

I wanted to make a batch of burritos so I could grab and go for breakfast during the week. These burritos are loaded with eggs, cheese, sausage (you could substitute pork sausage with imitation sausage), and tater-tots.

The filling options are only limited by your imagination. Jalapeno, onions, and/or bell peppers would all be great veggie options.

I hope you will make your own breakfast burritos and let me know which fillings you used!

Loaded Breakfast Burritos

1 Star2 Stars3 Stars4 Stars5 Stars (No Ratings Yet)
Loading...
By Patrick Dulmage Serves: 3-6
Prep Time: 15 minutes Cooking Time: 30 minutes Total Time: 45 minutes

Loaded Breakfast Burritos

Ingredients

  • 6 6" flour tortillas
  • 4 eggs, scrambled
  • 1 cup cheddar cheese, grated
  • 1/2 lb sausage / imitation sausage, finely chopped
  • 1/2 lb tater-tots
  • 1/4 cup salsa
  • salt & pepper
  • butter

Instructions

1

Pre-heat oven to 425 degrees

2

Drizzle a little olive oil on a rimmed baking sheet, then evenly spread the tots

3

Cook the tater-tots according to package directions (I like mine on the crispy side)

4

Season the tots with salt and set aside

5

Pre-heat skillet over medium-high heat

6

Add the sausage to the pan and break it up as it cooks

7

When sausage is cooked, set aside

8

Add the eggs to the pan and gently move them around with a spatula so you don't end up with a giant omelet

9

When the eggs are cooked, season with salt and pepper, then set aside

10

Heat the tortillas in the microwave oven for 15-30 seconds to make them more pliable

11

I like lay each tortilla on a pre-cut tin foil sheet so that when I roll them up, the foil helps keep them together

12

Assemble burritos by adding a layer of grated cheese on the tortilla, then about two spoons of scrambled eggs

13

Top the eggs with a spoonful of sausage

14

Add 3-4 tater-tots, then roll the burrito

15

Repeat to use up all your ingredients

Notes

Beef/ Italian/ Pork/ Sauces

Meatballs and Sauce aka Sunday Gravy

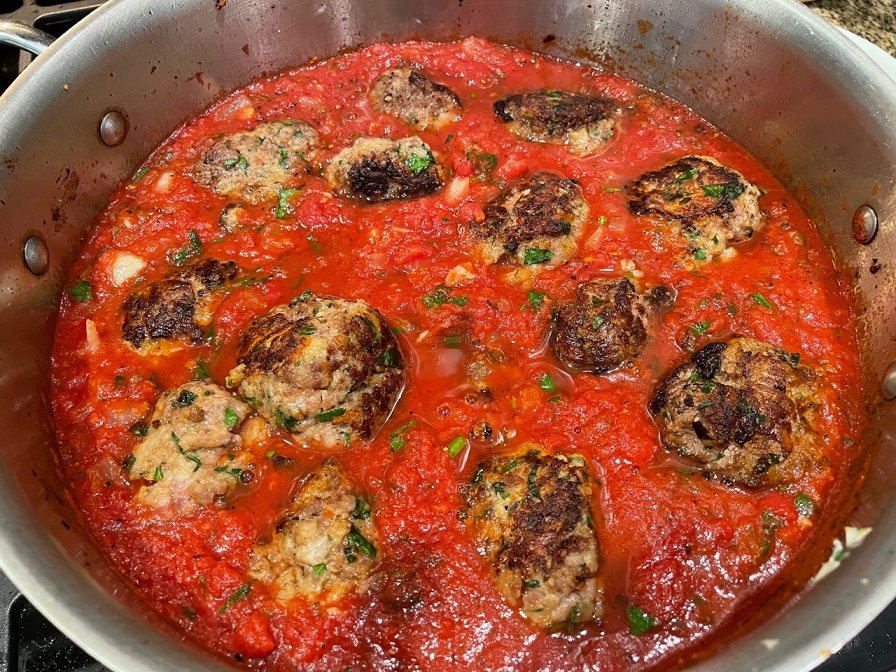
On the menu tonight – Meatballs and Sauce!

I just got back from a trip to Boston and one of the places I had to eat was the North End. There are SO many great Italian places to eat there. One of the places we went served a big meatball and sauce as an appetizer. As many Italian places I’ve eaten over the years, this is the first time I can recall seeing just a meatball and sauce as an appetizer.

This was one of the most tender meatballs I’ve had. The sauce that the meatballs were cooked in was incredible. I decided to try to replicate this incredible dish at home. It honestly wasn’t as good as what I had in Boston, BUT it was still AMAZING!

For the meatballs, I used pork and beef. I think the restaurant in Boston used pork, beef, and veal. I ever-so gently mixed all the meatball ingredients in a large bowl. If you over-mix the ingredients, you get a firm meatball – be gentle.

The sauce – When I decided to make this, I wanted the sauce to cook a few hours on low. It will be ready to eat in about 45 minutes, but I let it sit on low for a couple of hours – the house will smell amazing.

Serve the meatballs and sauce either by themselves, over pasta… OR you could make the BEST ever meatball subs. Don’t forget the garlic bread! You need garlic bread to sop up every bit of that lovely sauce. Mangia!

Meatballs and Sauce

1 Star2 Stars3 Stars4 Stars5 Stars (No Ratings Yet)
Loading...
By Patrick Dulmage Serves: 10-12

Meatballs and Sauce

Ingredients

  • The Meatballs:
  • 2 lbs ground beef (80/20)
  • 1 lb ground pork
  • 2 large eggs, beaten
  • 1 cup Pecorino Romano
  • 4 cloves garlic, minced
  • 1 cup Italian bread crumbs
  • 1 cup Milk
  • 1 cup Fresh Parsley, finely chopped
  • 1 Tbsp Onion Powder
  • 1 Tbsp Granulated Garlic
  • 1 Tbsp Oregano
  • 2 Tbsp Olive Oil for browning
  • The Sauce:
  • 2 28oz cans Crushed Tomatoes
  • 2 Tbsp Olive Oil
  • 1 Onion, finely chopped
  • 3-4 bay leaves
  • 1/2 bunch Parsley, finely chopped
  • 1 Tbsp Red Pepper flakes
  • Salt and Pepper to taste
  • 6-8 Basil leaves, torn into little pieces or chiffonaded

Instructions

1

Pre-heat, over medium heat, a large dutch oven or heavy pot that will hold all the sauce and the meatball

2

In a large bowl, gently mix all the ingredients for the meat balls - don't over work the mixture

3

Form the meatballs into 1 1/2 - 2 inch balls

4

Brown the meatballs in batches and set aside

5

In the same pot, add some additional olive oil, the chopped onion, red pepper flakes, and cook until translucent - about 4-5 minutes

6

Add the garlic and cook for about a minute, then add the crushed tomatoes, bay leaves, and parsley

7

Season with salt and pepper

8

Bring the sauce to a boil, then reduce to low

9

If you want a really smooth sauce use an immersion blender or blender

10

Add the meatballs and simmer at least 45 minutes.

11

When it is time to serve, add the basil and give it a gentle mix

12

If you haven't already, remove the bay leaves

Breakfast

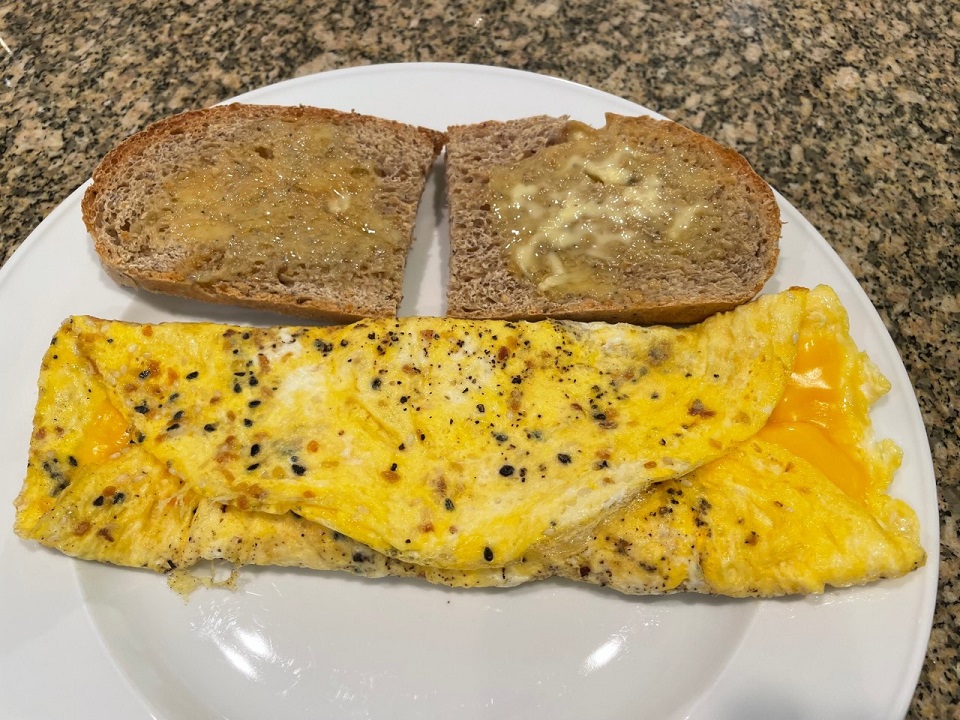
Everything Bagel Seasoned Cheese Omelette

On the menu this morning – Everything Bagel Seasoned Cheese Omelette!

One of my favorite meals for breakfast is eggs. Today, I made a simple omelette with American cheese and Everything bagel seasoning – that’s it!

One of my other favorite meals for breakfast is an Everything bagel with cream cheese and lox. When I saw Everything Bagel seasoning in the store, I had to have it. I use this stuff in all kinds of meals, but one of my favorites is in eggs.

Getting that perfect fold on an omelette can be tricky. Once the eggs have setup a little, you can lift an edge and then tilt the pan to get more uncooked egg underneath to thicken up a little more. Then, with the eggs cooked 85-90% you can either add your filling and fold over with a spatula, or you can flip it in the pan, then add the filling and fold over.

If you want to practice flipping an omelette in the pan without breaking a bunch of eggs, use a piece of bread. Pretty quickly, you will see how you need to move the pan to get the omelette to flip.

Once the omelette is cooked and plated, serve with some good toast, English muffin, or maybe a biscuit. Let me know how your omelette turned out!

Everything Bagel Seasoned Cheese Omelette

1 Star2 Stars3 Stars4 Stars5 Stars (No Ratings Yet)
Loading...
By Patrick Dulmage Serves: 1-2
Prep Time: 2 minutes Cooking Time: 5 minutes Total Time: 7 minutes

Everything Bagel Seasoned Cheese Omelette

Ingredients

  • 4 Large eggs, scrambled (use the best quality eggs you can find)
  • 2 slices American cheese
  • 1-2 tsp Everything Bagel Seasoning
  • 2 Tbsp butter
  • 2 pieces of bread, toasted

Instructions

1

Pre-heat a non-stick skillet over medium heat

2

Scramble the eggs in a bowl

3

Start toasting the bread

4

Add the butter to the pan and make sure the entire pan is coated

5

Pour in the eggs and evenly distribute by lifting and tilting the pan

6

Add the Everything Bagel seasoning

7

Once the eggs begin to setup, use a fork or spatula to gently lift the edges to get some more of the uncooked eggs underneath

8

When the eggs have cooked 85-90%, flip finish cooking the other side

9

Cut the heat, add your cheese and fold over

10

Gently slide your omelette onto a plate and serve with the toast

11

Season with a little pepper. The Everything Bagel seasoning has a decent amount of salt, so you may not need to add any additional salt

Casserole/ Fish/ Vegetarian

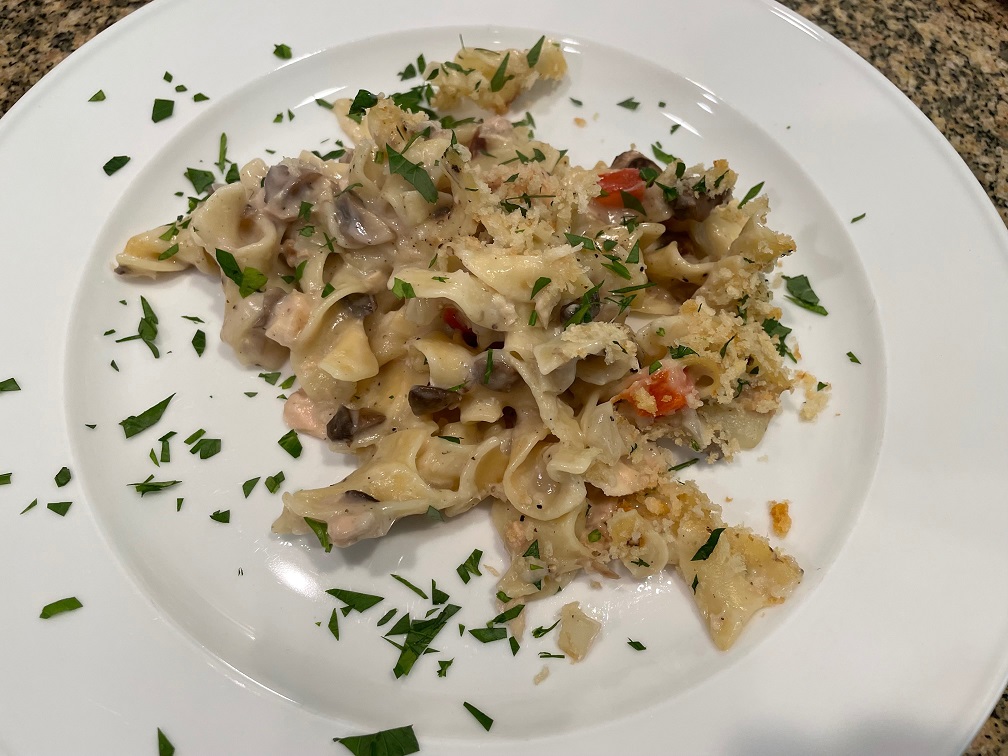
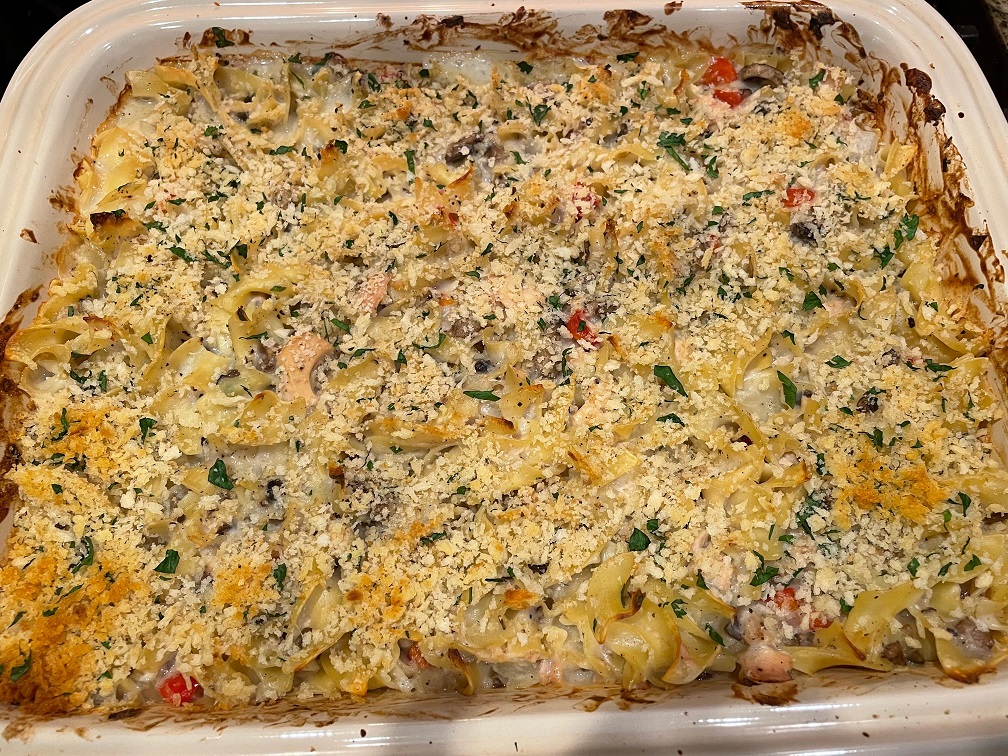
Not Your Average Tuna Casserole

On the Menu Tonight – Not Your Average Tuna Casserole!

I really like Tuna Casserole, but it is one of those things I just don’t make very often. This version of Tuna Casserole is elevated by using fresher ingredients. For example, I didn’t use any frozen veggies or any dry herbs. Most versions I have had include peas, but I swapped them out with diced red bell pepper. Instead of using canned cream of mushroom soup, I made it.

The results were FANTASTIC! Whether you are feeding a big family, or making enough for leftovers, try my version of Tuna Casserole.

Tuna Casserole

Not Your Average Tuna Casserole

1 Star2 Stars3 Stars4 Stars5 Stars (No Ratings Yet)
Loading...
By Patrick Dulmage Serves: 8-12
Prep Time: 15 minutes Cooking Time: 45 minutes Total Time: 1 hour

Not Your Average Tuna Casserole

Ingredients

  • 16 oz egg noodles
  • 3 6.4 oz cans tuna fish, drained and broken into small pieces
  • 1 diced onion
  • 3 cups whole milk (2% is OK, but don't go below 2% fat), warmed or room temp
  • 8 Tbsp butter
  • 6-8 oz mushrooms, finely chopped (White button or Cremini)
  • 1/4 cup flour
  • Kosher salt and freshly ground pepper
  • 1/2 cup panko bread crumbs
  • 2 Tbsp parsley, finely chopped

Instructions

1

Pre-heat oven to 400 degrees

2

Boil the egg noodles according to pkg directions, drain and set aside

3

Pre-heat large skillet over medium-high heat

4

Add 4 Tbsp of butter to the pan along with the diced onion

5

Let the onions get translucent, then add the mushrooms and cook 2-3 more minutes

6

Add the flour and mix thoroughly to coat the onions and mushrooms

7

Slowly add the milk and whisk/mix as you go to avoid lumps

8

Season with salt and pepper

9

When the mixture thickens, add the tuna, half the chopped parsley, and red bell pepper

10

Add the egg noodles and mix to coat all the noodles

11

Transfer to a buttered baking dish (13x9)

12

Melt the remaining 4 Tbsp of butter and mix with the panko and remaining parsley

13

Top the casserole with the bread crumb mix and put in the oven

14

Bake for 25-30 minutes

15

Let it rest for about 5 minutes before serving

Notes

If you mix the noodles with the creamy tuna mixture and it looks like you need more liquid, add a can of cream of mushroom soup with a little additional milk.

Casserole/ Chicken

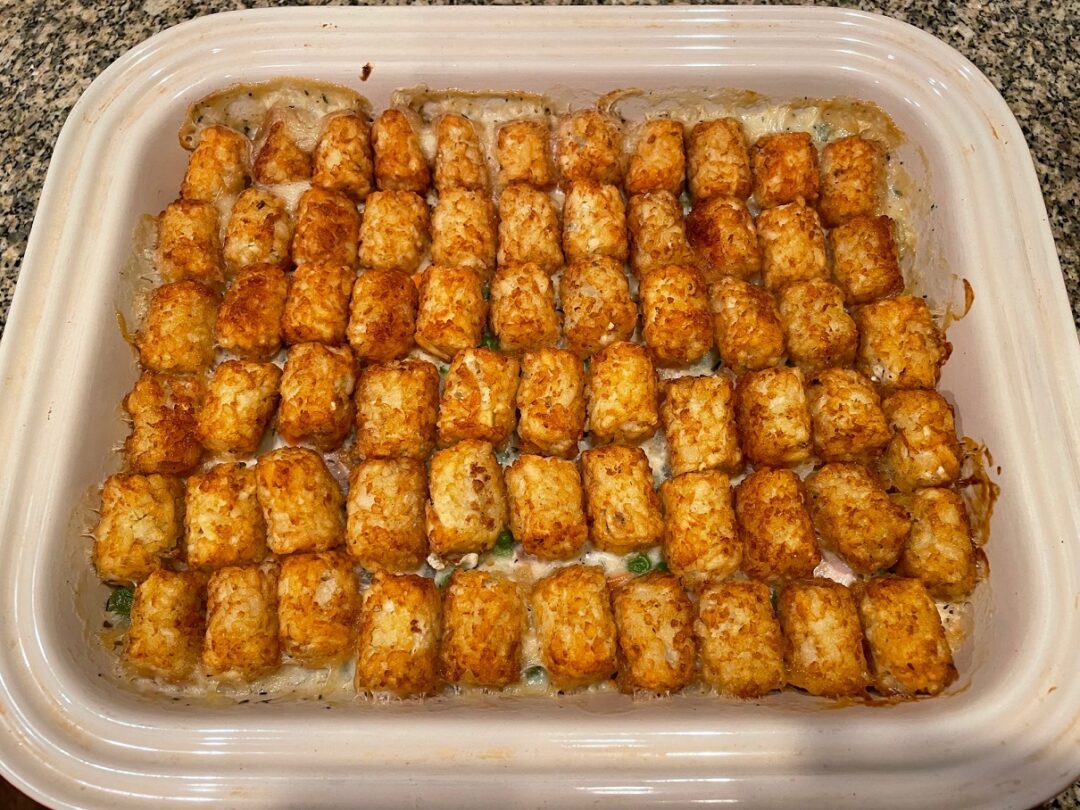
Chicken and Tater Tot Hotdish

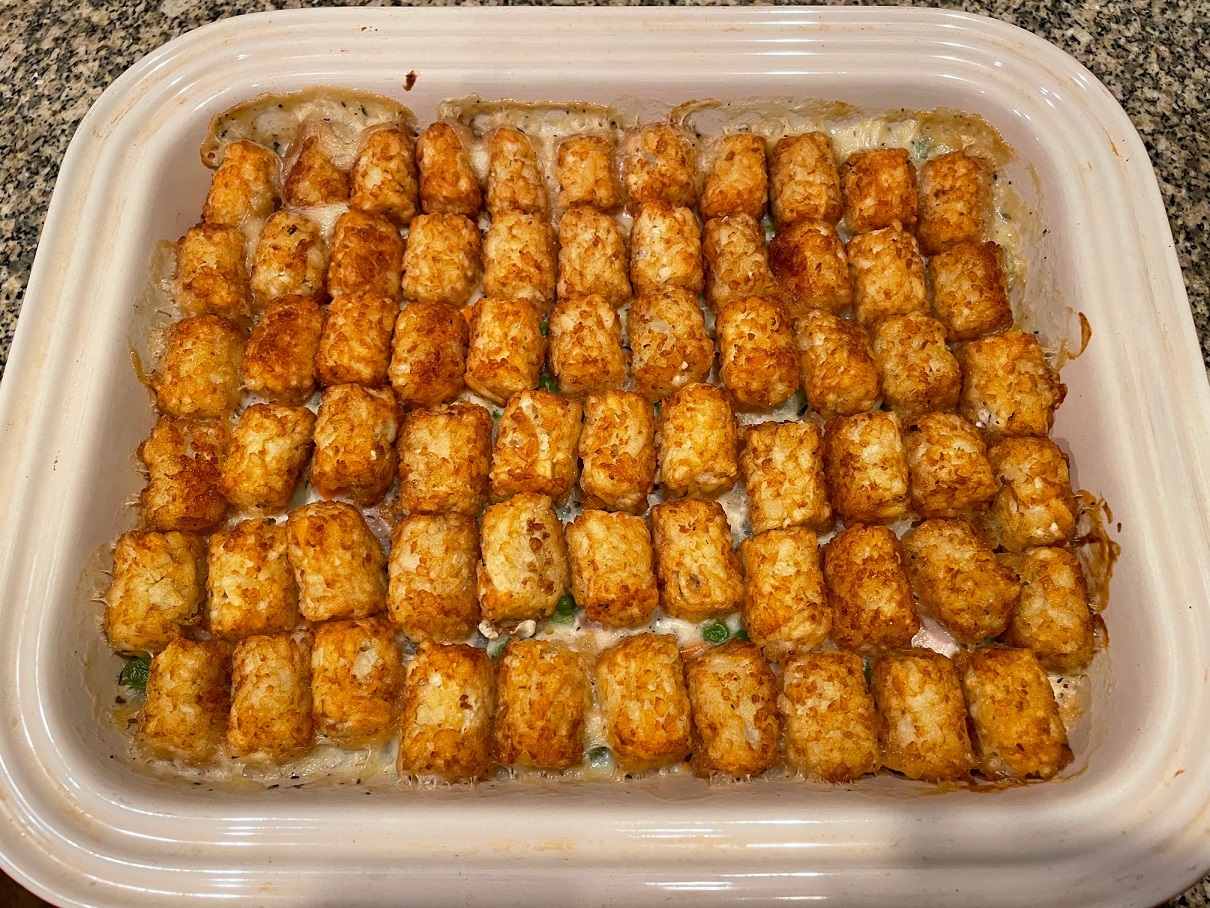
On the menu tonight – Chicken and Tater Tot Hotdish! What’s a hot dish? It’s a mid-west casserole that contains a protein, starch, a creamed soup, and a vegetable. In this version, think chicken pot pie but the crust is tater tots!

If you like chicken pot pie, but are intimidated by making the crust, this is the one to try! Start by giving the tots a pre-cook in the oven. I like really crispy tots and since they won’t be fried, this your chance to get them crispy.

While the tots are in the oven, sauté the onion until translucent, about 4-5 minutes. Then add some flour and butter to the pan to make the roux. Let the flour cook 2-3 minutes and begin adding the milk, whisking as you go to avoid clumps.

Instead of chopping carrots, I used a pea and carrot mix from the frozen section to save a little time. Add that to the mix along with the chicken, bouillon, and other seasonings. Let everything simmer 10-15 minutes, until the chicken cooks through.

Transfer the mix to a baking dish and cover with the tots. Put the baking dish in the oven and bake for about 30 minutes. Let me know how your version of this hot dish turns out!

Chicken and Tater Tot Hotdish

1 Star2 Stars3 Stars4 Stars5 Stars (No Ratings Yet)
Loading...
By Patrick Dulmage Serves: 8-10
Prep Time: 15 minutes Cooking Time: 1 hour Total Time: 1 hour 15 minutes

Chicken and Tater Tot Hotdish

Ingredients

  • 2 Tbsp Butter
  • 1lb chicken thighs, cut into bite-sized pieces
  • 1 Vidalia Onion, finely diced
  • 1 16 oz pkg frozen peas and carrots
  • 1/4 cup all purpose flour
  • 2 cups milk, room temp
  • 1 tsp Better Than Bouillon, Chicken broth
  • 1 tsp dried Thyme
  • 1 tsp dried (or fresh) Rosemary, finely chopped
  • 1 bag Tater Tots

Instructions

1

Pre-heat the oven to 400 degrees

2

Put the tater tots on an oiled baking sheet, bake for about 20-25 minutes to make sure they are crispy

3

While the tots bake, pre-heat a large skillet with some butter and the onions. Cook about 5 minutes

4

Add the flour to the pan along with some more butter to make the roux

5

Stir the flour, butter, and onions around for 2-3 minutes, then slowly whisk in the milk

6

Continuously stir to avoid clumps in the sauce

7

Add the chicken, bouillon, carrot/pea mix, thyme, and rosemary to the sauce

8

Simmer for about 10-12 minutes to cook the chicken through, then transfer to a baking dish (13x9)

9

Cover the mixture with the tater tots and put in the oven for about 30 minutes